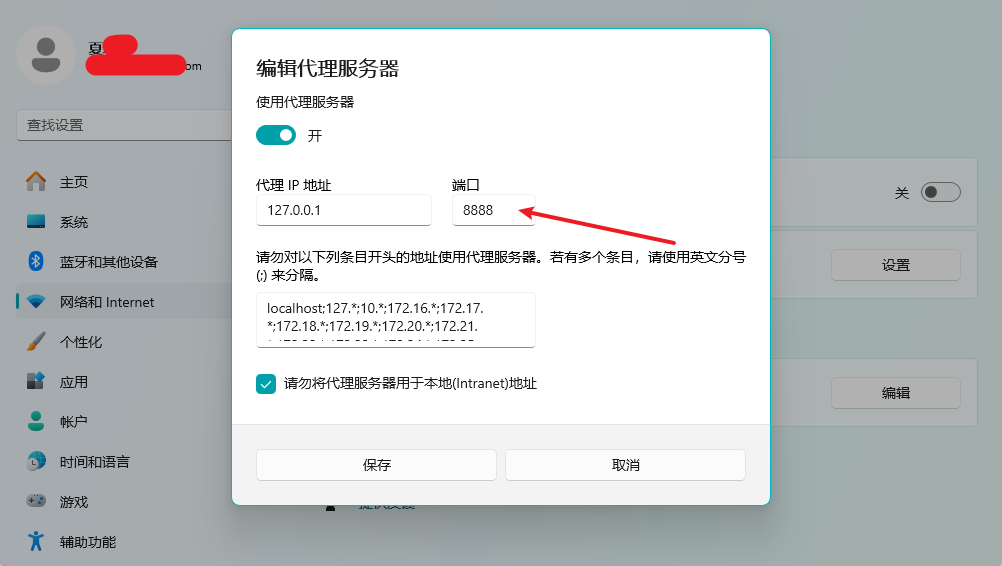
配置代理

配置代理

前提是要知道7890端口是个啥

1.git配置代理

因为使用git提交代码经常会超时, 所以可以通过配置代理的方式来解决

1
2
git config --global http.proxy http://127.0.0.1:7890
git config --global https.proxy https://127.0.0.1:7890

取消代理

1
2
3
4
# 取消代理
git config --global --unset http.proxy

git config --global --unset https.proxy

参考:

2.maven配置代理

注释掉之前的阿里源镜像仓库

1
2
3
4
5
6
7
8
9
10
11
12
13
14
15
16
17
18
19
20
21
 <mirrors>
<!-- mirror
| Specifies a repository mirror site to use instead of a given repository. The repository that
| this mirror serves has an ID that matches the mirrorOf element of this mirror. IDs are used
| for inheritance and direct lookup purposes, and must be unique across the set of mirrors.
|
<mirror>
<id>mirrorId</id>
<mirrorOf>repositoryId</mirrorOf>
<name>Human Readable Name for this Mirror.</name>
<url>http://my.repository.com/repo/path</url>
</mirror>
-->
<!-- <mirror>
<id>nexus-aliyun</id>
<mirrorOf>central</mirrorOf>
<name>Nexus aliyun</name>
<url>http://maven.aliyun.com/nexus/content/groups/public</url>
</mirror> -->

</mirrors>

修改添加自己的proxy

1
2
3
4
5
6
7
8
9
10
11
12
13
14
15
16
17
18
19
20
21
22
23
<proxies>
<!-- proxy
| Specification for one proxy, to be used in connecting to the network.
|
<proxy>
<id>optional</id>
<active>true</active>
<protocol>http</protocol>
<username>proxyuser</username>
<password>proxypass</password>
<host>proxy.host.net</host>
<port>80</port>
<nonProxyHosts>local.net|some.host.com</nonProxyHosts>
</proxy>
-->
<proxy>
<id>proxy-clash</id>
<active>true</active>
<protocol>http</protocol>
<host>127.0.0.1</host>
<port>7890</port>
</proxy>
</proxies>

参考:

3.npm配置代理

配置

1
2
3
4
npm config set proxy http://127.0.0.1:7890
# 一般来说不用https的,会他妈报错
# npm config set https-proxy https://127.0.0.1:7890
npm config set registry https://registry.npmjs.org

取消代理,并设置成淘宝镜像

1
2
3
4
npm config delete proxy
npm config delete https-proxy

npm config set registry https://registry.npmmirror.com

注意不再是:npm config set registry https://registry.npm.taobao.org
之前的淘宝镜像源已经更新了

带账号密码的:

1
2
npm config set proxy http://username:password@server:port
npm config set https-proxy http://username:pawword@server:port

参考:

4.IDEA配置代理

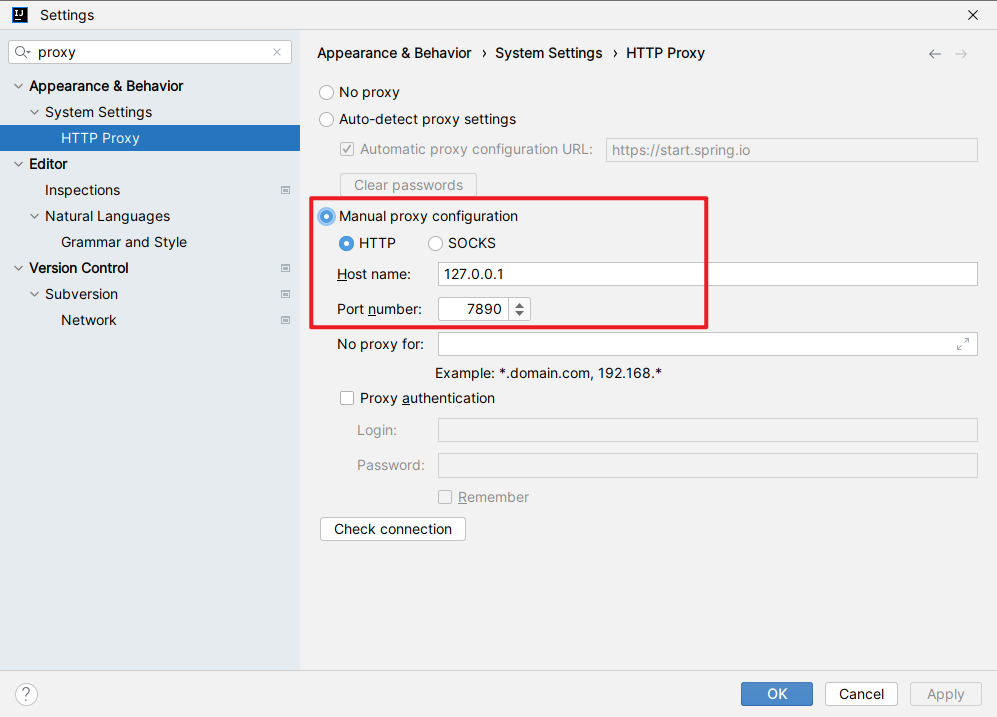
Settings - Appearance & Behavior - System Settings - HTTP Proxy - Manual proxy configuration

1
HTTP 127.0.0.1 7890

5.Linux配置代理

export的环境变量只有在当前会话中奏效
以下是clash

1
2
3
4
5
6
# 设置HTTP代理
export http_proxy="http://127.0.0.1:7890"

# 设置HTTPS代理
export https_proxy="http://127.0.0.1:7890"

永久写入环境变量

1
2
3
4
5
6
7
8
9
10
vim /etc/profile.d/my_env.sh

# 设置HTTP代理
export http_proxy="http://127.0.0.1:7890"

# 设置HTTPS代理
export https_proxy="http://127.0.0.1:7890"

# 刷新配置
source /etc/profile

6.pip配置代理

1
2
pip install -r requirements.txt --proxy=127.0.0.1:7890

豆瓣源

1
pip install module -i https://pypi.douban.com/simple

7.docker配置代理

1
sudo mkdir -p /etc/systemd/system/docker.service.d

vim /etc/systemd/system/docker.service.d/http-proxy.conf

1
2
3
4
5
6
7
8
9
10
11
12
[Service]
Environment="HTTP_PROXY=http://proxy.example.com:80"
Environment="HTTPS_PROXY=https://proxy.example.com:443"

# 忽略的域名,ip
# Environment="NO_PROXY=your-registry.com,10.10.10.10,*.example.com"


# 示例:
# [Service]
# Environment="HTTP_PROXY=http://192.168.154.85:7890"
# Environment="HTTPS_PROXY=http://192.168.154.85:7890"

重新加载配置文件,重启 docker

1
2
sudo systemctl daemon-reload
sudo systemctl restart docker

检查确认环境变量已经正确配置:

1
sudo systemctl show --property=Environment docker

参考:

救回来了, 不就是超时吗?

8.curl配置代理

1
curl --proxy "http://x.x.x.x:port" -O https://www.baidu.com/down/file

配置代理
https://xiamu.icu/Java/配置代理/
作者
肉豆蔻吖
发布于
2023年4月28日
许可协议