找到你喜欢做的事情, 并长期做下去
通过扩容提升整体吞吐量
1.单机垂直扩容:硬件资源增加
1
2
3
4
5
6
7
8
9
10
11
| 云服务资源增加
整机:IBM、浪潮、DELL、HP等
CPU/主板:更新到主流
网卡:10G/40G网卡
磁盘:SAS(SCSI) HDD(机械)、HHD(混合)、SATA SSD、PCI-e SSD、 MVMe SSD
SSD
多副本机制
系统盘/热点数据/数据库存储
HDD
冷数据存储
|
2.水平扩展:集群化
会话管理
Nginx高级负载均衡
1.通过iphash负载均衡
iphash维持会话特点及配置
ip_hash
hash $cookie_jsessionid;
hash $request_uri;
使用lua逻辑定向分发
Redis + SpringSession
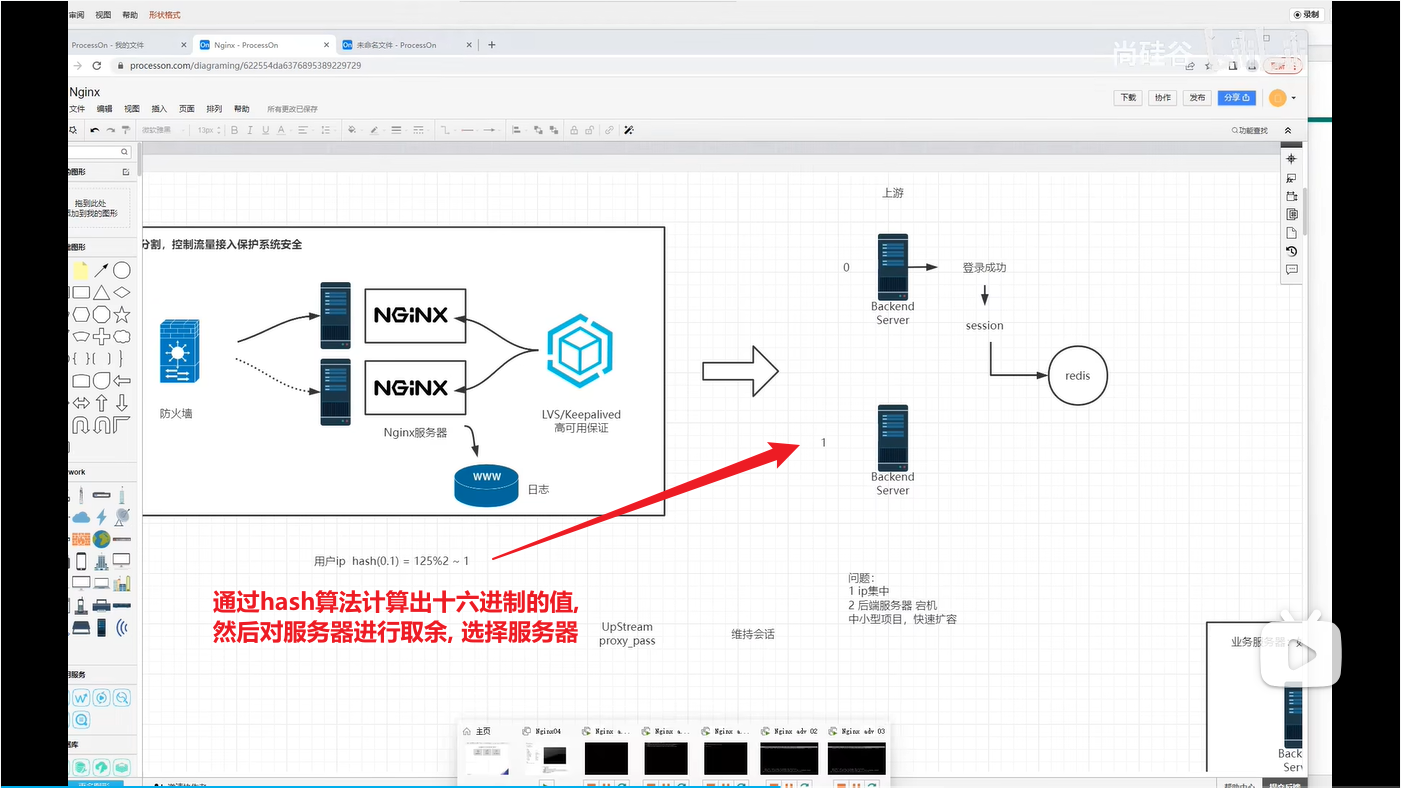
缺点:
- ip集中, 当一个学校考试的时候, 好几万人都在同一个地区, ip可能就那么几个, 计算出来的hash值都是一样的
- 后端服务器宕机的时候, 一些存储的session会话就消失了
适用于 中小型项目, 快速扩容, 这种方式可以不用修改后端代码, 直接扩容
1
2
3
4
5
6
7
8
9
10
11
12
13
14
15
16
17
18
19
20
21
22
23
24
25
26
27
28
29
| upstream httpget {
ip_hash;
server 192.168.1.102;
server 192.168.1.103;
}
server {
listen 80;
server_name localhost;
#charset koi8-r;
#access_log logs/host.access.log main;
location / {
proxy_pass http://httpget;
#root html;
#index index.html index.htm;
}
#error_page 404 /404.html;
# redirect server error pages to the static page /50x.html
#
error_page 500 502 503 504 /50x.html;
location = /50x.html {
root html;
}
}
|
之后 systemctl reload nginx 一下
刷新, 101展示的一直是102的内容

如果将 ip_hash; 注释掉, 不断请求101, 则是轮询的展示102 103
2.通过cookie负载均衡
这种方式的负载均衡需要上游服务器/后端给客户端下发一个cookie, 之后才有效果的, 这里边为了省事, 直接手动编辑的cookie
1
2
3
4
5
6
7
| upstream httpget {
#ip_hash;
hash $cookie_jsessionid;
server 192.168.1.102;
server 192.168.1.103;
}
|
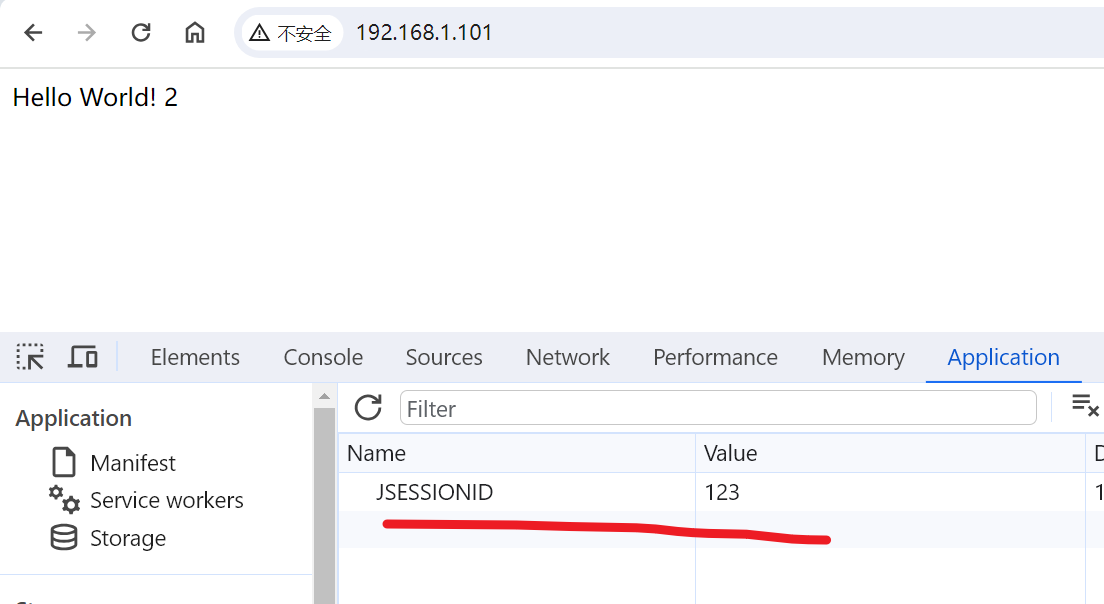
随便编辑一个cookie key JSESSIONID value 随意
value = 123一直转发流量到了 2
value = 789一直转发流量到了 3
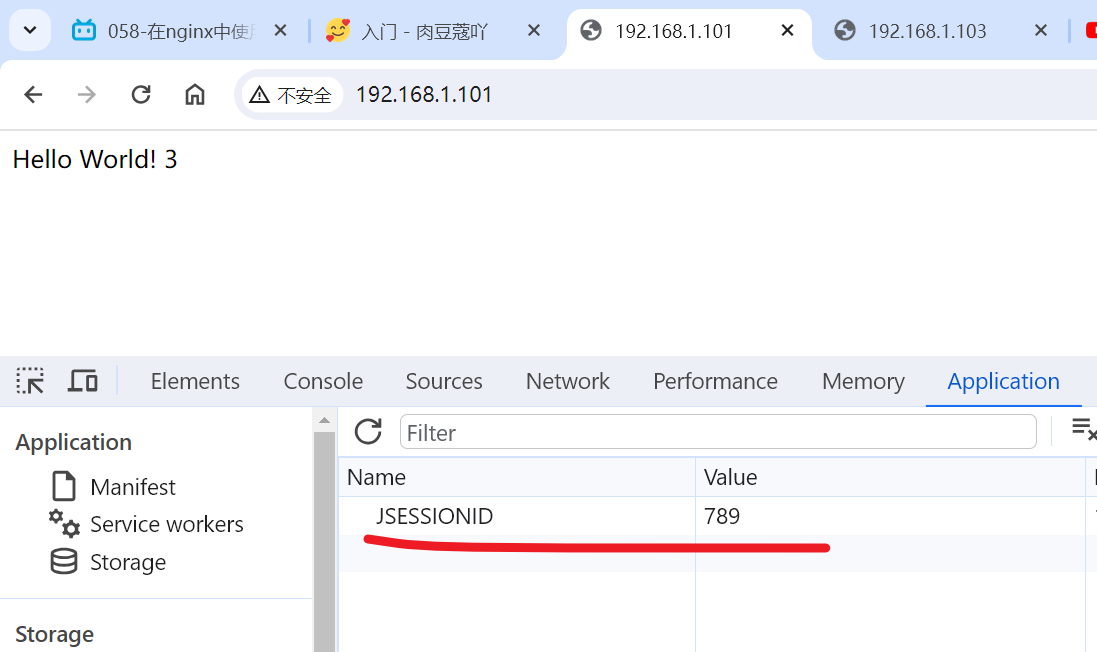
此次hash算法采用的是cookie进行的hash
3.通过request_uri负载均衡
1
2
3
4
5
6
7
| upstream httpget {
#ip_hash;
#hash $cookie_jsessionid;
hash $request_uri;
server 192.168.1.102;
server 192.168.1.103;
}
|
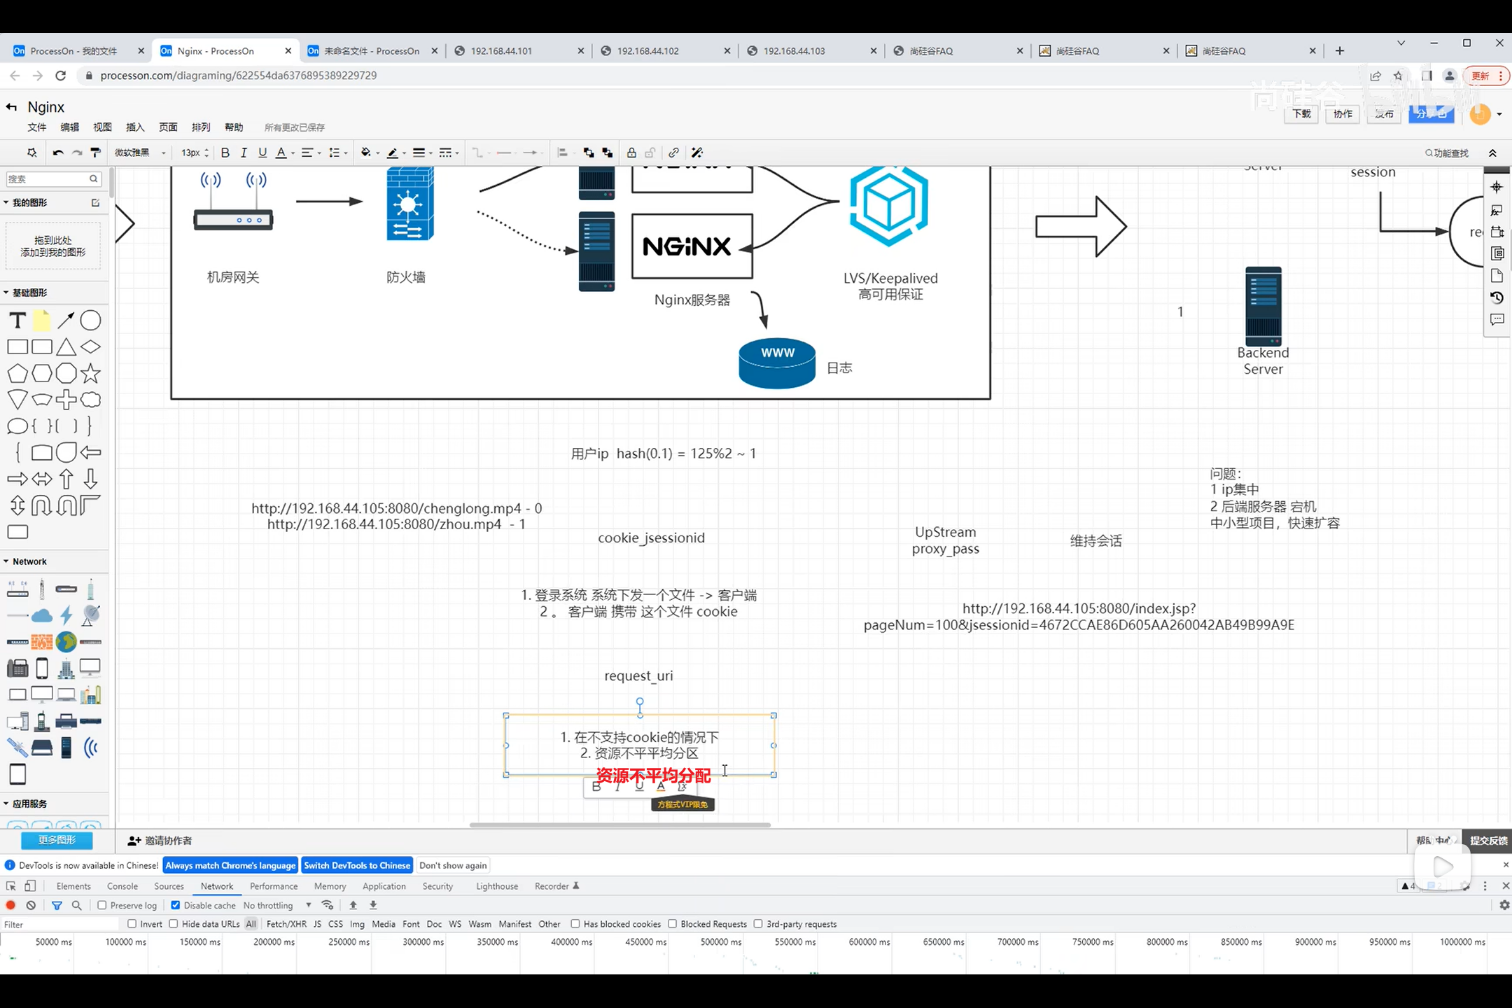
请求的uri为?123456访问的是2资源, 请求的uri为?12345访问的是3资源
相同的uri分发到相同的服务器上, 不同的uri分发到不同的服务器上


使用sticky模块完成对Nginx的负载均衡
使用第三方模块平滑升级
使用参考
http://nginx.org/en/docs/http/ngx_http_upstream_module.html#sticky
tengine中有session_sticky模块我们通过第三方的方式安装在开源版本中
sticky是第三方模块,需要重新编译Nginx,他可以对Nginx这种静态文件服务器使用基于cookie的负载均衡
1.下载模块
项目官网
https://bitbucket.org/nginx-goodies/nginx-sticky-module-ng/src/master/
另外一个版本
https://github.com/bymaximus/nginx-sticky-module-ng
下载
https://bitbucket.org/nginx-goodies/nginx-sticky-module-ng/get/1.2.6.zip
1
2
3
4
5
6
7
8
9
10
11
12
13
14
| cd /opt
wget https://bitbucket.org/nginx-goodies/nginx-sticky-module-ng/get/c78b7dd79d0d099e359c5c4394d13c9317b9348f.tar.gz
tar zxvf c78b7dd79d0d099e359c5c4394d13c9317b9348f.tar.gz
cd nginx-1.22.1
ls
./configure --prefix=/usr/local/nginx/ --add-module=/opt/nginx-goodies-nginx-sticky-module-ng-c78b7dd79d0d/
make
|
如果出现报错
1
2
3
4
5
6
7
8
9
10
11
12
13
14
15
16
17
18
19
20
21
22
23
24
25
26
27
28
29
30
31
32
33
34
35
36
37
38
39
40
41
42
43
44
45
46
47
| /opt/nginx-goodies-nginx-sticky-module-ng-c78b7dd79d0d//ngx_http_sticky_misc.c: 在函数‘ngx_http_sticky_misc_md5’中:
/opt/nginx-goodies-nginx-sticky-module-ng-c78b7dd79d0d//ngx_http_sticky_misc.c:152:15: 错误:‘MD5_DIGEST_LENGTH’未声明(在此函数内第一次使用)
u_char hash[MD5_DIGEST_LENGTH];
^
/opt/nginx-goodies-nginx-sticky-module-ng-c78b7dd79d0d//ngx_http_sticky_misc.c:152:15: 附注:每个未 声明的标识符在其出现的函数内只报告一次
/opt/nginx-goodies-nginx-sticky-module-ng-c78b7dd79d0d//ngx_http_sticky_misc.c:152:10: 错误:未使用 的变量‘hash’ [-Werror=unused-variable]
u_char hash[MD5_DIGEST_LENGTH];
^
/opt/nginx-goodies-nginx-sticky-module-ng-c78b7dd79d0d//ngx_http_sticky_misc.c: 在函数‘ngx_http_sticky_misc_sha1’中:
/opt/nginx-goodies-nginx-sticky-module-ng-c78b7dd79d0d//ngx_http_sticky_misc.c:171:15: 错误:‘SHA_DIGEST_LENGTH’未声明(在此函数内第一次使用)
u_char hash[SHA_DIGEST_LENGTH];
^
/opt/nginx-goodies-nginx-sticky-module-ng-c78b7dd79d0d//ngx_http_sticky_misc.c:171:10: 错误:未使用 的变量‘hash’ [-Werror=unused-variable]
u_char hash[SHA_DIGEST_LENGTH];
^
/opt/nginx-goodies-nginx-sticky-module-ng-c78b7dd79d0d//ngx_http_sticky_misc.c: 在函数‘ngx_http_sticky_misc_hmac_md5’中:
/opt/nginx-goodies-nginx-sticky-module-ng-c78b7dd79d0d//ngx_http_sticky_misc.c:189:15: 错误:‘MD5_DIGEST_LENGTH’未声明(在此函数内第一次使用)
u_char hash[MD5_DIGEST_LENGTH];
^
/opt/nginx-goodies-nginx-sticky-module-ng-c78b7dd79d0d//ngx_http_sticky_misc.c:190:12: 错误:‘MD5_CBLOCK’未声明(在此函数内第一次使用)
u_char k[MD5_CBLOCK];
^
/opt/nginx-goodies-nginx-sticky-module-ng-c78b7dd79d0d//ngx_http_sticky_misc.c:190:10: 错误:未使用 的变量‘k’ [-Werror=unused-variable]
u_char k[MD5_CBLOCK];
^
/opt/nginx-goodies-nginx-sticky-module-ng-c78b7dd79d0d//ngx_http_sticky_misc.c:189:10: 错误:未使用 的变量‘hash’ [-Werror=unused-variable]
u_char hash[MD5_DIGEST_LENGTH];
^
/opt/nginx-goodies-nginx-sticky-module-ng-c78b7dd79d0d//ngx_http_sticky_misc.c: 在函数‘ngx_http_sticky_misc_hmac_sha1’中:
/opt/nginx-goodies-nginx-sticky-module-ng-c78b7dd79d0d//ngx_http_sticky_misc.c:237:15: 错误:‘SHA_DIGEST_LENGTH’未声明(在此函数内第一次使用)
u_char hash[SHA_DIGEST_LENGTH];
^
/opt/nginx-goodies-nginx-sticky-module-ng-c78b7dd79d0d//ngx_http_sticky_misc.c:238:12: 错误:‘SHA_CBLOCK’未声明(在此函数内第一次使用)
u_char k[SHA_CBLOCK];
^
/opt/nginx-goodies-nginx-sticky-module-ng-c78b7dd79d0d//ngx_http_sticky_misc.c:238:10: 错误:未使用 的变量‘k’ [-Werror=unused-variable]
u_char k[SHA_CBLOCK];
^
/opt/nginx-goodies-nginx-sticky-module-ng-c78b7dd79d0d//ngx_http_sticky_misc.c:237:10: 错误:未使用 的变量‘hash’ [-Werror=unused-variable]
u_char hash[SHA_DIGEST_LENGTH];
^
cc1: all warnings being treated as errors
make[1]: *** [objs/addon/nginx-goodies-nginx-sticky-module-ng-c78b7dd79d0d/ngx_http_sticky_misc.o] 错误 1
make[1]: 离开目录“/opt/nginx-1.22.1”
make: *** [build] 错误 2
|
执行如下代码
1
2
3
4
5
6
7
8
9
10
11
12
13
14
15
16
17
18
19
20
21
22
23
24
25
26
27
28
29
30
31
32
33
34
35
36
37
38
39
40
41
42
43
44
45
46
47
48
49
50
| cd /opt/nginx-goodies-nginx-sticky-module-ng-c78b7dd79d0d/
vim ngx_http_sticky_misc.h
:wq
yum install -y openssl-devel
cd /opt/nginx-1.22.1
./configure --prefix=/usr/local/nginx/ --add-module=/opt/nginx-goodies-nginx-sticky-module-ng-c78b7dd79d0d/
make
[root@nginx01 nginx-1.22.1]
/usr/local/nginx//sbin/nginx -t
nginx: the configuration file /usr/local/nginx/conf/nginx.conf syntax is ok
nginx: configuration file /usr/local/nginx/conf/nginx.conf test is successful
kill -USR2 `cat /usr/local/nginx//logs/nginx.pid`
sleep 1
test -f /usr/local/nginx//logs/nginx.pid.oldbin
kill -QUIT `cat /usr/local/nginx//logs/nginx.pid.oldbin`
mv /usr/local/nginx/sbin/nginx /usr/local/nginx/sbin/nginx.old
[root@nginx01 nginx-1.22.1]
[root@nginx01 objs]
[root@nginx01 objs]
[root@nginx01 sbin]
nginx nginx.old
[root@nginx01 sbin]
nginx version: nginx/1.22.1
built by gcc 4.8.5 20150623 (Red Hat 4.8.5-44) (GCC)
configure arguments: --prefix=/usr/local/nginx/ --add-module=/opt/nginx-goodies-nginx-sticky-module-ng-c78b7dd79d0d/
[root@nginx01 sbin]
[root@nginx01 sbin]
[root@nginx01 sbin]
|
请求页面, 页面显示正常

使用sticky
配置方法
sticky 后面可以带参数, 也可以不带参数
1
2
3
4
5
6
7
8
9
10
11
12
13
14
15
16
17
18
|
    upstream httpget {
        #ip_hash;
        #hash   $cookie_jsessionid;
        #hash    $request_uri;
        sticky;
        server 192.168.1.102;
        server 192.168.1.103;
    }


upstream httpget {

sticky name=route expires=6h;

server 192.168.44.102;
server 192.168.44.103;
}
|
systemctl restart nginx
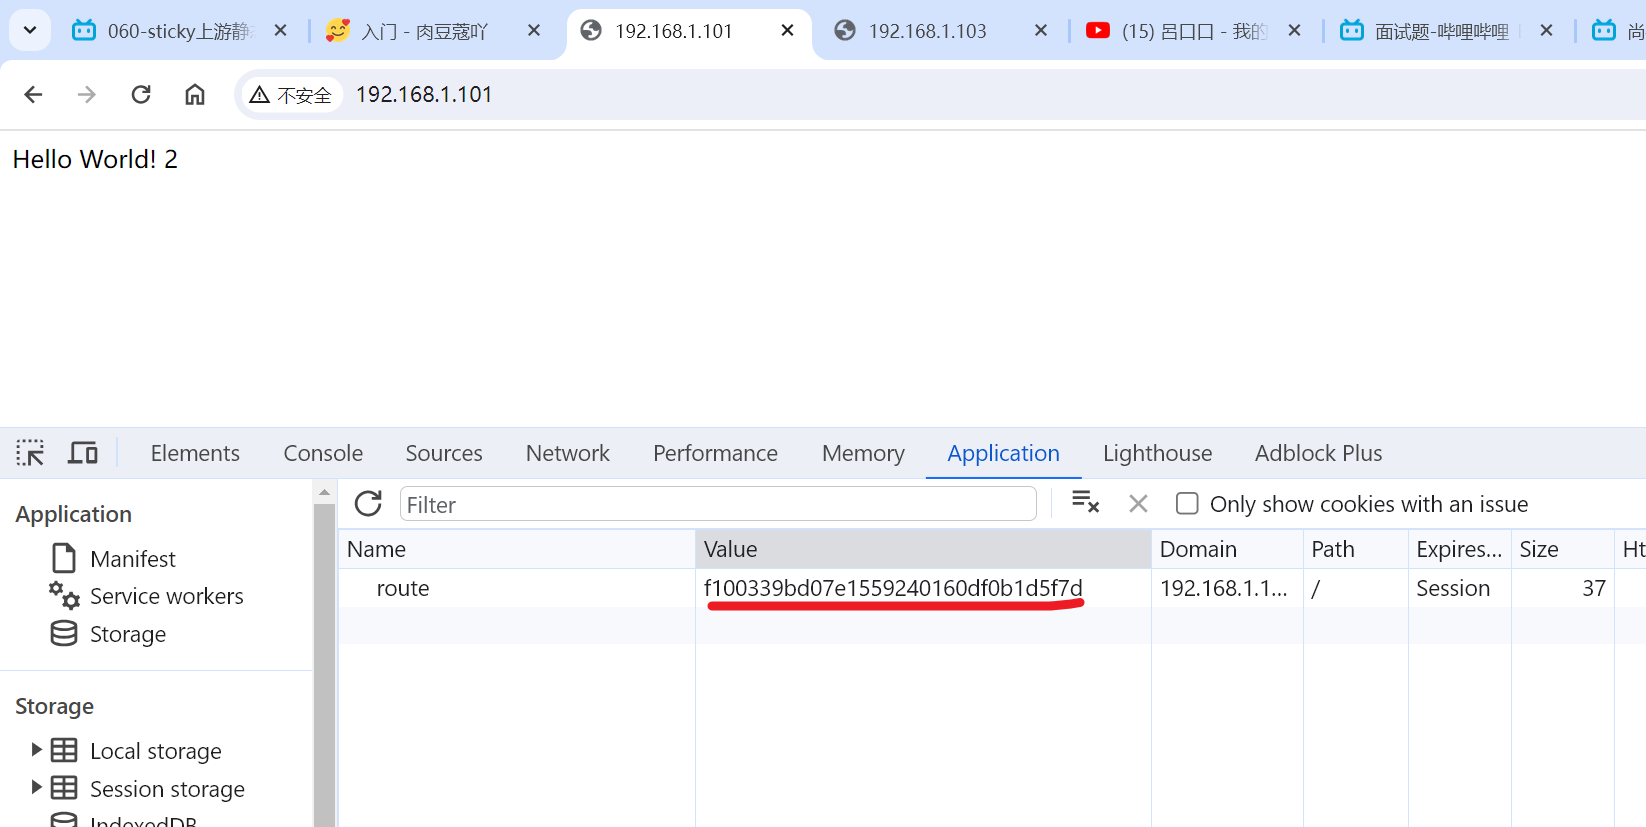
此时的是通过route作为的cookie作为的负载均衡, router是由第三方插件给我们下发的cookie
KeepAlive
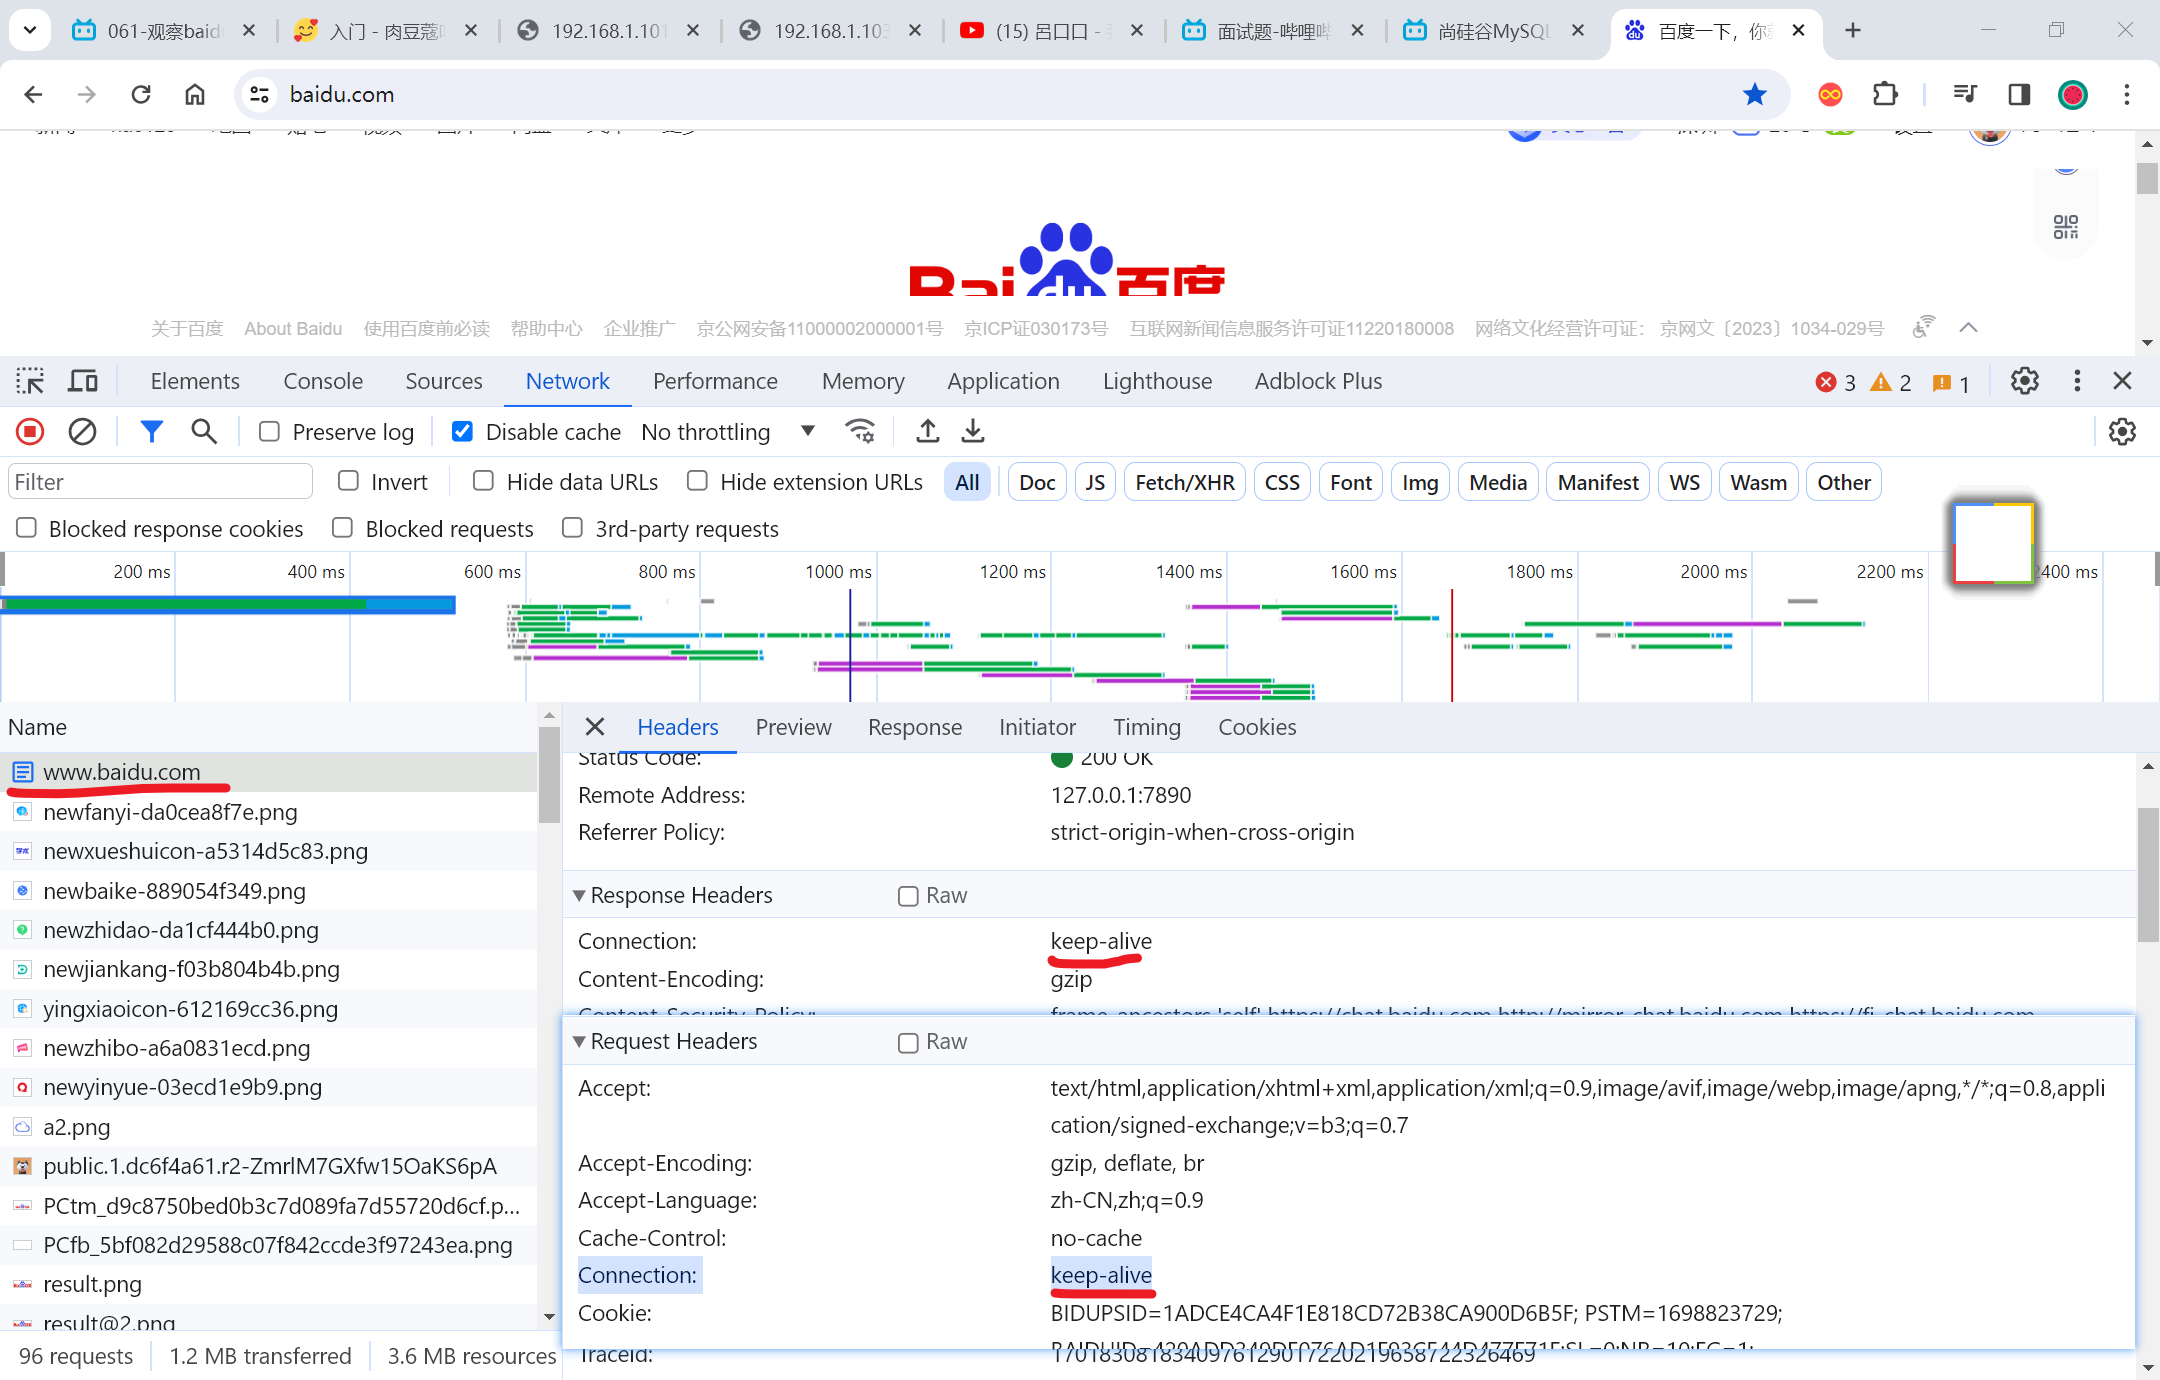
在请求baidu.com的时候, Request的connect需要 keep-alive, Response的connect也同样的有 keep-alive 来建立连接
关闭keep_timeout
1
2
| keepalive_timeout 0;
#keepalive_timeout 65;
|
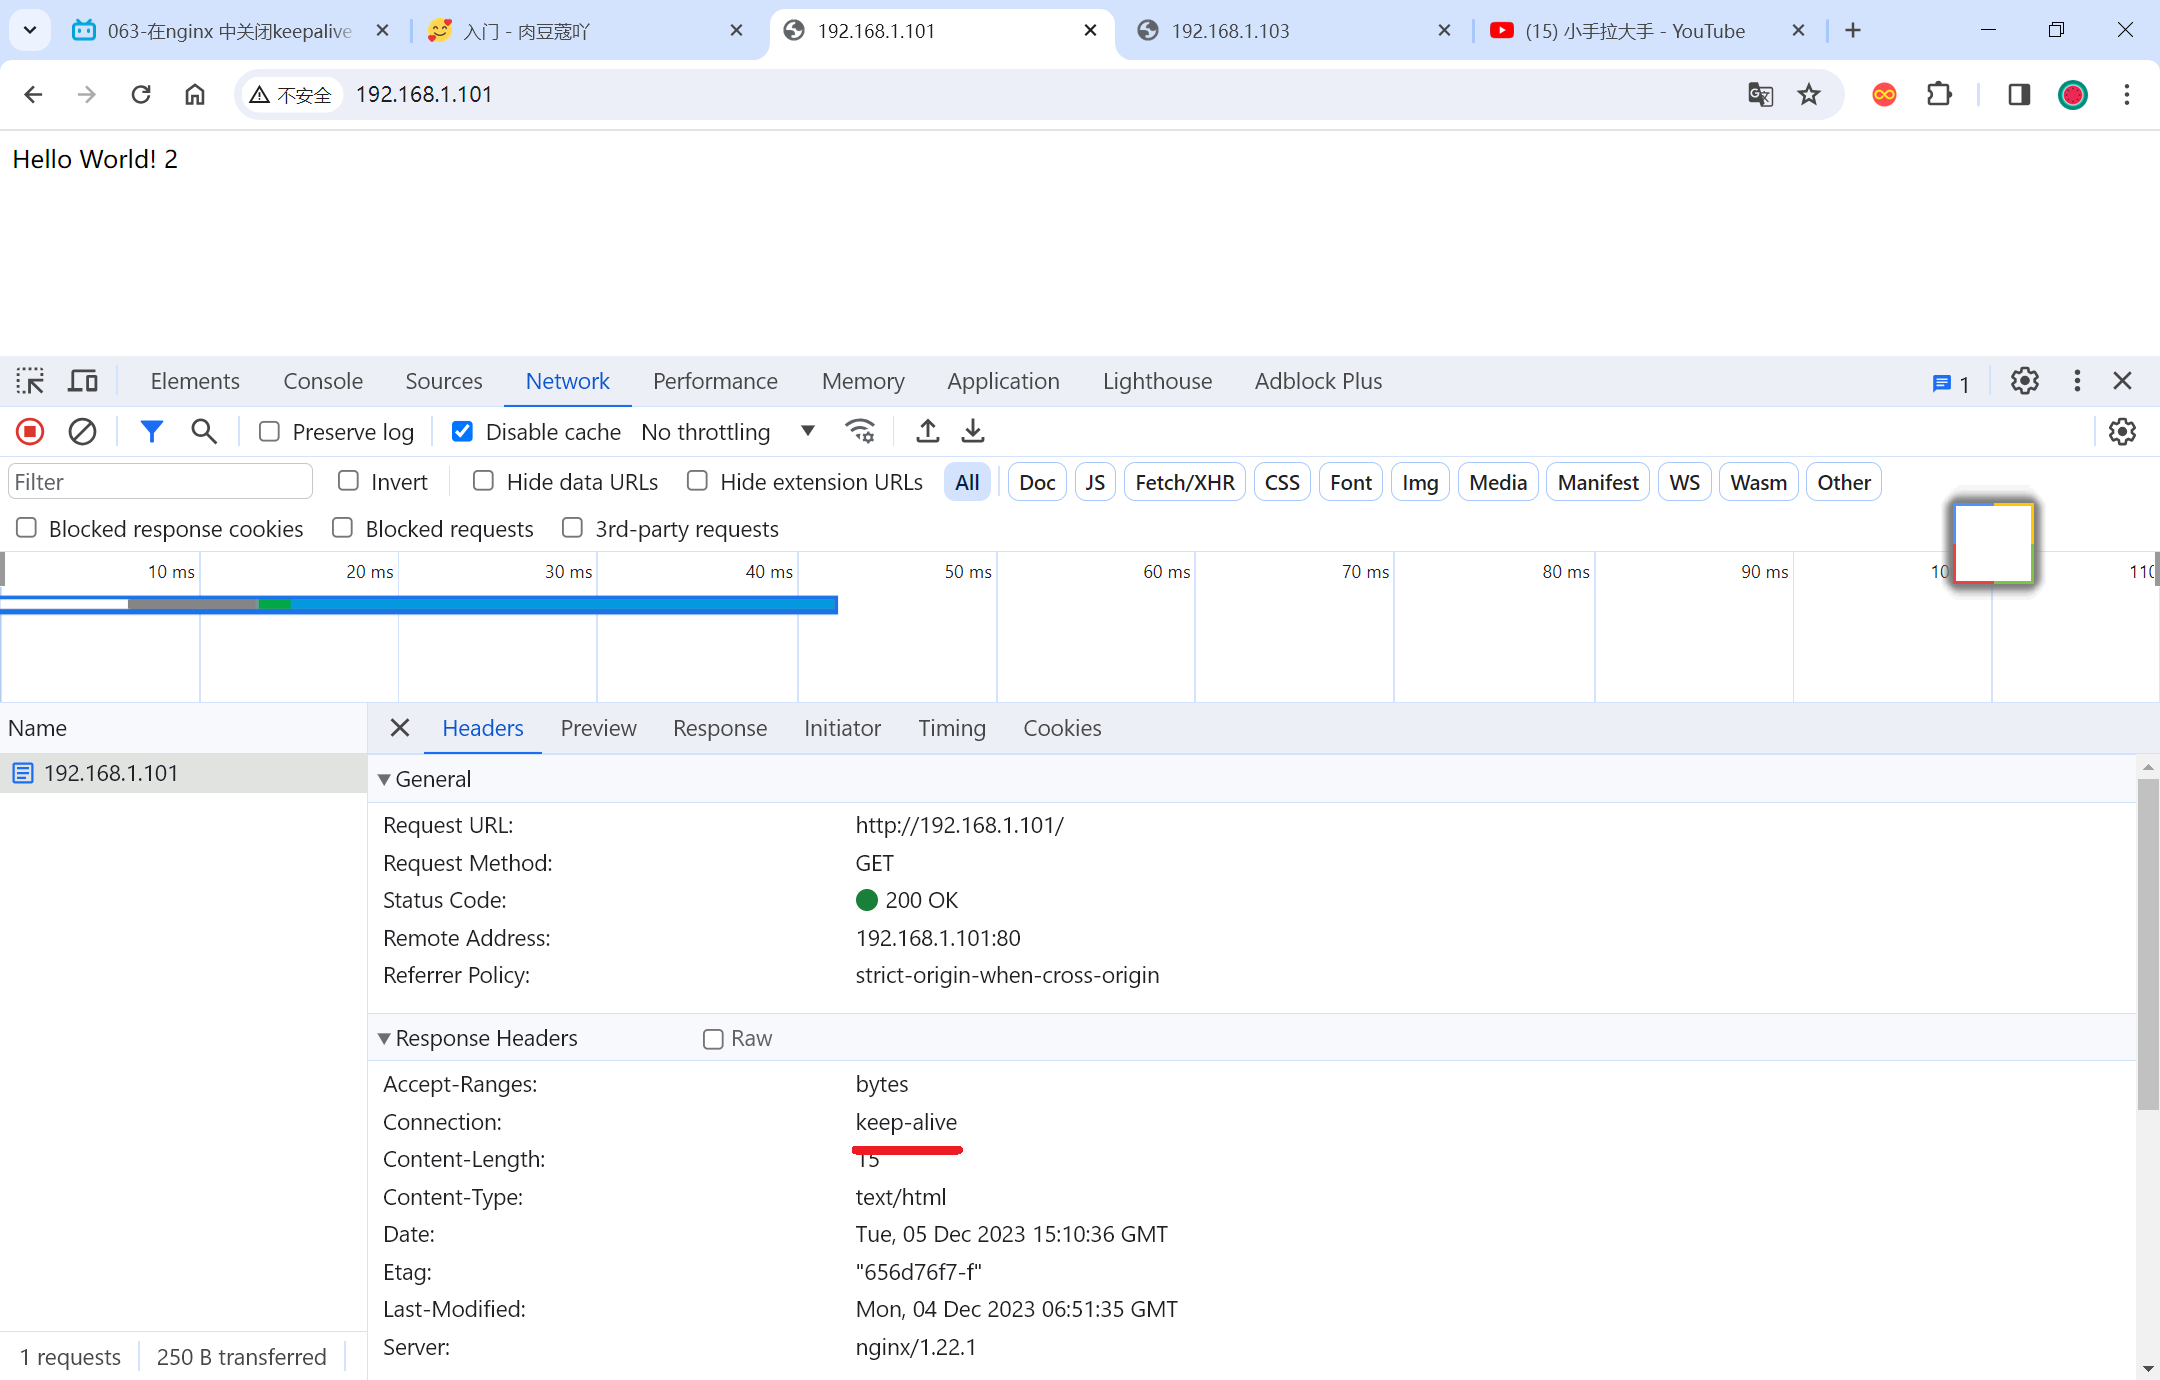
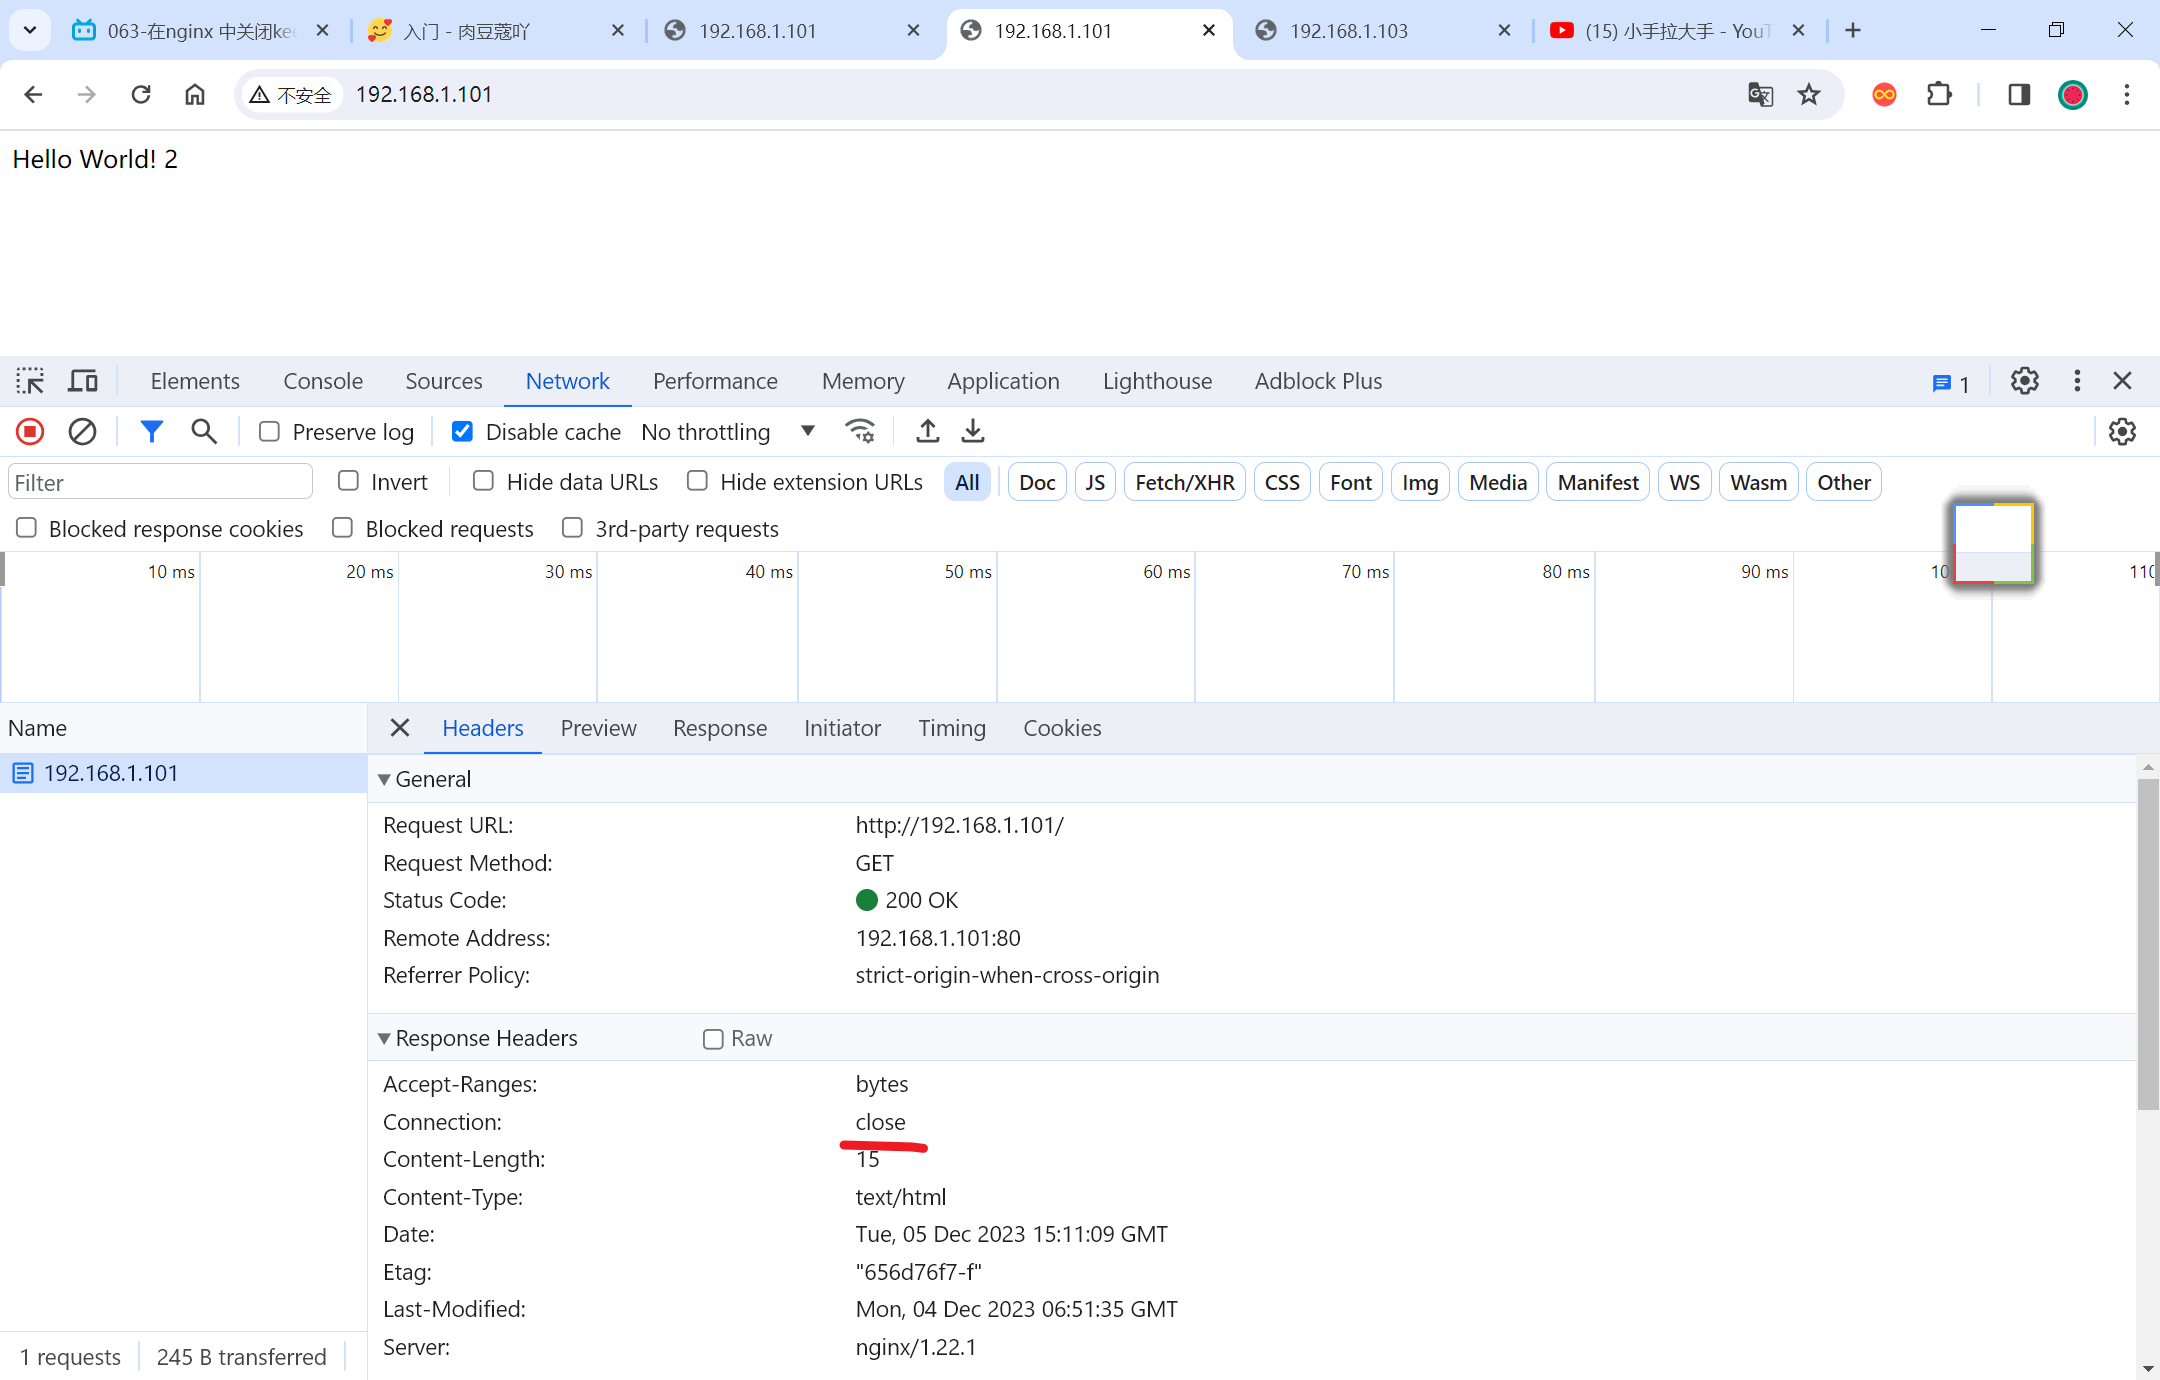
之前的状态是response 中connect显示的keep-alive, systemctl restart nginx之后, 显示的close
2023-12-5 57集
2023-12-6 58集 - 64集


