介绍 SpringCloud=分布式微服务架构的一站式解决方案, 是多种微服务架构落地技术的集合体, 俗称微服务全家桶
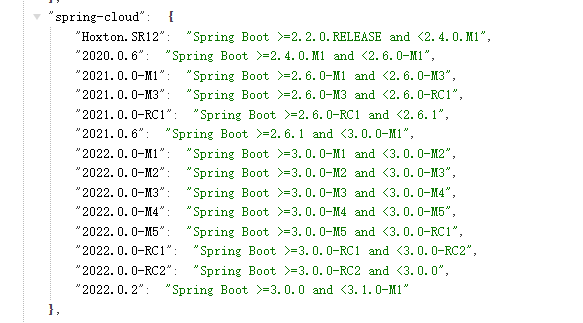
版本选型 https://start.spring.io/actuator/info
通过这个网站就可以查看到匹配的cloud版本
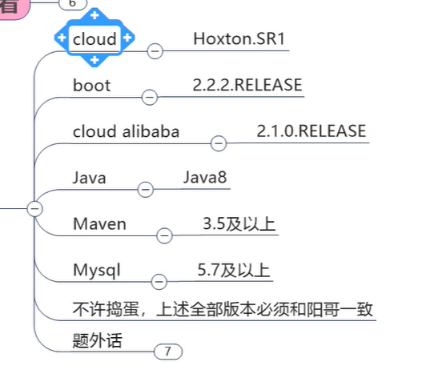
另外推荐跟视频中保持版本一致,
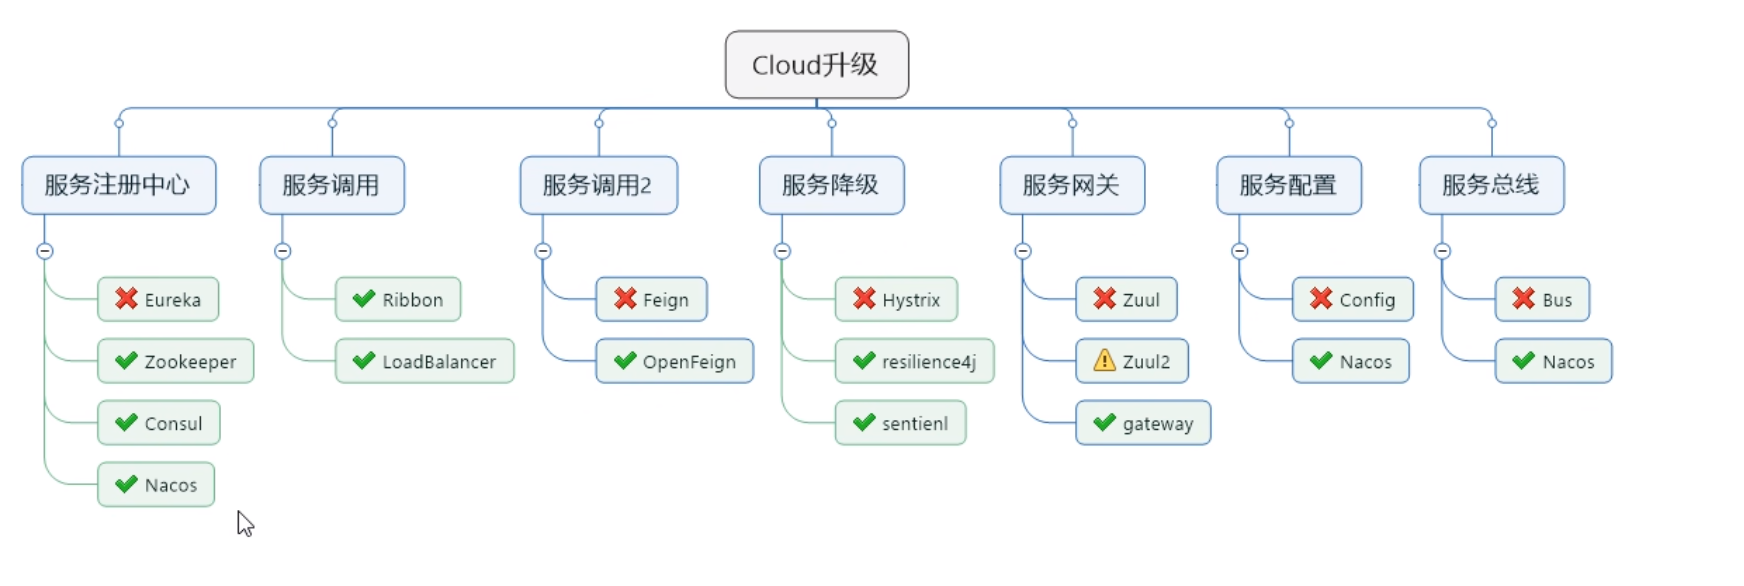
cloud停更
dependencyManagement和dependencies dependencyManagement其实给父工程指定版本号, 让子工程无需指定自己的版本号, 父工程修改一处版本号, 子工程处处生效
1
2
3
4
5
6
7
8
9
10
11
12
13
14
15
16
17
18
19
20
21
22
23
24
25
26
27
28
29
30
31
32
33
34
35
36
37
38
39
40
41
42
43
44
45
46
47
48
49
50
51
52
53
54
55
56
57
58
59
60
<!-- 子模块继承之后,提供作用:锁定版本+子modlue不用写groupId和version --><dependencyManagement > <dependencies > <dependency > <groupId > org.springframework.boot</groupId > <artifactId > spring-boot-dependencies</artifactId > <version > 2.2.2.RELEASE</version > <type > pom</type > <scope > import</scope > </dependency > <dependency > <groupId > org.springframework.cloud</groupId > <artifactId > spring-cloud-dependencies</artifactId > <version > Hoxton.SR1</version > <type > pom</type > <scope > import</scope > </dependency > <dependency > <groupId > com.alibaba.cloud</groupId > <artifactId > spring-cloud-alibaba-dependencies</artifactId > <version > 2.1.0.RELEASE</version > <type > pom</type > <scope > import</scope > </dependency > <dependency > <groupId > mysql</groupId > <artifactId > mysql-connector-java</artifactId > <version > ${mysql.version}</version > </dependency > <dependency > <groupId > com.alibaba</groupId > <artifactId > druid</artifactId > <version > ${druid.version}</version > </dependency > <dependency > <groupId > org.mybatis.spring.boot</groupId > <artifactId > mybatis-spring-boot-starter</artifactId > <version > ${mybatis.spring.boot.version}</version > </dependency > <dependency > <groupId > junit</groupId > <artifactId > junit</artifactId > <version > ${junit.version}</version > </dependency > <dependency > <groupId > log4j</groupId > <artifactId > log4j</artifactId > <version > ${log4j.version}</version > </dependency > <dependency > <groupId > org.projectlombok</groupId > <artifactId > lombok</artifactId > <version > ${lombok.version}</version > <optional > true</optional > </dependency > </dependencies > </dependencyManagement >
新建模块的流程
建module
改POM
写YML
主启动
业务类
RestTemplate 使用RestTemplate访问restful接口非常的简单粗暴无脑(url, restMap, ResponseBean.class)这三个参数代表REST请求地址, 请求参数, HTTP响应转换成的对象类型
在config.ApplicationContextConfig 将RestTemplate 注入到spring容器中
1 2 3 4 5 6 7 @Configuration class ApplicationContextConfig {Bean RestTemplate getRestTemplate (return new RestTemplate ();
使用RestTemplate传递参数会自动将对象序列化成JSON对象
消费者
1 2 3 4 5 6 7 8 9 10 static final String PAYMENT_URL = "http://localhost:8001" ;Resource RestTemplate restTemplate;GetMapping ("/consumer/payment/create" )CommonResult <Payment > create (Payment payment ) {return restTemplate.postForObject (PAYMENT_URL +"/payment/create" ,payment, CommonResult .class );
生产者
记得添加@RequestBody注解
1 2 3 4 5 6 7 8 9 10 11 12 13 14 @Resource PaymentService paymentService;PostMapping ("/payment/create" )CommonResult create (@RequestBody Payment payment ) {create (payment);info ("插入结果 {}" , result);if (result > 0 ) {return new CommonResult (200 , "插入数据库成功" , result);else {return new CommonResult (444 , "插入数据库失败" , null );
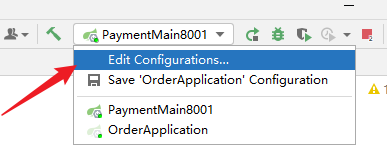
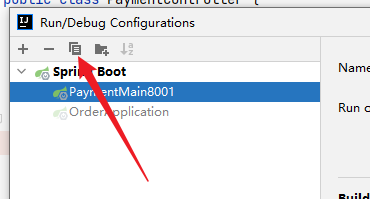
开启services(run dashboard 在配置中随便拷贝一个boot工程就可以显示出来了
另外一种方式通过配置.idea配置文件让其显示出来
参考:
配置Eureka注册中心 创建工程, 引入依赖
1 2 3 4 5 6 7 8 9 10 11 12 13 14 15 16 17 18 19 20 21 22 23 24 25 26 27 28 29 30 31 32 33 34 35 36 37 38 39 40 41 42 <dependencies><dependency > <groupId > org.springframework.cloud</groupId > <artifactId > spring-cloud-starter-netflix-eureka-server</artifactId > </dependency > Payment 支付Entity --><dependency > <groupId > com.atguigu.springcloud</groupId > <artifactId > cloud-api-commons</artifactId > <version > ${project.version}</version > </dependency > <dependency > <groupId > org.springframework.boot</groupId > <artifactId > spring-boot-starter-web</artifactId > </dependency > <dependency > <groupId > org.springframework.boot</groupId > <artifactId > spring-boot-starter-actuator</artifactId > </dependency > <dependency > <groupId > org.springframework.boot</groupId > <artifactId > spring-boot-devtools</artifactId > <scope > runtime</scope > <optional > true</optional > </dependency > <dependency > <groupId > org.projectlombok</groupId > <artifactId > lombok</artifactId > </dependency > <dependency > <groupId > org.springframework.boot</groupId > <artifactId > spring-boot-starter-test</artifactId > <scope > test</scope > </dependency > <dependency > <groupId > junit</groupId > <artifactId > junit</artifactId > </dependency >
配置application.yml
1
2
3
4
5
6
7
8
9
10
11
12
13
14
server :port : 7001 eureka :instance :hostname : localhost #eureka服务端的实例名称client :false 表示不向注册中心注册自己。with -eureka : false false 表示自己端就是注册中心,我的职责就是维护服务实例,并不需要去检索服务registry : false url :Eureka Server 交互的地址查询服务和注册服务都需要依赖这个地址。defaultZone : http :
编写入口Main
1 2 3 4 5 6 7 @SpringBootApplication EnableEurekaServer class EurekaMain7001 {static void main (String [] argsSpringApplication .run (EurekaMain7001 .class , args);
值得注意的是需要添加注解@EnableEurekaServer来标识这个是eureka的服务端
最后启动项目, 访问http://localhost:7001/
引入服务的提供者到注册中心 在pom.xml中配置
1 2 3 4 5 <groupId > org.springframework.cloud</groupId > <artifactId > spring-cloud-starter-netflix-eureka-client</artifactId >
application.yml中配置eureka
1
2
3
4
5
6
7
8
eureka :client :EurekaServer 默认为true 。with -eureka : true EurekaServer 抓取已有的注册信息,默认为true 。单节点无所谓,集群必须设置为true 才能配合ribbon使用负载均衡fetchRegistry : true url :defaultZone : http :
最后标记注解@EnableEurekaClient
1 2 3 4 5 6 7 @SpringBootApplication EnableEurekaClient class PaymentMain8001 {static void main (String [] argsSpringApplication .run (PaymentMain8001 .class , args);
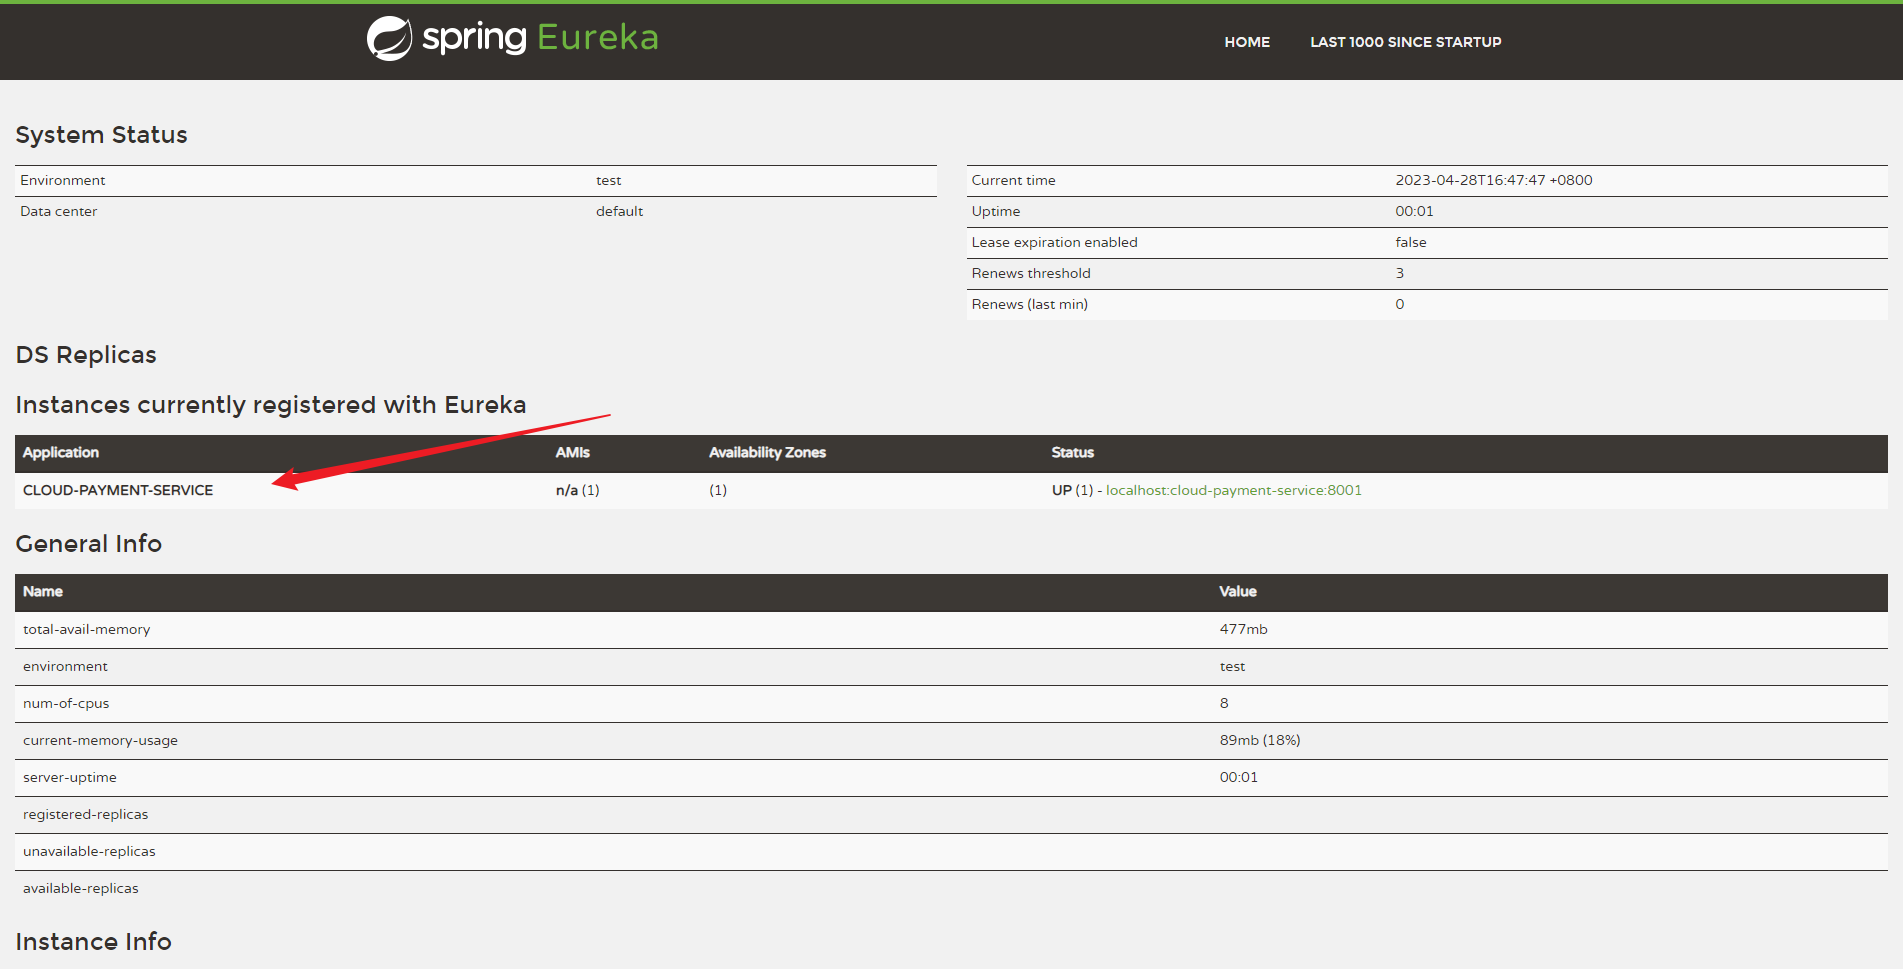
配置完成之后需要重启服务, 就能看见CLOUD-PAYMENT-SERVICE成功的注册到了eureka中
配置eureka集群 引入依赖
1 2 3 4 5 6 7 8 9 10 11 12 13 14 15 16 17 18 19 20 21 22 23 24 25 26 27 28 29 30 31 32 33 34 35 36 37 38 39 40 41 42 <dependencies><dependency > <groupId > org.springframework.cloud</groupId > <artifactId > spring-cloud-starter-netflix-eureka-server</artifactId > </dependency > Payment 支付Entity --><dependency > <groupId > com.atguigu.springcloud</groupId > <artifactId > cloud-api-commons</artifactId > <version > ${project.version}</version > </dependency > <dependency > <groupId > org.springframework.boot</groupId > <artifactId > spring-boot-starter-web</artifactId > </dependency > <dependency > <groupId > org.springframework.boot</groupId > <artifactId > spring-boot-starter-actuator</artifactId > </dependency > <dependency > <groupId > org.springframework.boot</groupId > <artifactId > spring-boot-devtools</artifactId > <scope > runtime</scope > <optional > true</optional > </dependency > <dependency > <groupId > org.projectlombok</groupId > <artifactId > lombok</artifactId > </dependency > <dependency > <groupId > org.springframework.boot</groupId > <artifactId > spring-boot-starter-test</artifactId > <scope > test</scope > </dependency > <dependency > <groupId > junit</groupId > <artifactId > junit</artifactId > </dependency >
修改配置application.yml配置文件
1
2
3
4
5
6
7
8
9
10
11
server :port : 7005 eureka :instance :hostname : eureka7005.com #eureka服务端的实例名称client :with -eureka : false #false 表示不向注册中心注册自己。registry : false #false 表示自己端就是注册中心,我的职责就是维护服务实例,并不需要去检索服务url :defaultZone : http :
一般来说服务注册中心不会自己注册自己
但是多个服务注册中心需要互相注册
1 注册 2 3 4 5
2 注册 1 3 4 5
3 注册 1 2 4 5
4 注册 1 2 3 5
5 注册 1 2 3 4
互相注册, 相互守望
编写程序启动类, 记得需要添加@EnableEurekaServer这个注解
1
2
3
4
5
6
7
8
9
10
11
12
13
package com.atguigu .springcloud ;import org.springframework .boot .SpringApplication ;import org.springframework .boot .autoconfigure .SpringBootApplication ;import org.springframework .cloud .netflix .eureka .server .EnableEurekaServer ;SpringBootApplication EnableEurekaServer class EurekaMain7005 {static void main (String [] argsSpringApplication .run (EurekaMain7005 .class , args);
将消费者注册到注册中心集群 1 2 3 4 5 6 7 8 eureka :client :EurekaServer 默认为true 。with -eureka : true EurekaServer 抓取已有的注册信息,默认为true 。单节点无所谓,集群必须设置为true 才能配合ribbon使用负载均衡fetchRegistry : true url :defaultZone : http :
同样的提供者也是相同的方式注册到集群
将提供者注册到注册中心集群 注意server.port不要跟其他的服务重名了
1 2 3 4 5 6 7 8 9 10 11 12 13 14 15 16 17 18 19 20 21 22 23 24 25 26 server :port : 8002 spring :application :name : cloud-payment-servicedatasource :type : com.alibaba .druid .pool .DruidDataSource # 当前数据源操作类型class -name : com.mysql .cj .jdbc .Driver # mysql驱动包url : jdbc :mysql :username : rootpassword : 123456 eureka :client :EurekaServer 默认为true 。with -eureka : true EurekaServer 抓取已有的注册信息,默认为true 。单节点无所谓,集群必须设置为true 才能配合ribbon使用负载均衡fetchRegistry : true url :defaultZone : http :defaultZone : http :mybatis :mapperLocations : classpath :mapper
消费者开启负载均衡@LoadBalanced
1 2 3 4 5 6 7 8 @Configuration class ApplicationContextConfig {Bean LoadBalanced RestTemplate getRestTemplate (return new RestTemplate ();
通过http://服务名
进行调用
1 2 3 4 5 6 7 8 9 10 11 12 13 14 15 static final String PAYMENT_URL = "http://CLOUD-PAYMENT-SERVICE" ;Resource RestTemplate restTemplate;GetMapping ("/consumer/payment/create" )CommonResult <Payment > create (Payment payment ) {return restTemplate.postForObject (PAYMENT_URL +"/payment/create" ,payment, CommonResult .class );GetMapping ("/consumer/get/{id}" )CommonResult getPayment (@PathVariable("id" ) Long id ) {return restTemplate.getForObject (PAYMENT_URL +"/payment/get/" +id, CommonResult .class );
actuator微服务信息完善 在application.yml中
instance:
这段信息就能显示主机名, 并且点击之后就可以显示对应的IP地址
1 2 3 4 5 6 7 8 9 10 11 12 eureka :client :EurekaServer 默认为true 。with -eureka : true EurekaServer 抓取已有的注册信息,默认为true 。单节点无所谓,集群必须设置为true 才能配合ribbon使用负载均衡fetchRegistry : true url :defaultZone : http :defaultZone : http :instance :id : payment8003address : true #访问路径可以显示IP 地址
配置服务发现Discovery 1 2 3 4 5 6 7 8 9 10 11 12 13 14 15 16 17 @Resource private DiscoveryClient discoveryClient;@GetMapping("/payment/discovery") public Object discovery () {for (String service : services) {"service: {}" , service);"CLOUD-PAYMENT-SERVICE" );for (ServiceInstance instance : instances) {"instance: " + instance.getServiceId() + "\t" + instance.getHost() + "\t" + instance.getPort() + "\t" + instance.getUri());return this .discoveryClient;
接着在入口函数添加注解@EnableDiscoveryClient
1 2 3 4 5 6 7 8 @SpringBootApplication @EnableEurekaClient @EnableDiscoveryClient public class PaymentMain8001 {public static void main (String[] args) {
测试结果
Eureka自我保护
当出现这个段英文时, EMERGENCY! EUREKA MAY BE INCORRECTLY CLAIMING INSTANCES ARE UP WHEN THEY’RE NOT. RENEWALS ARE LESSER THAN THRESHOLD AND HENCE THE INSTANCES ARE NOT BEING EXPIRED JUST TO BE SAFE.
就说明eureka进入了自我保护
可能是因为网络状态正常接收某个微服务的心跳
在某时刻某一个微服务不可用了, Eureka不会立刻清理, 依旧会对该微服务的信息进行保存
关闭自我保护 配置了1秒发送心跳, 超过2秒没有收到心跳就剔除这个微服务
THE SELF PRESERVATION MODE IS TURNED OFF. THIS MAY NOT PROTECT INSTANCE EXPIRY IN CASE OF NETWORK/OTHER PROBLEMS.
提供者
1 2 3 4 5 6 7 8 9 10 11 12 13 14 15 16 17 18 eureka:true 。true true 。单节点无所谓,集群必须设置为true 才能配合ribbon使用负载均衡true true #访问路径可以显示IP地址30 秒)1 90 秒),超时将剔除服务2
注册中心
1 2 3 4 5 6 7 8 9 10 11 12 13 14 15 eureka:false 表示不向注册中心注册自己。false false 表示自己端就是注册中心,我的职责就是维护服务实例,并不需要去检索服务false false 2000
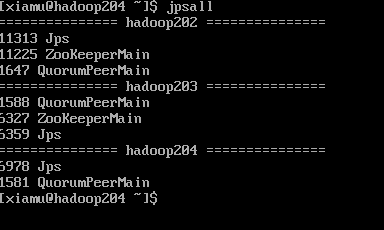
替换成zookeeper为注册中心 在centos7中启动zookeeper集群
创建一个新的微服务模块
中间排除了zookeeper的某个版本, 其实也可以不用, 因为我排不排除都能正常运行
1 2 3 4 5 6 7 8 9 10 11 12 13 14 15 16 17 18 19 20 21 22 23 24 25 26 27 28 29 30 31 32 33 34 35 36 37 38 39 40 41 42 43 44 45 46 <dependencies>.5 .3 -->.5 .7 版本-->3.5 .7 </version>true </optional>true </optional>
配置application.yml
1 2 3 4 5 6 7 8 9 10 11 12 server: port: 8004 spring: application: name: cloud-provider-payment8004 cloud: zookeeper: connect-string: hadoop202:2181,hadoop203:2181,hadoop204:2181
编写入口
1 2 3 4 5 6 7 8 9 10 11 12 @Slf4j @RestController @EnableDiscoveryClient public class PaymentController {@Value("${server.port}") private String serverPort;@RequestMapping("/payment/zk") public String paymentzk () {return "springcloud with zookeeper: " +serverPort+"\t" + UUID.randomUUID().toString();
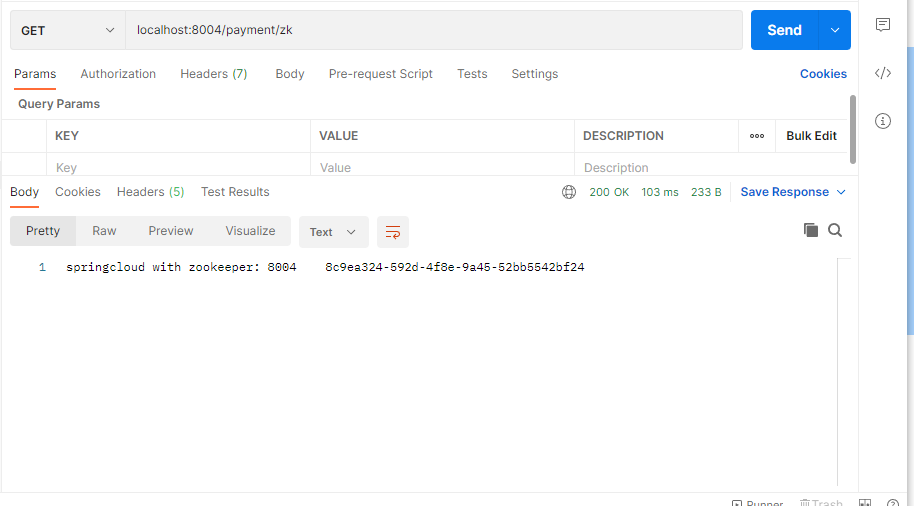
测试代码
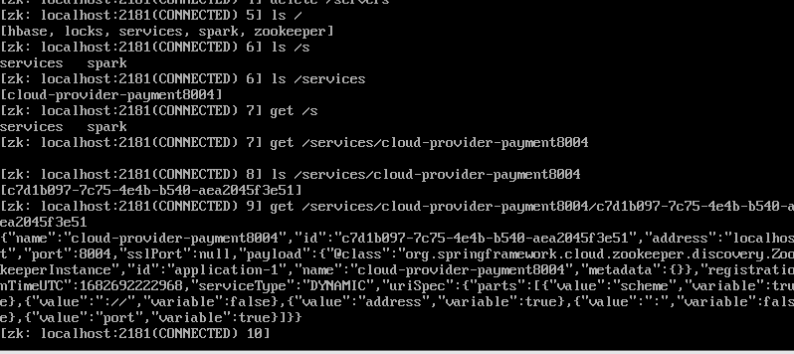
成功配置好了zookeeper注册中心
zookeeper服务节点 zookeeper服务节点是临时节点
当把cloud-provider-payment8004关闭之后, zookeeper就会将cloud-provider-payment8004这个节点给删除, 当cloud-provider-payment8004重新启动之后, zookeeper就会再次把cloud-provider-payment8004注册上
编写相对应的消费者
1 2 3 4 5 6 7 8 9 10 11 12 13 14 15 16 17 18 19 20 21 22 23 24 25 26 27 28 29 30 31 32 33 34 35 36 37 38 39 40 41 42 43 44 45 46 <dependencies>.5 .3 -->.4 .9 版本-->3.5 .7 </version>true </optional>true </optional>
1 2 3 4 5 6 7 8 @Configuration public class ApplicationContextBean {@Bean @LoadBalanced public RestTemplate getRestTemplate () {return new RestTemplate ();
1 2 3 4 5 6 7 8 9 10 11 12 13 14 15 16 @RestController @Slf4j public class OrderZKController {public static final String INVOKE_URL = "http://cloud-provider-payment8004" ;@Resource private RestTemplate restTemplate;@GetMapping("/consumer/payment/zk") public String getPaymentInfo () {String result = restTemplate.getForObject(INVOKE_URL + "/payment/zk" , String.class);"消费者调用支付服务(zookeeper) => result: {}" , result);return result;
1 2 3 4 5 6 7 @SpringBootApplication @EnableDiscoveryClient public class OrderZK80 {public static void main (String[] args) {
1 2 3 4 5 6 7 8 9 10 11 #8004 表示注册到zookeeper服务器的支付服务提供者端口号80 2181 ,hadoop203:2181 ,hadoop204:2181
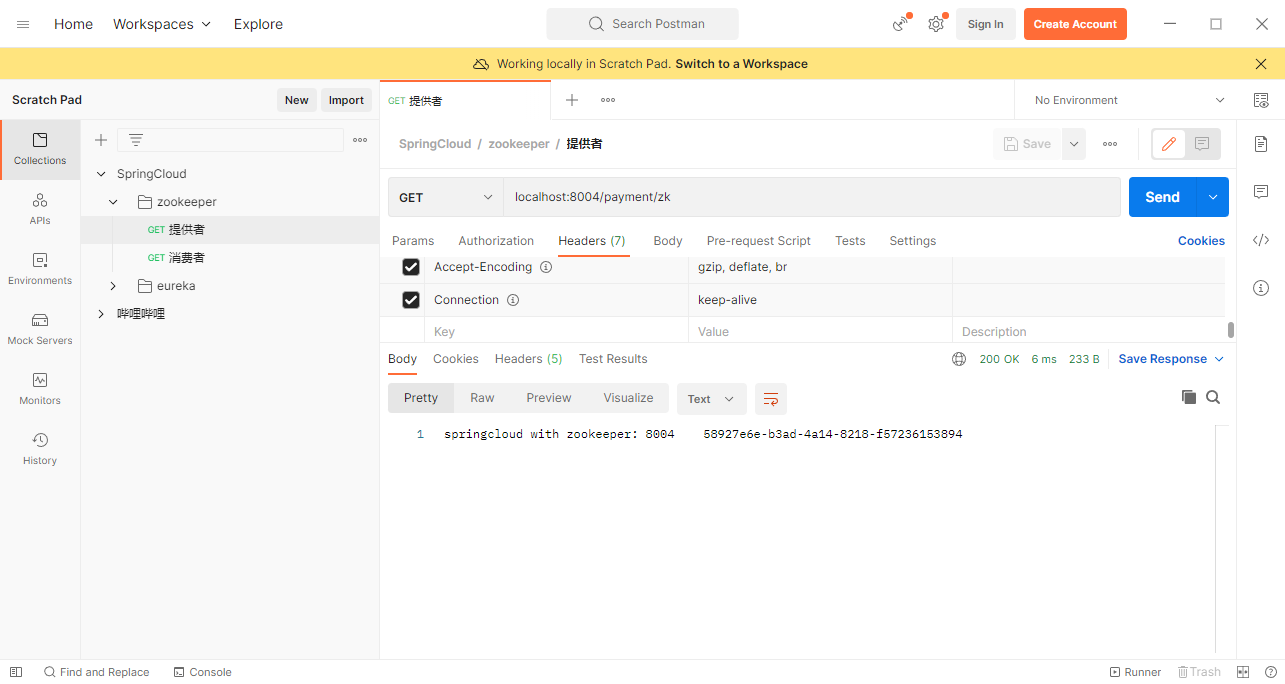
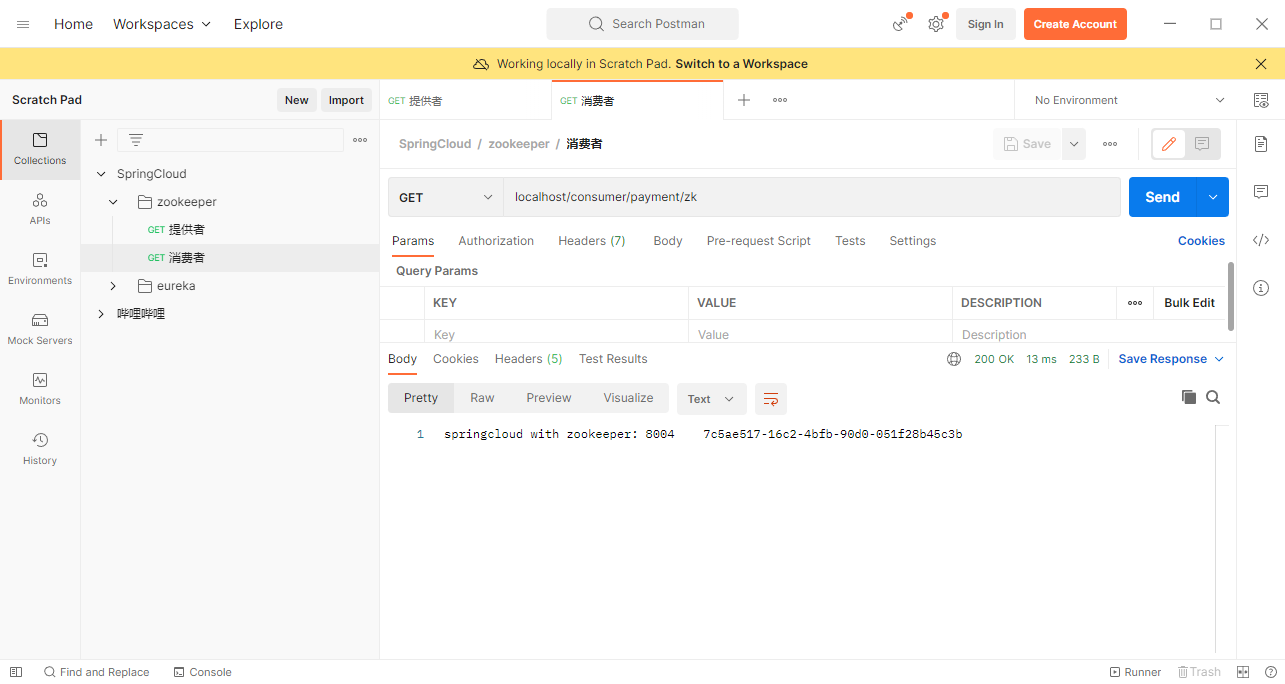
代码测试
启动了一个提供者和消费者
都能正常请求
Consul 下载地址
https://developer.hashicorp.com/consul/downloads?ajs_aid=cc9039da-f9af-4a8f-86e9-a9e6e2942e03&product_intent=consul
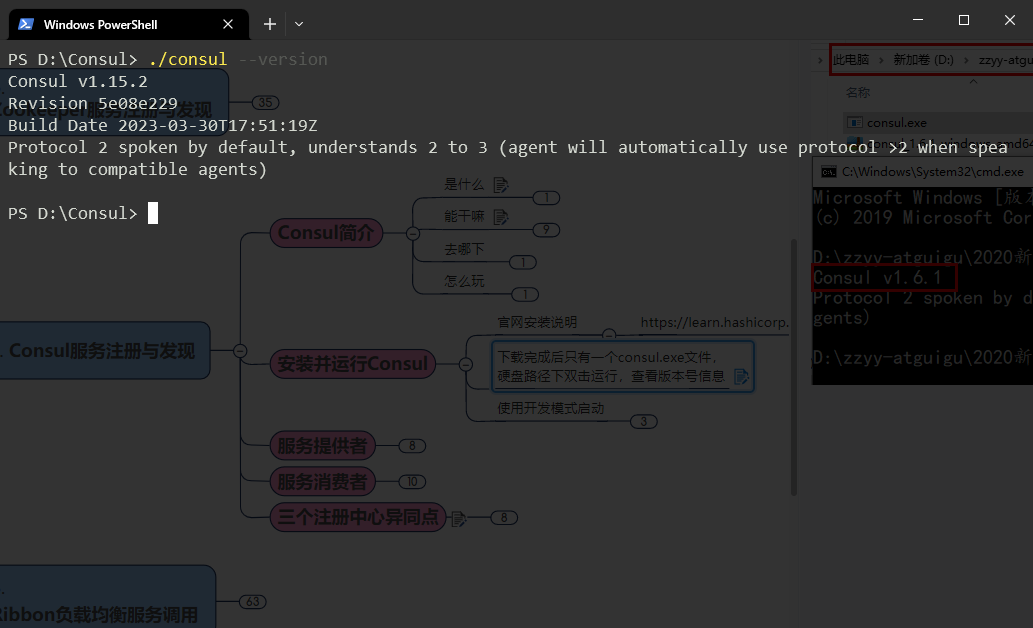
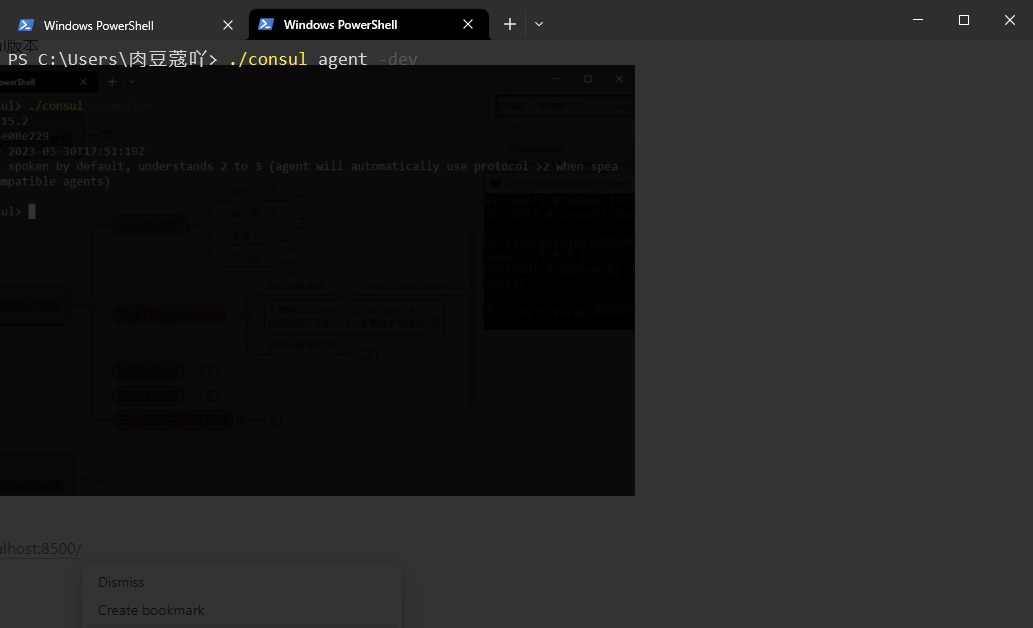
查看consul版本
输入./consul agent -dev 启动开发模式
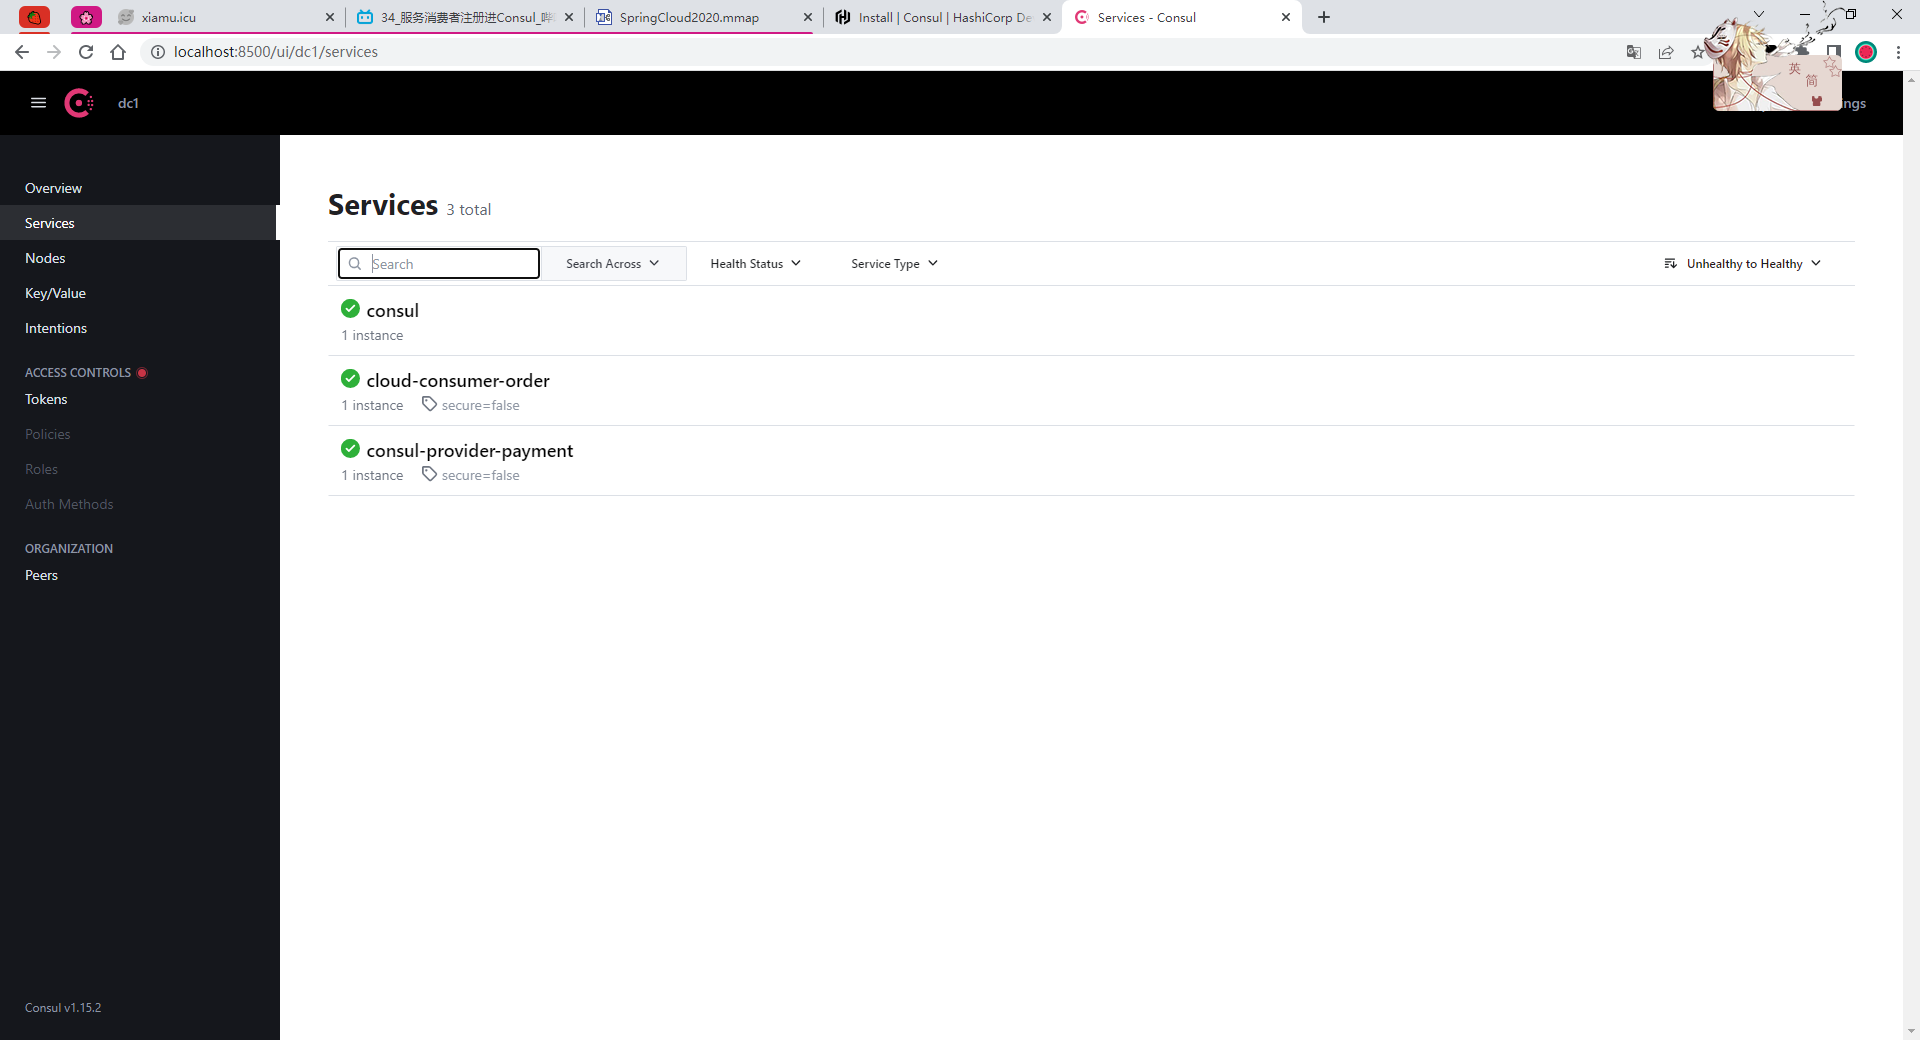
启动完之后可以访问http://localhost:8500/
配置Consul提供者 pom.xml
1 2 3 4 5 6 7 8 9 10 11 12 13 14 15 16 17 18 19 20 21 22 23 24 25 26 27 28 29 30 31 32 33 34 35 <dependencies>true </optional>true </optional>
application.yml
1 2 3 4 5 6 7 8 9 10 11 12 13 14 15 ###consul服务端口号8006 8500 127.0 .0 .1
Controller
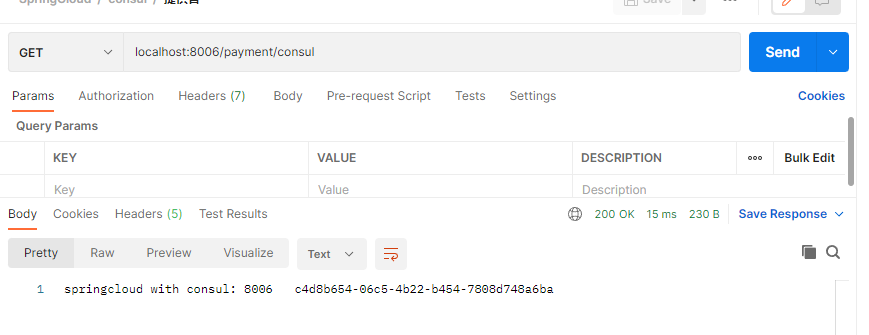
1 2 3 4 5 6 7 8 9 10 @RestController public class PaymentController {@Value("${server.port}") private String serverPort;@RequestMapping("/payment/consul") public String paymentzk () {return "springcloud with consul: " +serverPort+"\t" + UUID.randomUUID().toString();
代码测试
配置Consul消费者 pom.xml
1 2 3 4 5 6 7 8 9 10 11 12 13 14 15 16 17 18 19 20 21 22 23 24 25 26 27 28 29 30 31 32 33 34 35 <dependencies>true </optional>true </optional>
application.yml
1 2 3 4 5 6 7 8 9 10 11 12 13 14 15 ###consul服务端口号80 8500 127.0 .0 .1
config/ApplicationConfig
1 2 3 4 5 6 7 8 9 10 11 12 13 14 15 package com.atguigu.springcloud.config;import org.springframework.cloud.client.loadbalancer.LoadBalanced;import org.springframework.context.annotation.Bean;import org.springframework.context.annotation.Configuration;import org.springframework.web.client.RestTemplate;@Configuration public class ApplicationConfig {@Bean @LoadBalanced public RestTemplate getRestTemplate () {return new RestTemplate ();
controller
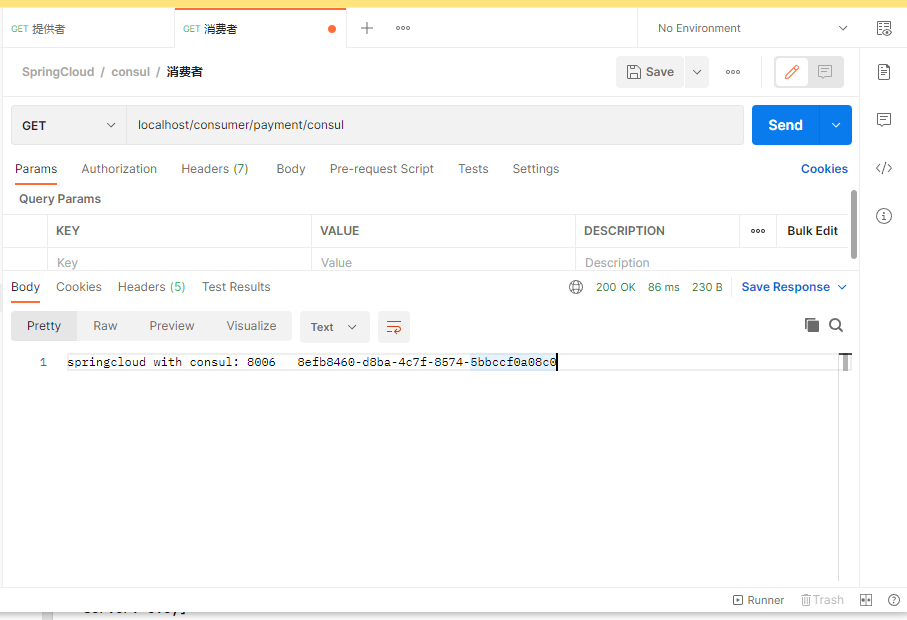
1 2 3 4 5 6 7 8 9 10 11 12 13 14 15 @RestController public class OrderConsulController {public static final String INVOKE_URL = "http://consul-provider-payment" ; @Autowired private RestTemplate restTemplate;@GetMapping(value = "/consumer/payment/consul") public String paymentInfo () String result = restTemplate.getForObject(INVOKE_URL+"/payment/consul" , String.class);"消费者调用支付服务(consule)--->result:" + result);return result;
代码测试
三个注册中心异同点
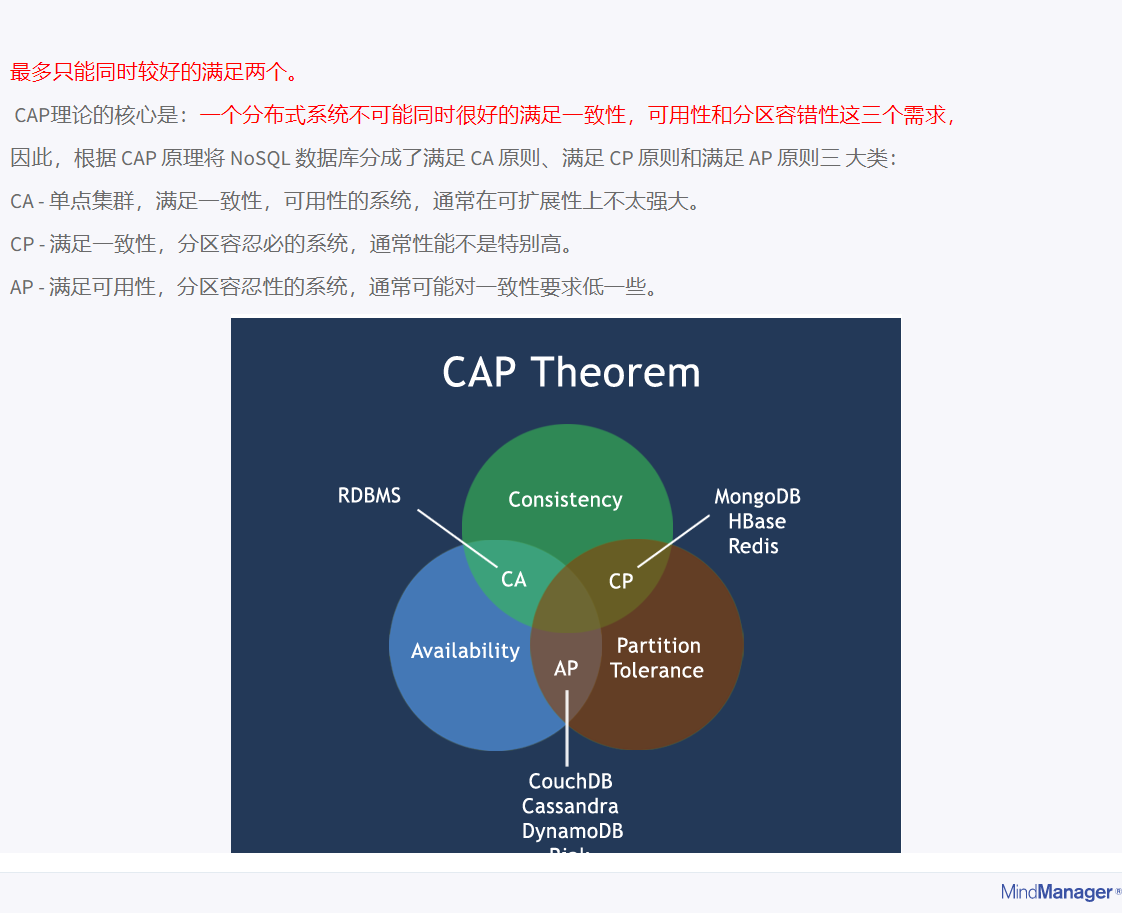
CAP
C: Consistency(强一致性)
A: Availablility (可用性)
P: Partition tolerance(分区容错性)
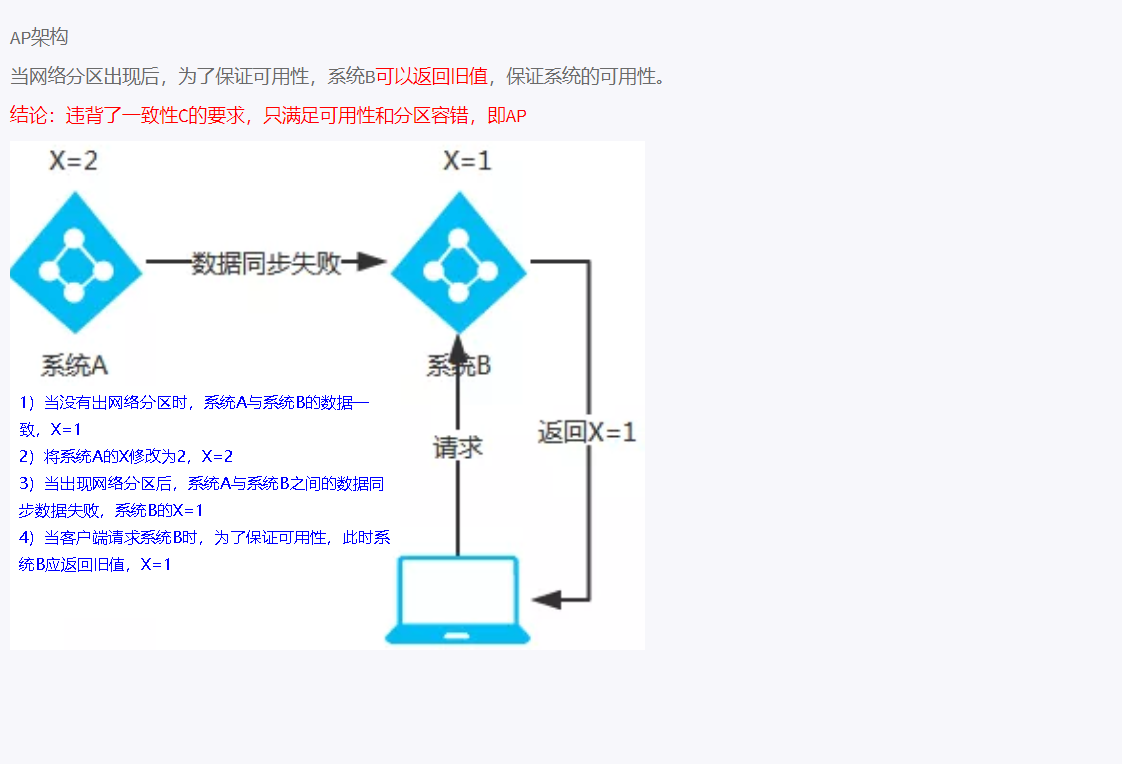
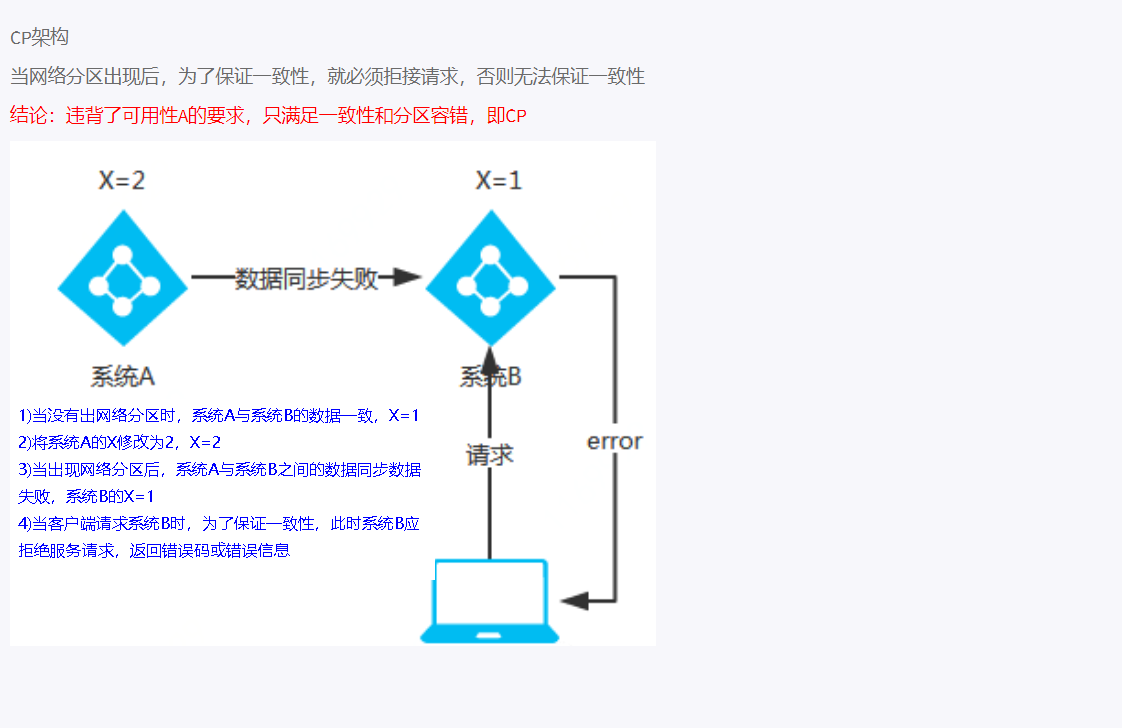
CAP理论关注粒度是数据, 而不是整体系统设计的策略
AP(Eureka)
CP(Zookeeper/Consul)
Ribbon负载均衡 1 2 3 4 <dependency>
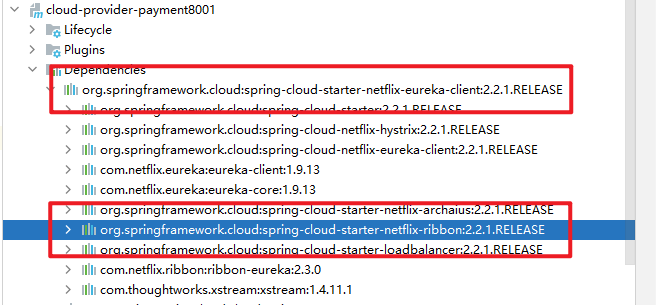
当引入了eureka的依赖之后会自动的添加上ribbon的依赖, 所以自己手动加不加依赖都可以
1 2 3 4 <dependency>
getForObject返回对象为响应体中数据转化成的对象,基本上可以理解为Json
getForEntity返回对象为ResponseEntity对象,包含了响应中的一些重要信息,比如响应头、响应状态码、响应体等
配置ribbon, 其实就是跟之前一样, 只用添加好@LoadBalanced注解, Controller就可以直接调用
1 2 3 4 5 6 7 8 @Configuration public class ApplicationContextConfig {@Bean @LoadBalanced public RestTemplate getRestTemplate () {return new RestTemplate ();
1 2 3 4 5 6 7 8 9 10 11 12 13 14 15 16 17 18 19 20 21 22 23 24 25 26 27 28 29 30 31 @RestController @Slf4j public class OrderController {public static final String PAYMENT_URL = "http://CLOUD-PAYMENT-SERVICE" ;@Resource private RestTemplate restTemplate;@GetMapping("/consumer/payment/create") public CommonResult<Payment> create (Payment payment) {return restTemplate.postForObject(PAYMENT_URL+"/payment/create" ,payment, CommonResult.class);@GetMapping("/consumer/get/{id}") public CommonResult getPayment (@PathVariable("id") Long id) {return restTemplate.getForObject(PAYMENT_URL+"/payment/get/" +id, CommonResult.class);@GetMapping("/consumer/payment/getForEntity/{id}") public CommonResult<Payment> getPayment2 (@PathVariable("id") Long id) {"/payment/get/" + id, CommonResult.class);if (entity.getStatusCode().is2xxSuccessful()) {"Headers: {}, status: {}" , entity.getHeaders(), entity.getStatusCode());return entity.getBody();else {return new CommonResult <>(444 , "操作失败" );
一些特定的算法
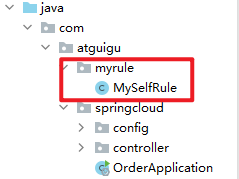
配置随机的规则 新建package, 注意不要建在Application的当前包及其子包下了
编写如下配置
1 2 3 4 5 6 7 @Configuration public class MySelfRule {@Bean public IRule myRule () {return new RandomRule ();
启动类中添加注解@RibbonClient
1 2 3 4 5 6 7 8 @SpringBootApplication @EnableEurekaClient @RibbonClient(name="CLOUD-PAYMENT-SERVICE", configuration = MySelfRule.class) public class OrderApplication {public static void main (String[] args) {
配置完成之后规则就变成了随机的了
负载均衡算法原理 负载均衡算法:rest接口第几次请求数 % 服务器集群总数量 = 实际调用服务器位置下标 ,每次服务重启动后rest接口计数从1开始。
List instances = discoveryClient.getInstances(“CLOUD-PAYMENT-SERVICE”);
如: List [0] instances = 127.0.0.1:8002
List [1] instances = 127.0.0.1:8001
8001+ 8002 组合成为集群,它们共计2台机器,集群总数为2, 按照轮询算法原理:
当总请求数为1时: 1 % 2 =1 对应下标位置为1 ,则获得服务地址为127.0.0.1:8001
当总请求数位2时: 2 % 2 =0 对应下标位置为0 ,则获得服务地址为127.0.0.1:8002
当总请求数位3时: 3 % 2 =1 对应下标位置为1 ,则获得服务地址为127.0.0.1:8001
当总请求数位4时: 4 % 2 =0 对应下标位置为0 ,则获得服务地址为127.0.0.1:8002
如此类推……
使用OpenFeign pom.xml
1 2 3 4 5 6 7 8 9 10 11 12 13 14 15 16 17 18 19 20 21 22 23 24 25 26 27 28 29 30 31 32 33 34 35 36 37 38 39 40 41 42 43 44 <dependencies>true </optional>true </optional>
1 2 3 4 5 6 7 8 server:80 false
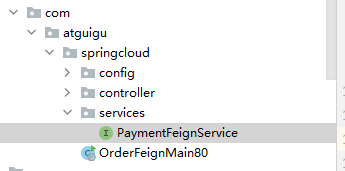
编写一个接口
1 2 3 4 5 6 7 8 @Component @FeignClient("CLOUD-PAYMENT-SERVICE") public interface PaymentFeignService {@GetMapping("/payment/get/{id}") getPayment (@PathVariable("id") Long id) ;
编写Controller
1 2 3 4 5 6 7 8 9 10 @RestController public class OrderFeignController {@Resource private PaymentFeignService paymentFeignService;@GetMapping(value = "/consumer/payment/get/{id}") public CommonResult<Payment> getPaymentById (@PathVariable("id") Long id) {return paymentFeignService.getPayment(id);
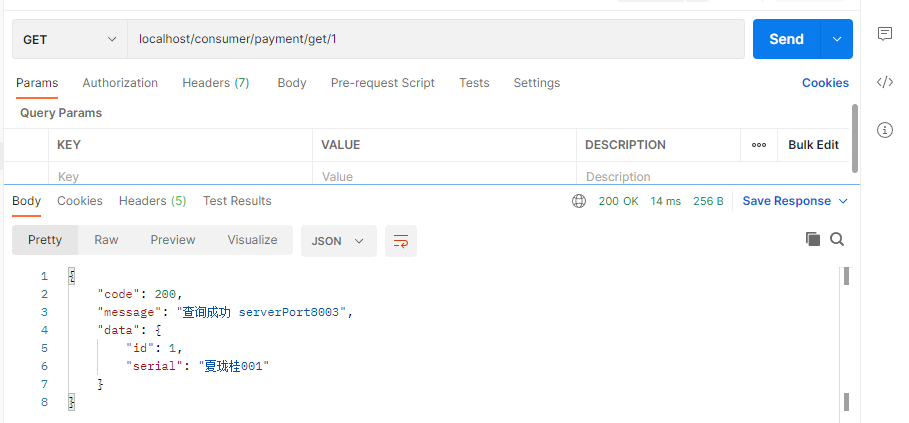
代码测试
修改超时时间 编写提供者的超时方法
1 2 3 4 5 6 7 8 9 10 @GetMapping("/payment/feign/timeout") public String paymentFeignTimeout () {"serverPort: {}" , serverPort);try {3000 );catch (InterruptedException e) {return serverPort;
消费者添加超时方法
1 2 3 4 5 6 7 8 9 10 @Component @FeignClient("CLOUD-PAYMENT-SERVICE") public interface PaymentFeignService {@GetMapping("/payment/get/{id}") getPayment (@PathVariable("id") Long id) ;@GetMapping("/payment/feign/timeout") paymentFeignTimeout () ;
1 2 3 4 @GetMapping("/consumer/payment/feign/timeout") public String paymentFeignTimeout () {return paymentFeignService.paymentFeignTimeout();
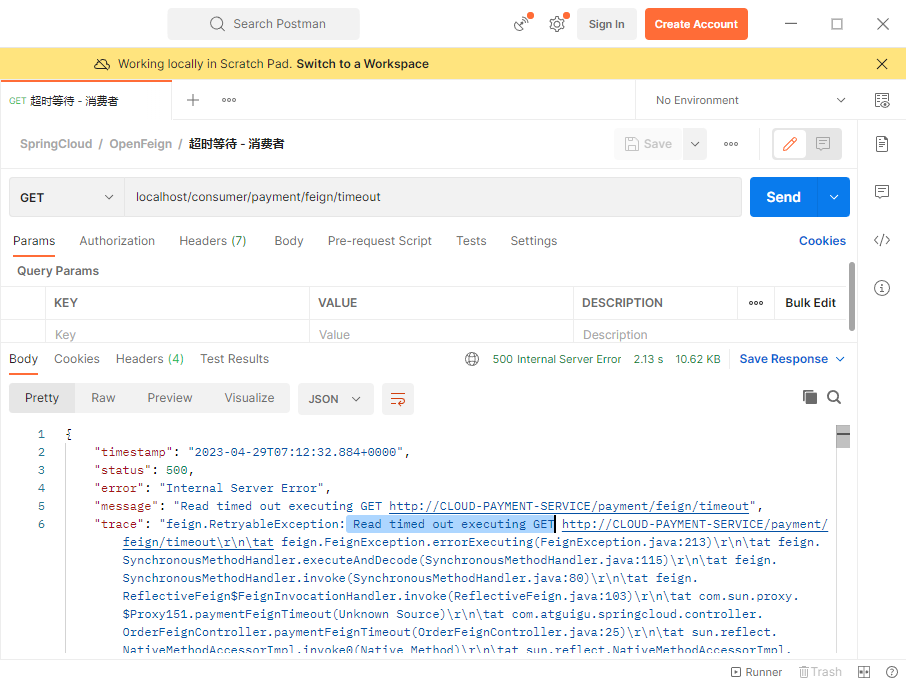
这样测试会造成OpenFeign的超时, 默认超时时长是1秒
在application.yml中配置
1 2 3 4 5 6 7 8 9 10 11 12 13 14 15 server:80 false 5000 5000
这样就可以增大超时的时长了
OpenFeign开启日志 添加config[配置
1 2 3 4 5 6 7 8 9 10 11 12 13 14 15 package com.atguigu.springcloud.config;import feign.Logger;import org.springframework.context.annotation.Bean;import org.springframework.context.annotation.Configuration;@Configuration public class FeignConfig @Bean feignLoggerLevel () return Logger.Level.FULL;
然后再application.yml中进行配置
注意这个路径应该是OpenFeign的接口的路径
com.atguigu.springcloud.services.PaymentFeignService: debug
1 2 3 4 logging:
搭建Hystrix模块 pom
1 2 3 4 5 6 7 8 9 10 11 12 13 14 15 16 17 18 19 20 21 22 23 24 25 26 27 28 29 30 31 32 33 34 35 36 37 38 39 40 41 42 <dependencies>true </optional>true </optional>
yml
1 2 3 4 5 6 7 8 9 10 11 12 13 14 server:8001 true true
service
1 2 3 4 5 6 7 8 9 10 11 12 13 14 15 16 17 18 19 20 21 22 23 24 25 26 27 28 29 package com.atguigu.springcloud.service;import org.springframework.stereotype.Service;import java.util.concurrent.TimeUnit;@Service public class PaymentService {public String paymentInfo_OK (Integer id) return "线程池:" +Thread.currentThread().getName()+"paymentInfo_OK,id: " +id+"\t" +"O(∩_∩)O" ;public String paymentInfo_TimeOut (Integer id) try { TimeUnit.SECONDS.sleep(3 ); } catch (InterruptedException e) { e.printStackTrace(); }return "线程池:" +Thread.currentThread().getName()+"paymentInfo_TimeOut,id: " +id+"\t" +"O(∩_∩)O,耗费3秒" ;
Controller
1 2 3 4 5 6 7 8 9 10 11 12 13 14 15 16 17 18 19 20 21 22 23 24 25 26 27 28 29 30 31 32 33 34 package com.atguigu.springcloud.controller;import com.atguigu.springcloud.service.PaymentService;import lombok.extern.slf4j.Slf4j;import org.springframework.beans.factory.annotation.Autowired;import org.springframework.beans.factory.annotation.Value;import org.springframework.web.bind.annotation.GetMapping;import org.springframework.web.bind.annotation.PathVariable;import org.springframework.web.bind.annotation.RestController;@Slf4j @RestController public class PaymentController {@Autowired private PaymentService paymentService;@Value("${server.port}") public String serverPort;@GetMapping("/payment/hystrix/ok/{id}") public String paymentInfo_OK (@PathVariable("id") Integer id) {String result = paymentService.paymentInfo_OK(id);"result: {}" , result);return result;@GetMapping("/payment/hystrix/timeout/{id}") public String paymentInfo_TimeOut (@PathVariable("id") Integer id) throws InterruptedExceptionString result = paymentService.paymentInfo_TimeOut(id);"result: {}" , result);return result;
main
1 2 3 4 5 6 7 8 9 10 11 12 13 package com.atguigu.springcloud;import org.springframework.boot.SpringApplication;import org.springframework.boot.autoconfigure.SpringBootApplication;import org.springframework.cloud.netflix.eureka.EnableEurekaClient;@SpringBootApplication @EnableEurekaClient public class PaymentHystrixMain8001 {public static void main (String[] args) {
配置Hystrix的服务降级 service中使用@HystrixCommand, fallbackMethod 指定失败之后的调用的方法
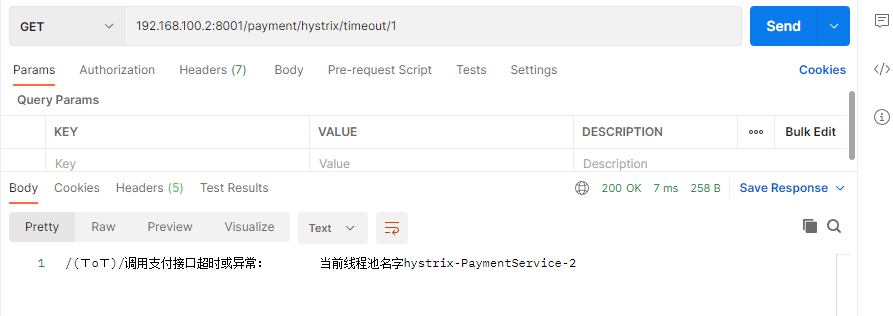
1 2 3 4 5 6 7 8 9 10 11 12 13 14 15 16 17 18 19 20 21 22 23 24 25 26 27 28 29 30 31 32 33 34 35 36 37 @Service public class PaymentService {public String paymentInfo_OK (Integer id) {return "线程池:" + Thread.currentThread().getName() + "paymentInfo_OK,id: " + id + "\t" + "O(∩_∩)O" ;@HystrixCommand(fallbackMethod = "paymentInfo_TimeOutHandler", commandProperties = { @HystrixProperty(name = "execution.isolation.thread.timeoutInMilliseconds", value = "3000") }) public String paymentInfo_TimeOut (Integer id) {int a = 1 /0 ;return "线程池:" + Thread.currentThread().getName() + "paymentInfo_TimeOut,id: " + id + "\t" + "O(∩_∩)O,耗费3秒" ;public String paymentInfo_TimeOutHandler (Integer id) {return "/(ㄒoㄒ)/调用支付接口超时或异常:\t" + "\t当前线程池名字" + Thread.currentThread().getName();
入口标记@EnableCircuitBreaker注解
1 2 3 4 5 6 7 8 @SpringBootApplication @EnableEurekaClient @EnableCircuitBreaker public class PaymentHystrixMain8001 {public static void main (String[] args) {
当调用的业务出现异常, 超时等就会调用兜底的方法paymentInfo_TimeOutHandler
配置Hystrix消费者服务降级 pom
1 2 3 4 5 6 7 8 9 10 11 12 13 14 15 16 17 18 19 20 21 22 23 24 25 26 27 28 29 30 31 32 33 34 35 36 37 38 39 40 41 42 43 44 45 46 47 48 49 <dependencies>true </optional>true </optional>
yml
1 2 3 4 5 6 7 8 9 10 11 12 server: port: 80 eureka: client: register-with-eureka: false service-url: defaultZone: http://eureka7001.com:7001/eureka/ feign: hystrix: enabled: true
Controller
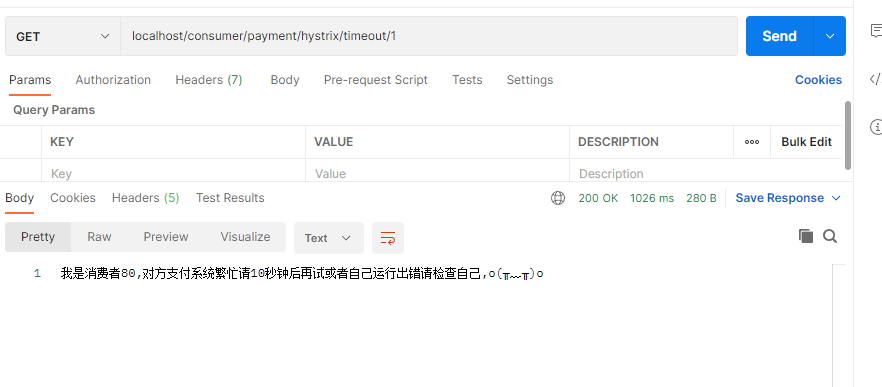
1 2 3 4 5 6 7 8 9 10 11 12 @GetMapping("/consumer/payment/hystrix/timeout/{id}") @HystrixCommand(fallbackMethod = "paymentTimeOutFallbackMethod",commandProperties = { @HystrixProperty(name="execution.isolation.thread.timeoutInMilliseconds",value="1500") }) public String paymentInfo_TimeOut (@PathVariable("id") Integer id) return paymentHystrixService.paymentInfo_TimeOut(id);public String paymentTimeOutFallbackMethod (@PathVariable("id") Integer id) return "我是消费者80,对方支付系统繁忙请10秒钟后再试或者自己运行出错请检查自己,o(╥﹏╥)o" ;
service
1 2 3 4 5 6 7 8 9 10 @Component @FeignClient(value = "CLOUD-PROVIDER-HYSTRIX-PAYMENT") public interface PaymentHystrixService @GetMapping("/payment/hystrix/ok/{id}") paymentInfo_OK (@PathVariable("id") Integer id) ;@GetMapping("/payment/hystrix/timeout/{id}") paymentInfo_TimeOut (@PathVariable("id") Integer id) ;
入口函数,记得 需要标记这个@EnableHystrix这个注解
1 2 3 4 5 6 7 8 @SpringBootApplication @EnableFeignClients @EnableHystrix public class OrderHystrixMain80 {public static void main (String[] args) {
代码测试
配置全局服务降级
Controller上面添加@DefaultProperties(defaultFallback = "payment_Global_FallbackMethod")
将
// @HystrixCommand(fallbackMethod = “paymentTimeOutFallbackMethod”,commandProperties = {
修改成@HystrixCommand
编写全局处理方法
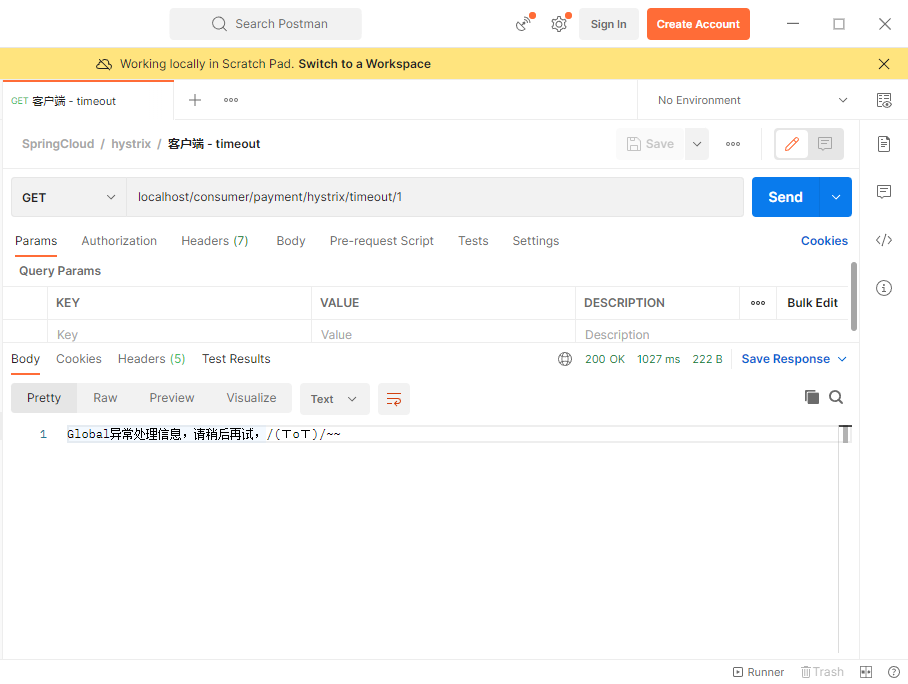
1 2 3 public String payment_Global_FallbackMethod () {return "Global异常处理信息,请稍后再试,/(ㄒoㄒ)/~~" ;
完整代码:
1 2 3 4 5 6 7 8 9 10 11 12 13 14 15 16 17 18 19 20 21 22 23 24 25 26 27 28 29 30 31 32 33 @RestController @Slf4j @DefaultProperties(defaultFallback = "payment_Global_FallbackMethod") public class OrderHystirxController @Resource private PaymentHystrixService paymentHystrixService;@GetMapping("/consumer/payment/hystrix/ok/{id}") public String paymentInfo_OK (@PathVariable("id") Integer id) String result = paymentHystrixService.paymentInfo_OK(id);return result;@GetMapping("/consumer/payment/hystrix/timeout/{id}") @HystrixCommand public String paymentInfo_TimeOut (@PathVariable("id") Integer id) return paymentHystrixService.paymentInfo_TimeOut(id);public String paymentTimeOutFallbackMethod (@PathVariable("id") Integer id) return "我是消费者80,对方支付系统繁忙请10秒钟后再试或者自己运行出错请检查自己,o(╥﹏╥)o" ;public String payment_Global_FallbackMethod () {return "Global异常处理信息,请稍后再试,/(ㄒoㄒ)/~~" ;
代码测试:
将业务分开 yml配置
1 2 3 4 5 6 7 8 9 10 11 12 server:80 false true
让PaymentFallbackService 实现PaymentHystrixService 接口
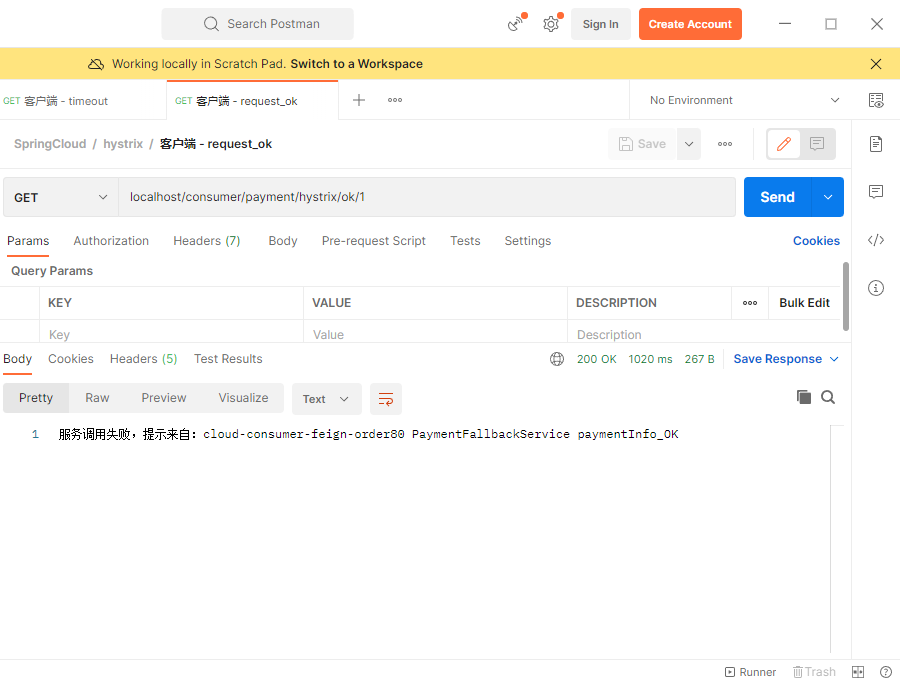
1 2 3 4 5 6 7 8 9 10 11 12 13 14 15 16 package com.atguigu.springcloud.service;import org.springframework.stereotype.Component;@Component public class PaymentFallbackService implements PaymentHystrixService {@Override public String paymentInfo_OK (Integer id) {return "服务调用失败,提示来自:cloud-consumer-feign-order80 PaymentFallbackService paymentInfo_OK" ;@Override public String paymentInfo_TimeOut (Integer id) {return "服务调用失败,提示来自:cloud-consumer-feign-order80 PaymentFallbackService paymentInfo_TimeOut" ;
在PaymentHystrixService接口上标记注解FeignClient注解, 并且需要指定fallback 是哪一个类
1 2 3 4 5 6 7 8 9 10 11 @Component @FeignClient(value = "CLOUD-PROVIDER-HYSTRIX-PAYMENT", fallback = PaymentFallbackService.class) public interface PaymentHystrixService @GetMapping("/payment/hystrix/ok/{id}") paymentInfo_OK (@PathVariable("id") Integer id) ;@GetMapping("/payment/hystrix/timeout/{id}") paymentInfo_TimeOut (@PathVariable("id") Integer id) ;
代码测试
服务熔断 service
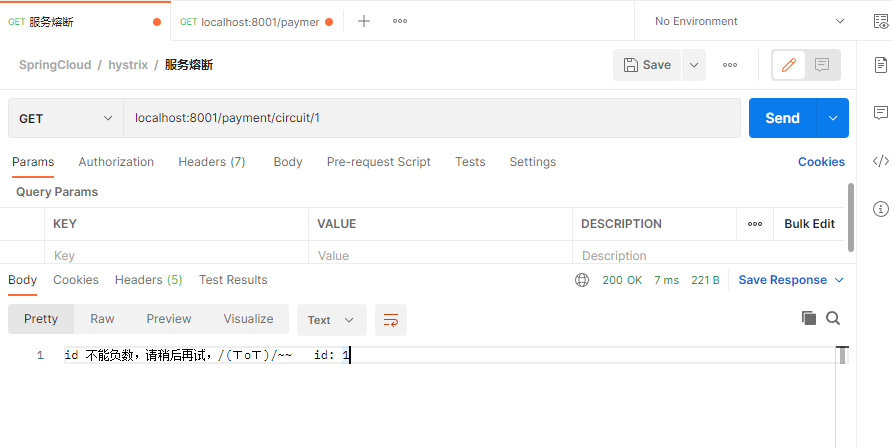
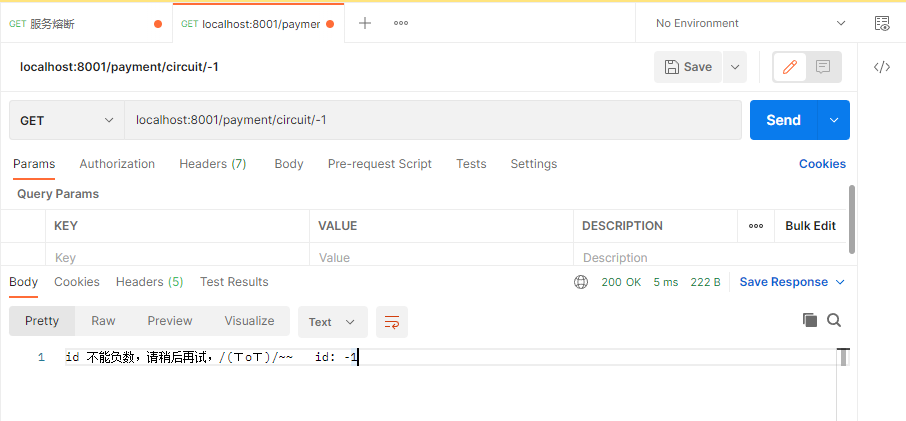
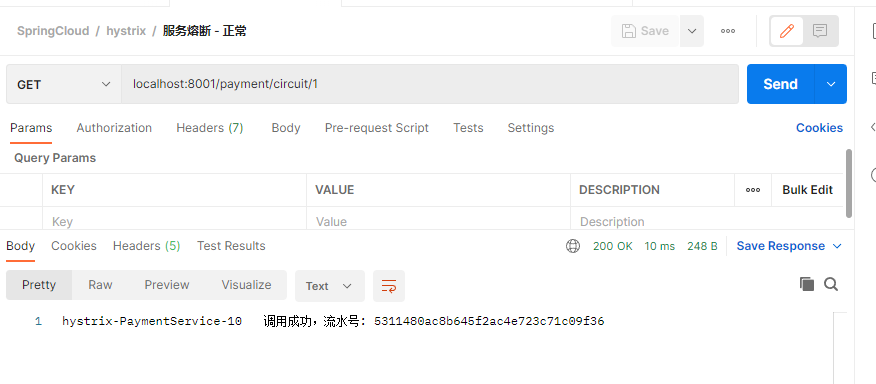
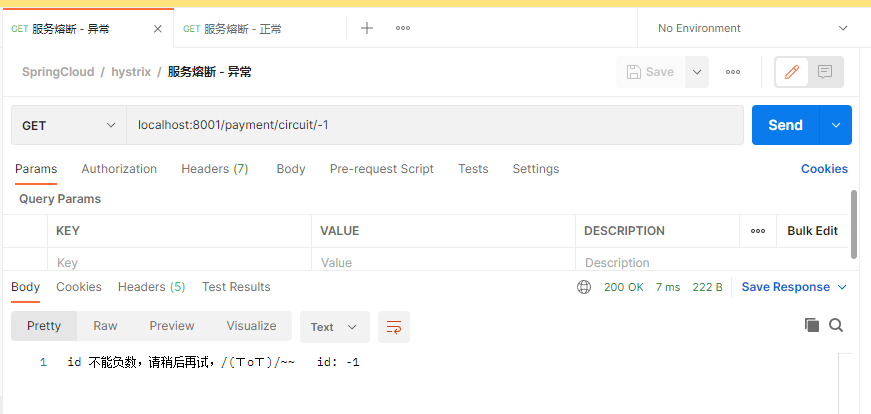
这个注解的意思是: 在10秒内, 发送了10个请求, 出现60%的错误, 就开启断路器
1 2 3 4 5 6 7 8 9 10 11 12 13 14 15 16 17 18 19 20 21 @HystrixCommand(fallbackMethod = "paymentCircuitBreaker_fallback",commandProperties = { @HystrixProperty(name = "circuitBreaker.enabled",value = "true"), @HystrixProperty(name = "circuitBreaker.requestVolumeThreshold",value = "10"), @HystrixProperty(name = "circuitBreaker.sleepWindowInMilliseconds",value = "10000"), @HystrixProperty(name = "circuitBreaker.errorThresholdPercentage",value = "60"), }) public String paymentCircuitBreaker (@PathVariable("id") Integer id) if (id < 0 )throw new RuntimeException ("******id 不能负数" );String serialNumber = IdUtil.simpleUUID();return Thread.currentThread().getName()+"\t" +"调用成功,流水号: " + serialNumber;public String paymentCircuitBreaker_fallback (@PathVariable("id") Integer id) return "id 不能负数,请稍后再试,/(ㄒoㄒ)/~~ id: " +id;
controller
1 2 3 4 5 6 7 @GetMapping("/payment/circuit/{id}") public String paymentCircuitBreaker (@PathVariable("id") Integer id) String result = paymentService.paymentCircuitBreaker(id);"****result: " +result);return result;
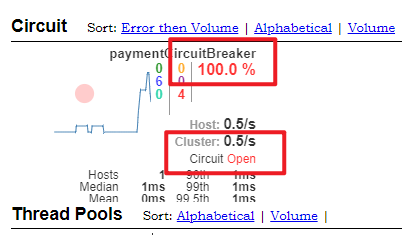
代码测试
总结:
Hystrix图形化Dashboard搭建 pom
1 2 3 4 5 6 7 8 9 10 11 12 13 14 15 16 17 18 19 20 21 22 23 24 25 26 27 <dependencies>true </optional>true </optional>
yml
入口函数,记得添加@EnableHystrixDashboard
1 2 3 4 5 6 7 8 9 10 11 12 13 package com.atguigu.springcloud;import org.springframework.boot.SpringApplication;import org.springframework.boot.autoconfigure.SpringBootApplication;import org.springframework.cloud.netflix.hystrix.dashboard.EnableHystrixDashboard;@SpringBootApplication @EnableHystrixDashboard public class HystrixDashboardMain9001 {public static void main (String[] args) {
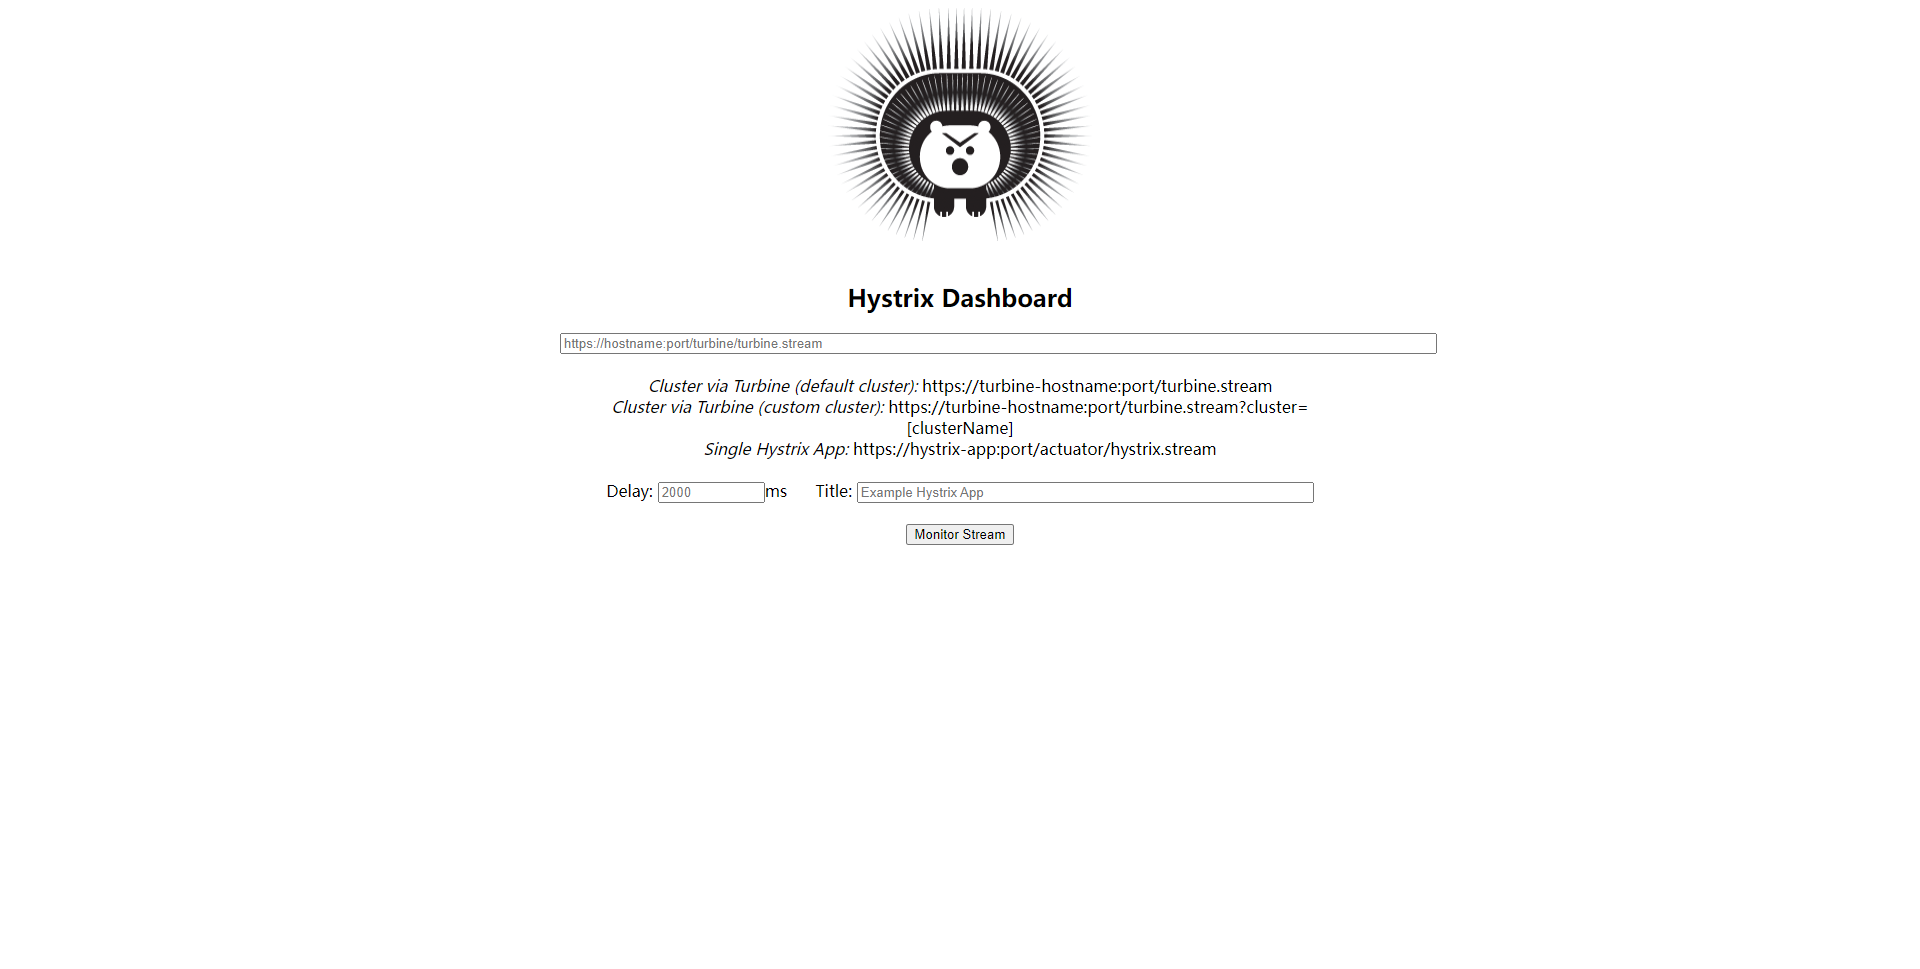
配置完成之后访问http://localhost:9001/hystrix
凡是要监控一定要添加actuator
1 2 3 4 <dependency>
9001监控8001
填写监控地址http://localhost:8001/hystrix.stream
1:Delay:该参数用来控制服务器上轮询监控信息的延迟时间,默认为2000毫秒,可以通过配置该属性来降低客户端的网络和CPU消耗。
2:Title:该参数对应了头部标题Hystrix Stream之后的内容,默认会使用具体监控实例的URL,可以通过配置该信息来展示更合适的标题。
Open表示断路器开启了
实心圆:共有两种含义。它通过颜色的变化代表了实例的健康程度,它的健康度从绿色<黄色<橙色<红色递减。
该实心圆除了颜色的变化之外,它的大小也会根据实例的请求流量发生变化,流量越大该实心圆就越大。所以通过该实心圆的展示,就可以在大量的实例中快速的发现故障实例和高压力实例。
Gateway的配置 pom
1 2 3 4 5 6 7 8 9 10 11 12 13 14 15 16 17 18 19 20 21 22 23 24 25 26 27 28 29 30 31 32 33 34 35 <dependencies>true </optional>true </optional>
yml
1 2 3 4 5 6 7 8 9 10 11 12 13 14 15 16 17 18 19 20 21 22 23 24 25 26 27 server: port: 9527 spring: application: name: cloud-gateway cloud: gateway: routes: - id: payment_routh#payment_route uri: http://localhost:8001#匹配后提供服务的路由地址 predicates: - Path=/payment/get/**#断言,路径相匹配的进行路由 - id: payment_routh2#payment_route uri: http://localhost:8001#匹配后提供服务的路由地址 predicates: - Path=/payment/lb/**#断言,路径相匹配的进行路由 eureka: instance: hostname: cloud-gateway-service client:#服务提供者provider注册进eureka服务列表内 service-url: register-with-eureka: true fetch-registry: true defaultZone: http://eureka7001.com:7001/eureka
入口函数
1 2 3 4 5 6 7 @SpringBootApplication @EnableEurekaClient public class GateWayMain9527 {public static void main (String[] args) {
另外第一个微服务的controller
1 2 3 4 @GetMapping("/payment/get/{id}") public CommonResult getPayment (@PathVariable("id") Long id) {}@GetMapping(value = "/payment/lb") public String getPaymentLB () {}
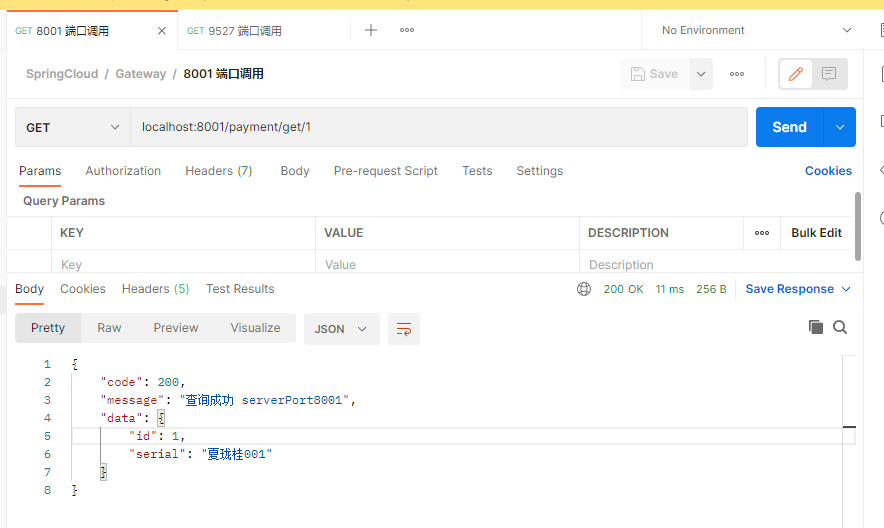
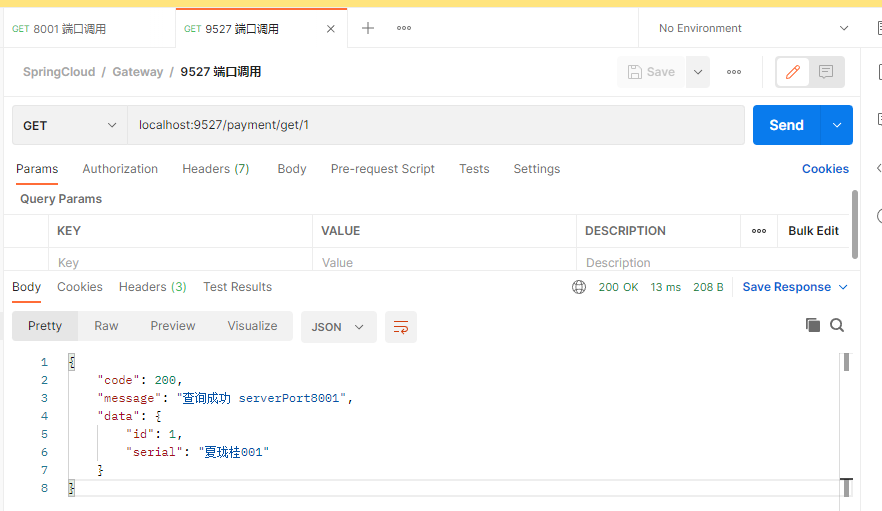
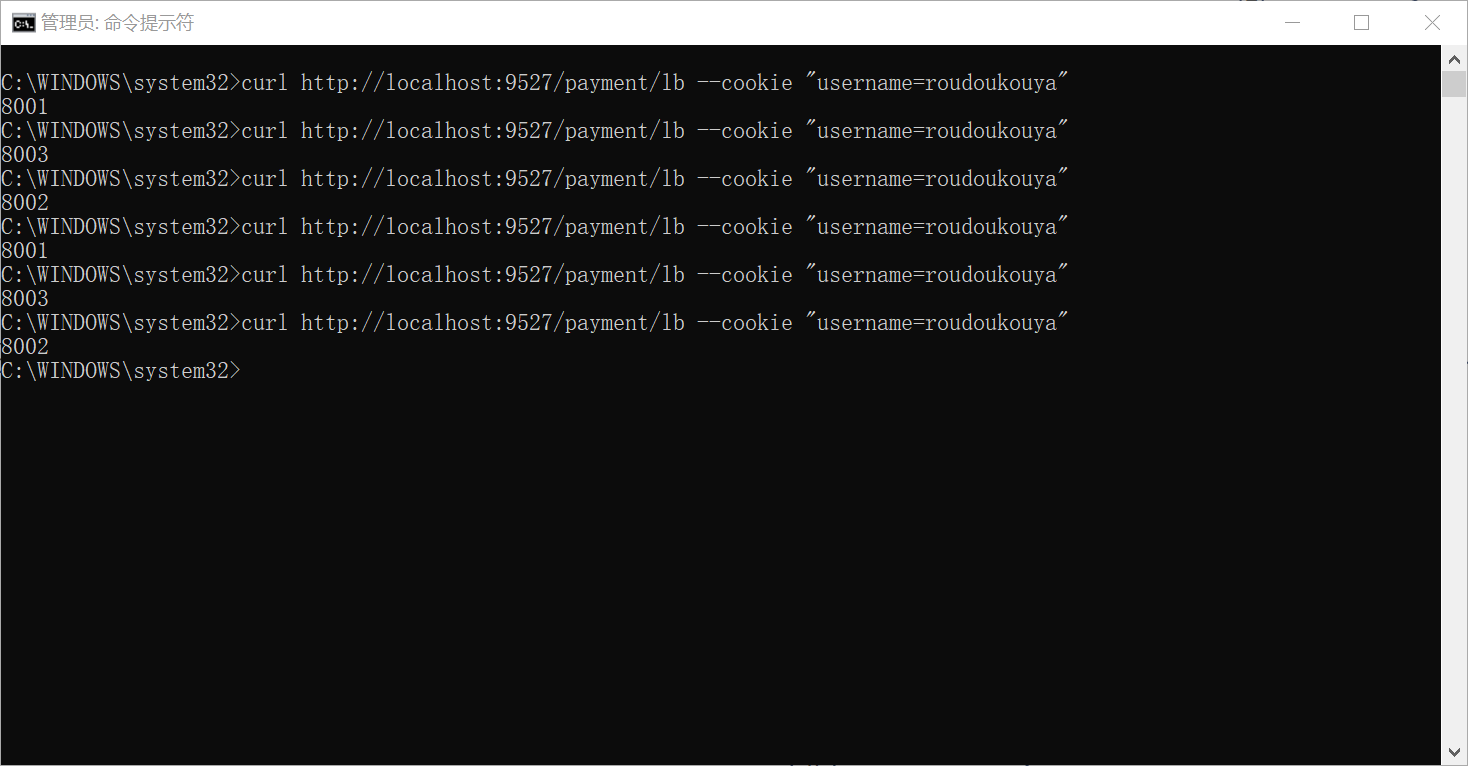
代码测试, 使用8001, 9527两个端口调用都可以
网关配置路由 9527端口的微服务配置config
1 2 3 4 5 6 7 8 9 10 @Configuration public class GateWayConfig {@Bean public RouteLocator customRouteLocator (RouteLocatorBuilder builder) {Builder routes = builder.routes();"path_router_atguigu" , r -> r.path("/video/BV18E411x7eT" ).uri("https://www.bilibili.com/video/BV18E411x7eT" ))"anime" , r->r.path("/anime" ).uri("https://www.bilibili.com/anime/" )).build();return routes.build();
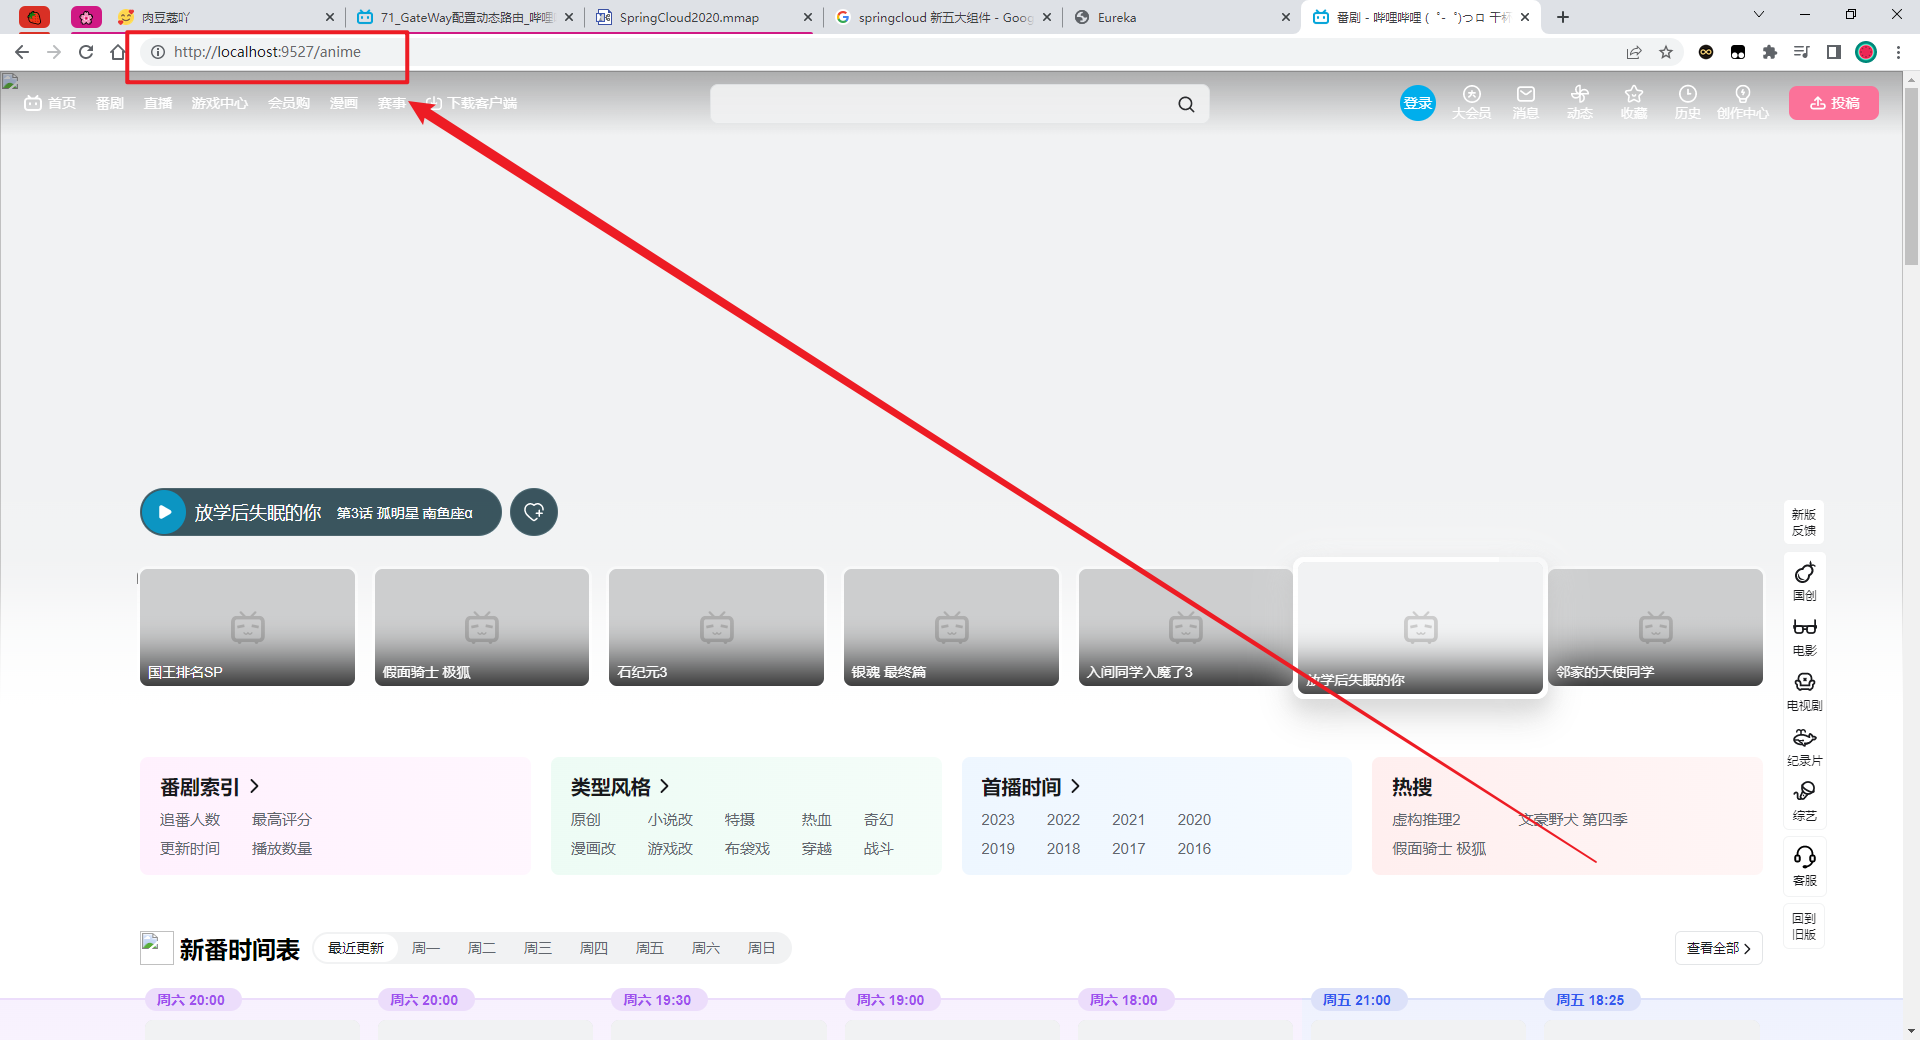
访问http://localhost:9527/anime 被转发到了B站番剧
虽然没有图片…
动态路由 修改9527服务的yml
开启动态路由
1 2 3 4 5 6 7 8 spring:true #开启从注册中心动态创建路由的功能,利用微服务名进行路由
把原先的uri注释掉, 改成lb://服务名
uri的协议为lb, 表示启用Gateway的负载均衡功能
lb://serviceName 是springcloud Gateway在微服务中自动为我们创建的负载均衡uri
完整代码如下:
1 2 3 4 5 6 7 8 9 10 11 12 13 14 15 16 17 18 19 20 21 22 23 24 25 26 27 28 29 30 31 32 server:9527 true #开启从注册中心动态创建路由的功能,利用微服务名进行路由
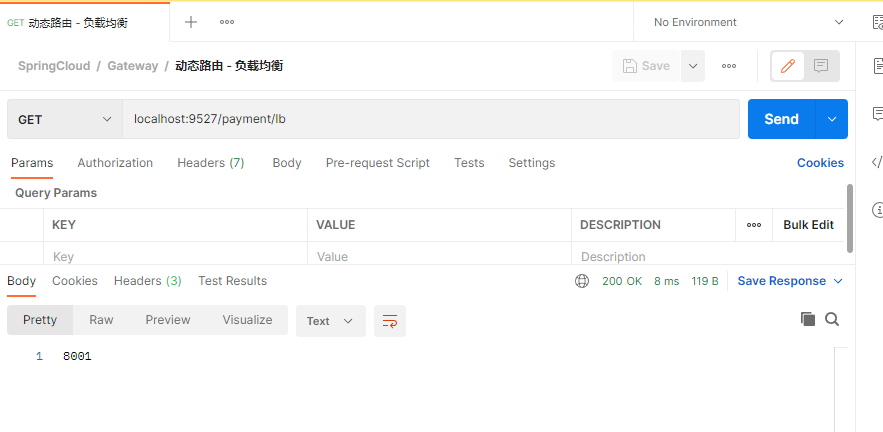
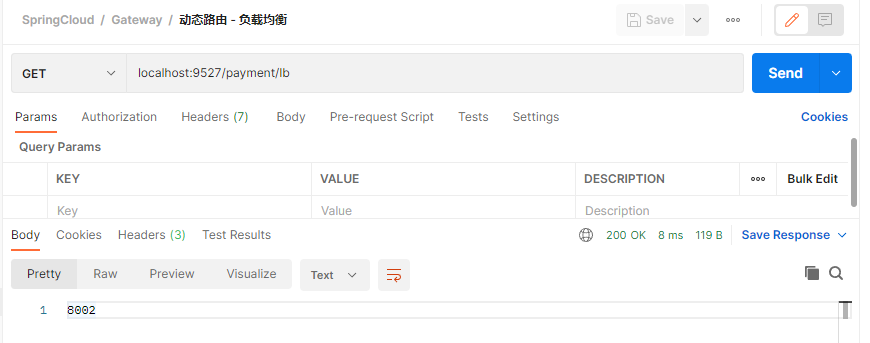
配置好之后, 测试9527就负载均衡了, 请求到了8001和8002
Gateway常用的Predicate 编写一个测试类获取当前时区的时间
1 2 3 4 5 6 7 public class ZonedDateTimeDemo {@Test public void testTime () {ZonedDateTime now = ZonedDateTime.now();
2023-04-30T11:01:33.030+08:00[Asia/Shanghai]
然后配置yml
predicates下的After, 表示在这个时间点之后才能运行
1 2 3 4 5 6 7 8 9 10 11 12 13 14 15 16 17 18 19 20 21 spring:true #开启从注册中心动态创建路由的功能,利用微服务名进行路由
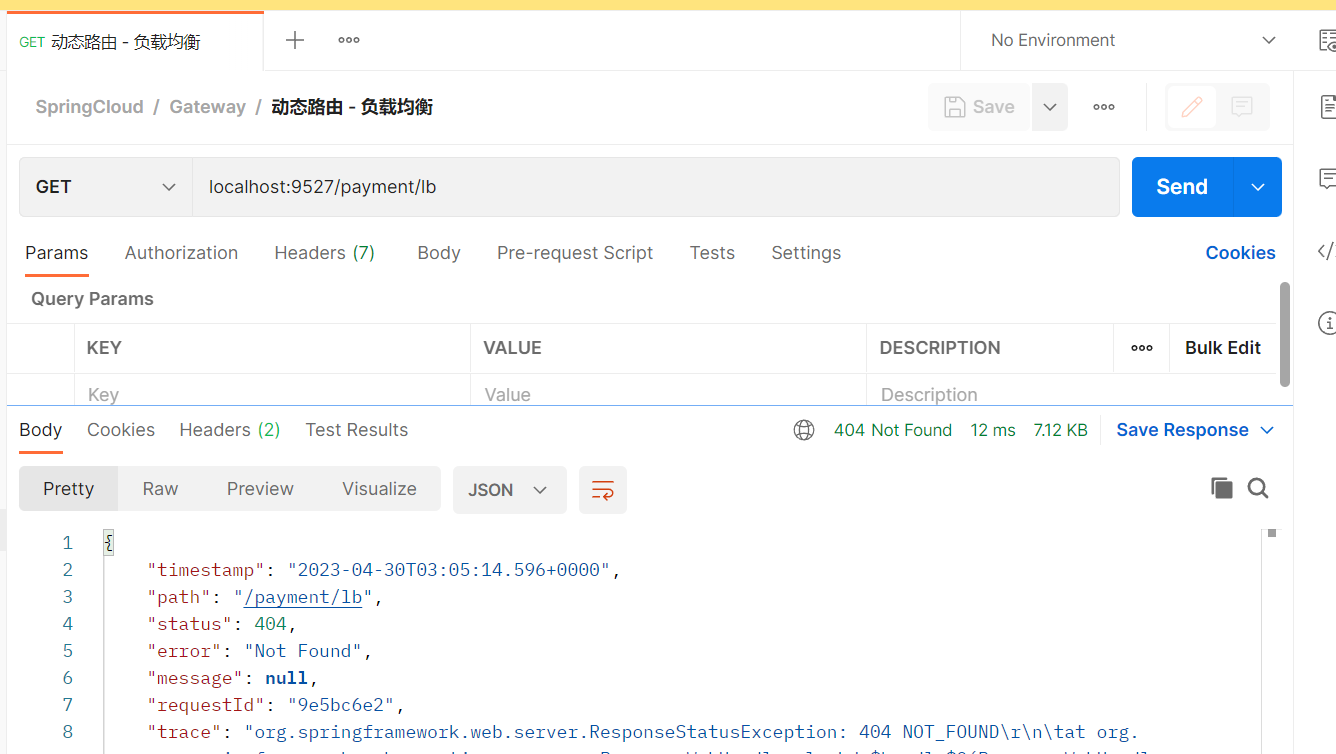
时间到了测试
时间还没到测试
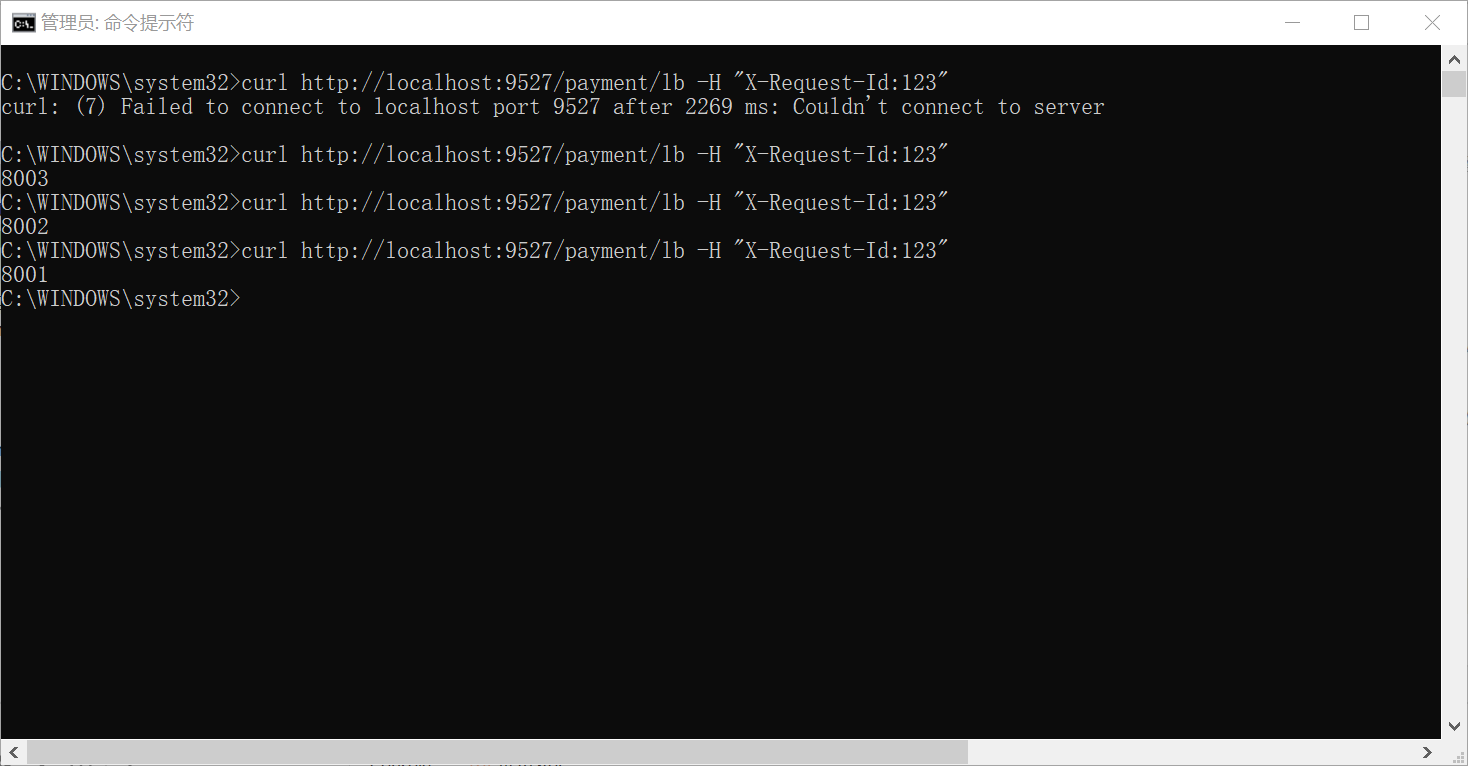
断言cookie
1 2 3 4 5 6 7 - id: payment_routh2 #payment_route #路由的ID,没有固定规则但要求唯一,建议配合服务名
断言请求头
1 2 3 4 5 6 7 8 - id: payment_routh2 #payment_route #路由的ID,没有固定规则但要求唯一,建议配合服务名
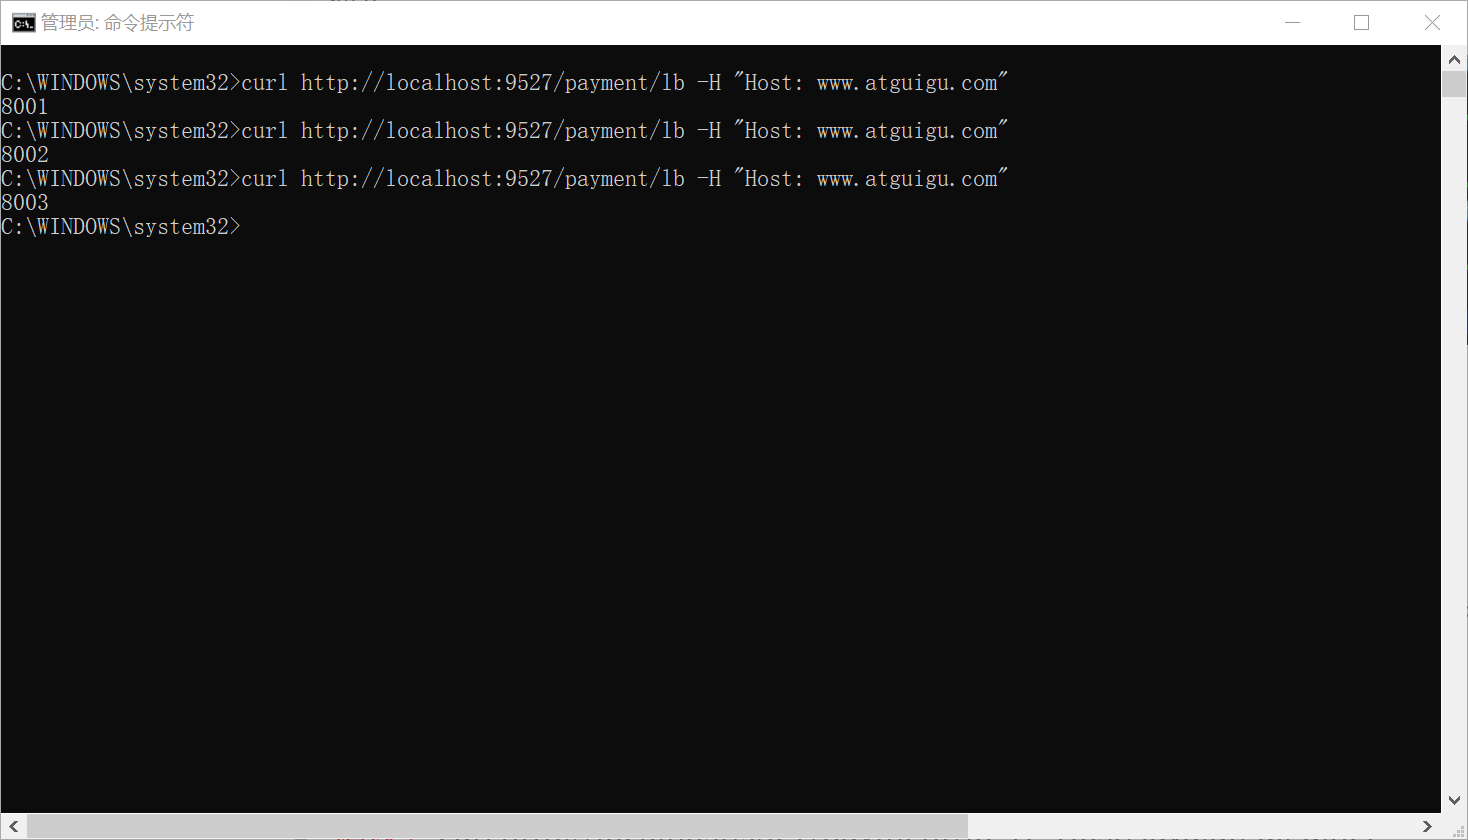
断言主机名Host
1 2 3 4 5 6 7 8 9 - id: payment_routh2 #payment_route #路由的ID,没有固定规则但要求唯一,建议配合服务名
断言方法类型
1 2 3 4 5 6 7 8 9 10 - id: payment_routh2 #payment_route #路由的ID,没有固定规则但要求唯一,建议配合服务名
断言参数
1 2 3 4 5 6 7 8 9 10 11 - id: payment_routh2 #payment_route #路由的ID,没有固定规则但要求唯一,建议配合服务名
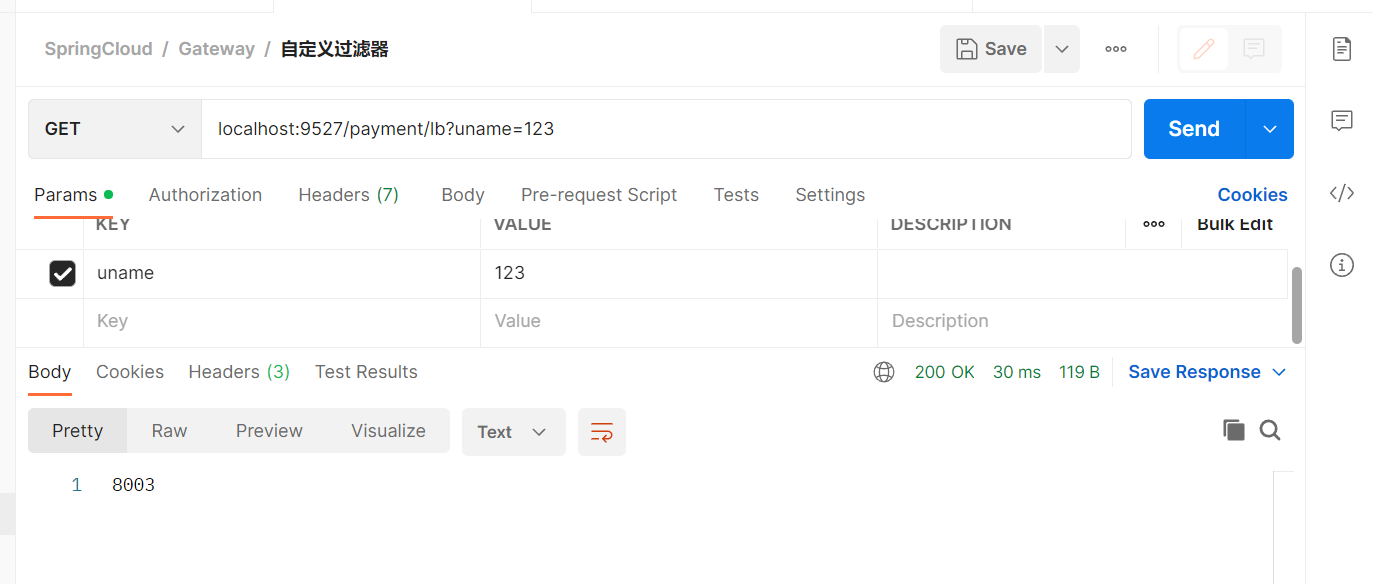
配置自定义过滤器 编写filter过滤器MyLogGateWayFilter
1 2 3 4 5 6 7 8 9 10 11 12 13 14 15 16 17 18 19 20 21 22 23 24 25 26 27 28 29 30 31 32 package com.atguigu.springcloud.filter;import lombok.extern.slf4j.Slf4j;import org.springframework.cloud.gateway.filter.GatewayFilterChain;import org.springframework.cloud.gateway.filter.GlobalFilter;import org.springframework.core.Ordered;import org.springframework.http.HttpStatus;import org.springframework.stereotype.Component;import org.springframework.web.server.ServerWebExchange;import reactor.core.publisher.Mono;@Component @Slf4j public class MyLogGateWayFilter implements GlobalFilter , Ordered {@Override public Mono<Void> filter (ServerWebExchange exchange, GatewayFilterChain chain) {"指定了自定义的全局过滤器 MyLogGateWayFilter" );String uname = exchange.getRequest().getQueryParams().getFirst("uname" );if (uname == null ) {"用户名为null , 无法登录" );return exchange.getResponse().setComplete();return chain.filter(exchange);@Override public int getOrder () {return 0 ;
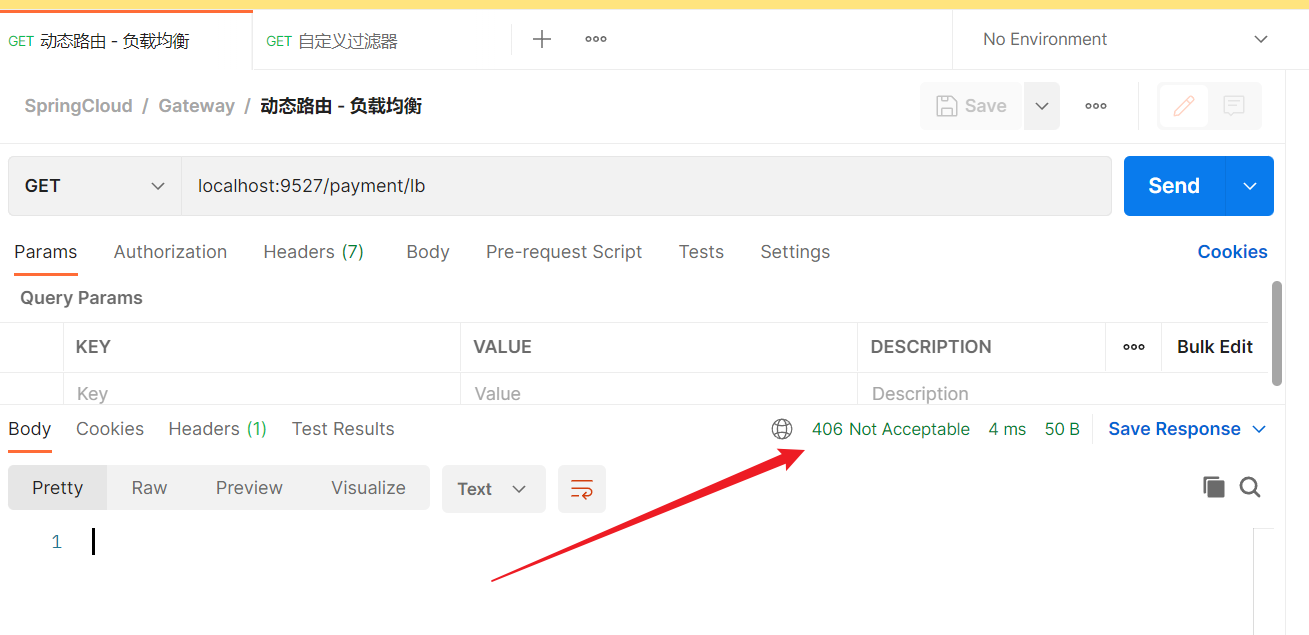
请求中就必须带上uname这个参数, 否则就会被406拒绝
配置中心Config 服务端 创建cloud-config-center-3344项目
引入pom
1 2 3 4 5 6 7 8 9 10 11 12 13 14 15 16 17 18 19 20 21 22 23 24 25 26 27 28 29 30 31 32 33 34 35 <dependencies>true </optional>true </optional>
需要提前创建一个gitee仓库, 为啥不用github, 因为我的代理垃圾呜呜呜
代理配置https://blog.csdn.net/qq_41731201/article/details/123527717
yml配置
1 2 3 4 5 6 7 8 9 10 11 12 13 14 15 16 17 18 19 20 21 22 23 server:3344
启动类
1 2 3 4 5 6 7 8 @SpringBootApplication @EnableConfigServer public class ConfigCenterMain3344 {public static void main (String[] args) {
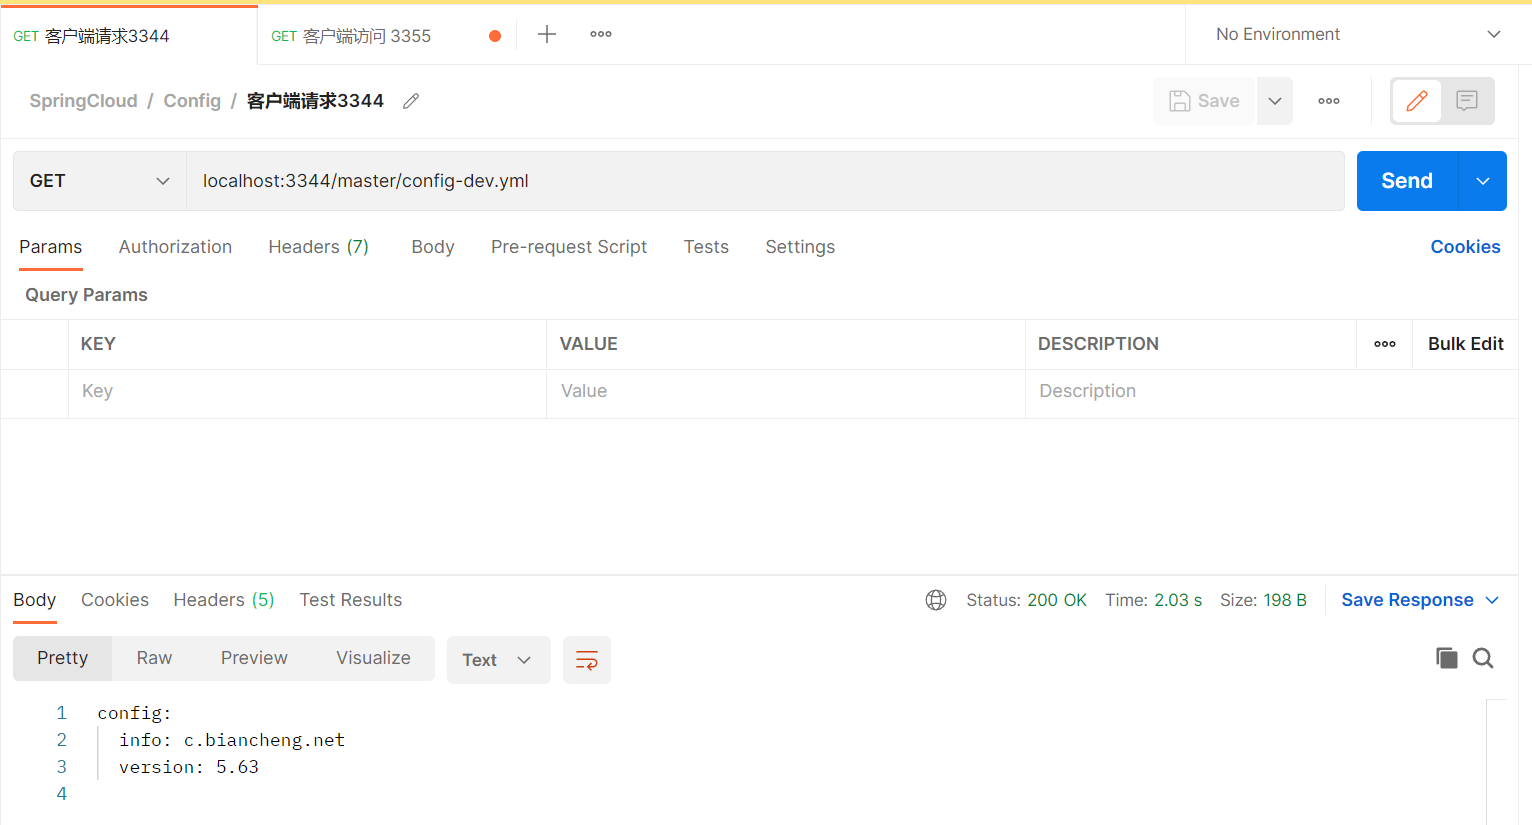
代码测试
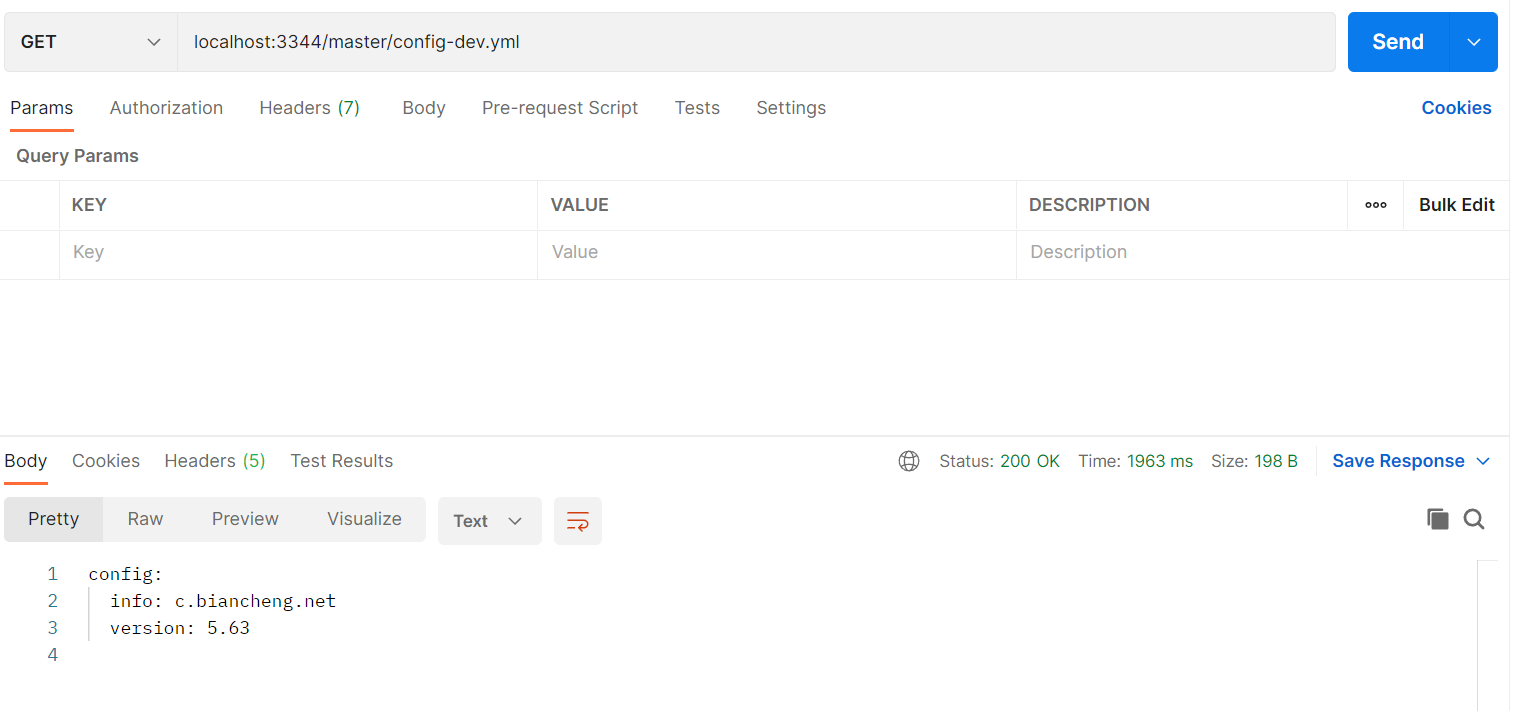
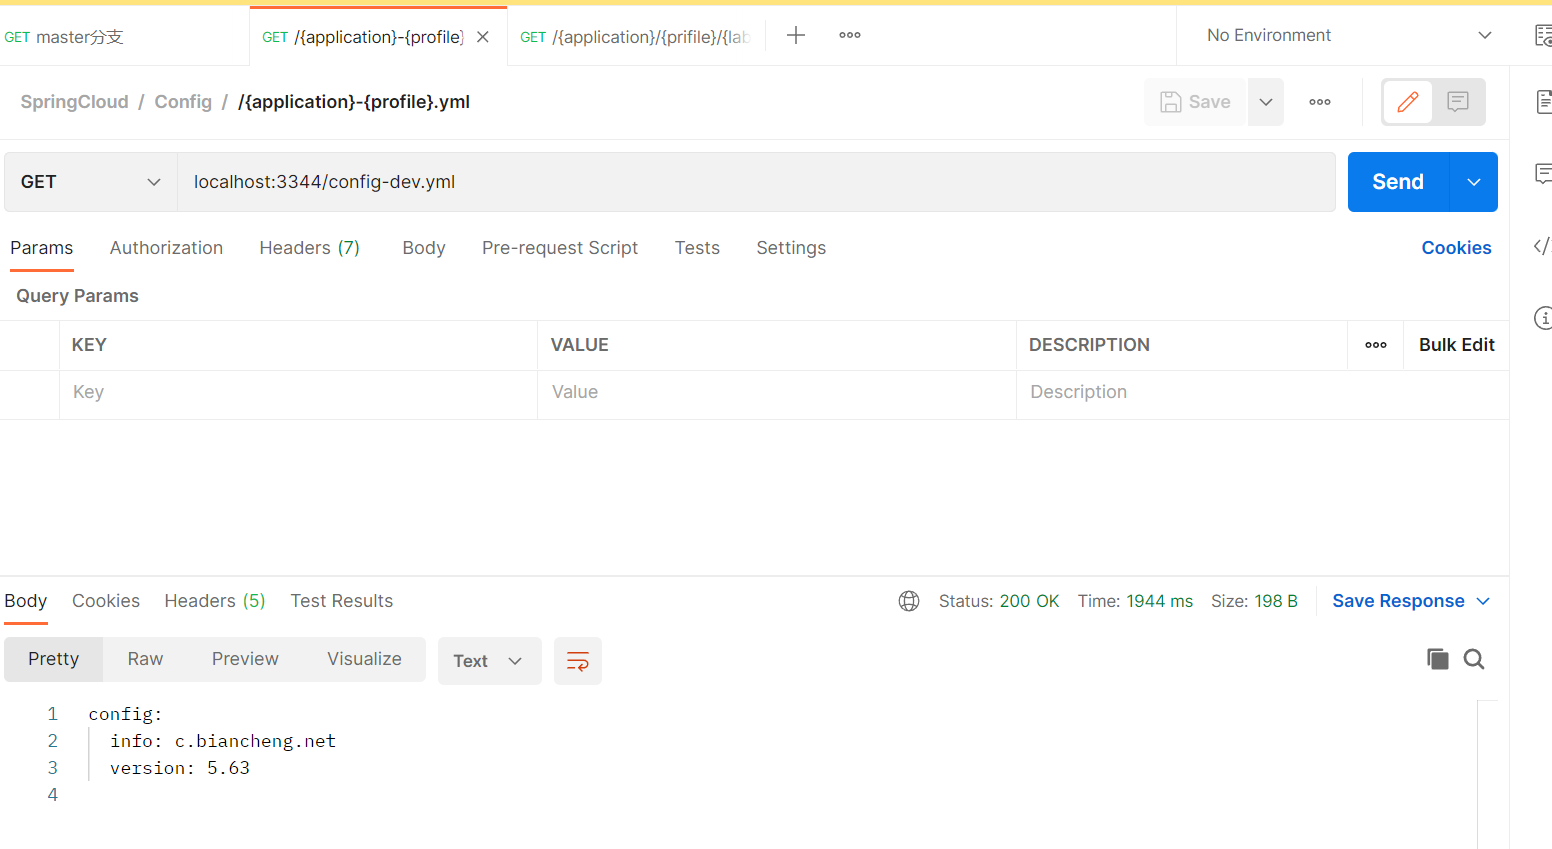
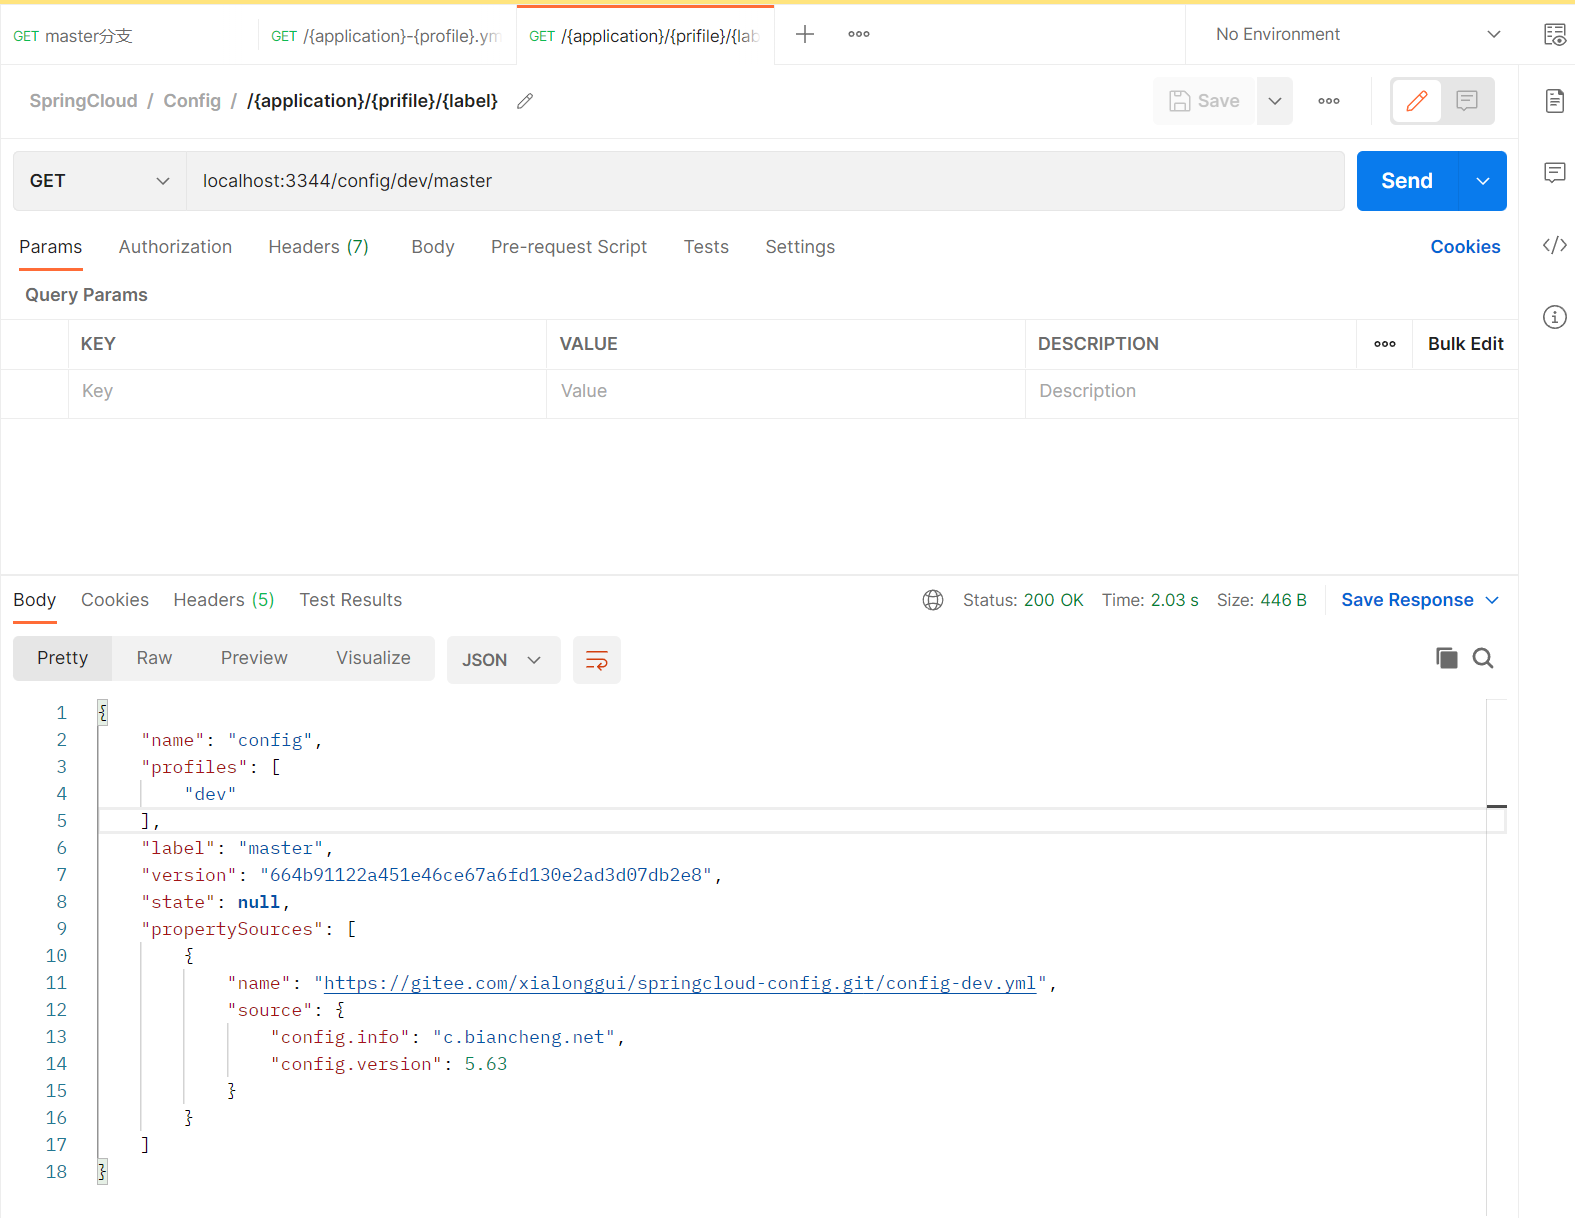
这几种测试都可以
localhost:3344/master/config-dev.yml
localhost:3344/config-dev.yml
localhost:3344/config/dev/master
Config客户端的配置 创建*cloud-config-client-3355项目*
pom
1 2 3 4 5 6 7 8 9 10 11 12 13 14 15 16 17 18 19 20 21 22 23 24 25 26 27 28 29 30 31 32 33 34 35 36 true </optional>true </optional>
注意这里需要创建的是bootstrap.yml
applicaiton.yml是用户级的资源配置项
bootstrap.yml是系统级的,优先级更加高
Spring Cloud会创建一个“Bootstrap Context”,作为Spring应用的Application Context的父上下文。初始化的时候,Bootstrap Context负责从外部源加载配置属性并解析配置。这两个上下文共享一个从外部获取的Environment。
Bootstrap属性有高优先级,默认情况下,它们不会被本地配置覆盖。 Bootstrap context和Application Context有着不同的约定,所以新增了一个bootstrap.yml文件,保证Bootstrap Context和Application Context配置的分离。
要将Client模块下的application.yml文件改为bootstrap.yml,这是很关键的,
因为bootstrap.yml是比application.yml先加载的。bootstrap.yml优先级高于application.yml
1 2 3 4 5 6 7 8 9 10 11 12 13 14 15 16 17 18 19 server:3355 3 个综合:master分支上config-dev.yml的配置文件被读取http:
controller
1 2 3 4 5 6 7 8 9 10 11 12 13 14 15 16 17 package com.atguigu.springcloud.controller;import org.springframework.beans.factory.annotation.Value;import org.springframework.web.bind.annotation.GetMapping;import org.springframework.web.bind.annotation.RestController;@RestController public class ConfigClientController @Value("${config.info}") private String configInfo;@GetMapping("/configInfo") public String getConfigInfo () {return configInfo;
入口函数
1 2 3 4 5 6 7 @EnableEurekaClient @SpringBootApplication public class ConfigClientMain3355 {public static void main (String[] args) {
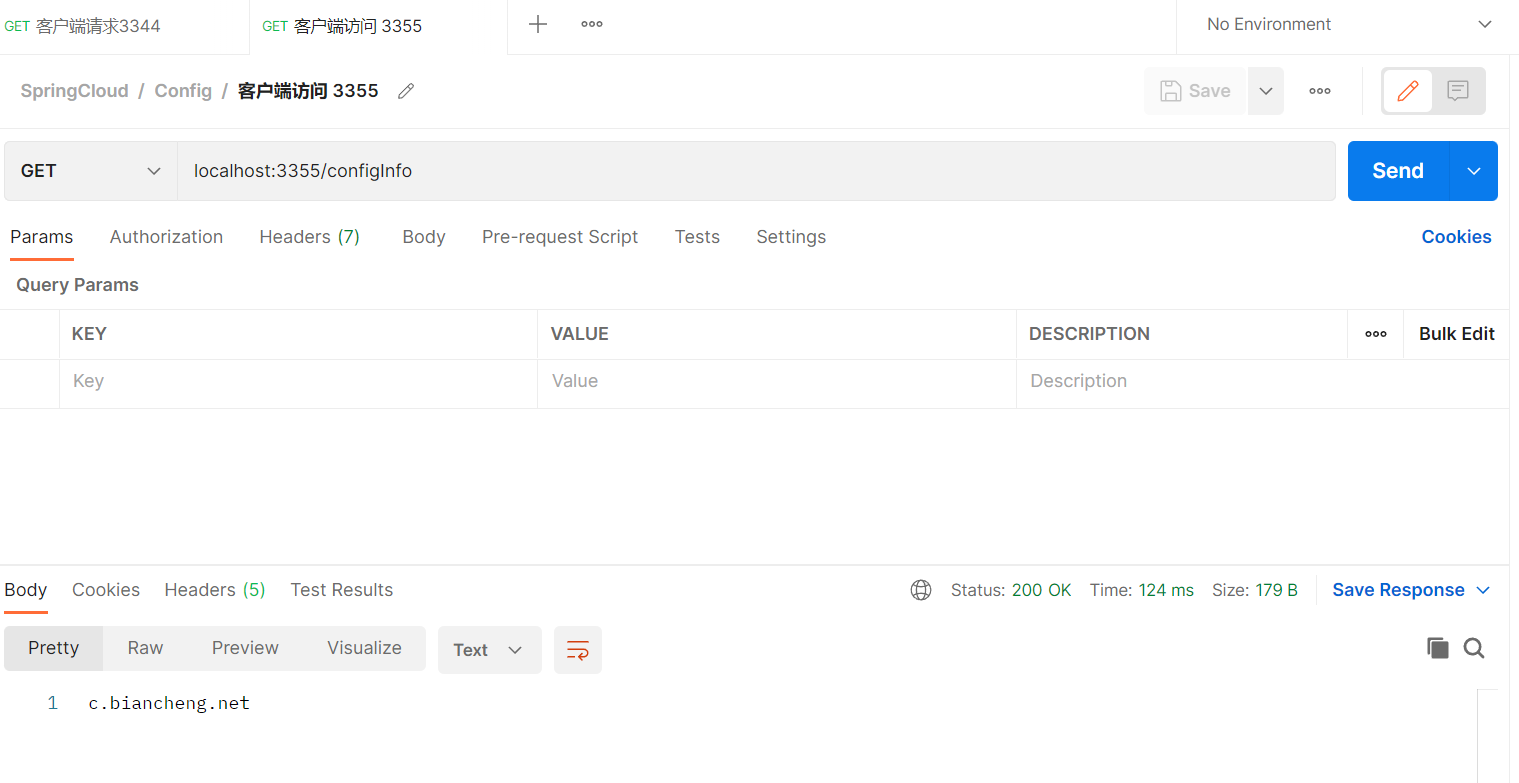
代码测试
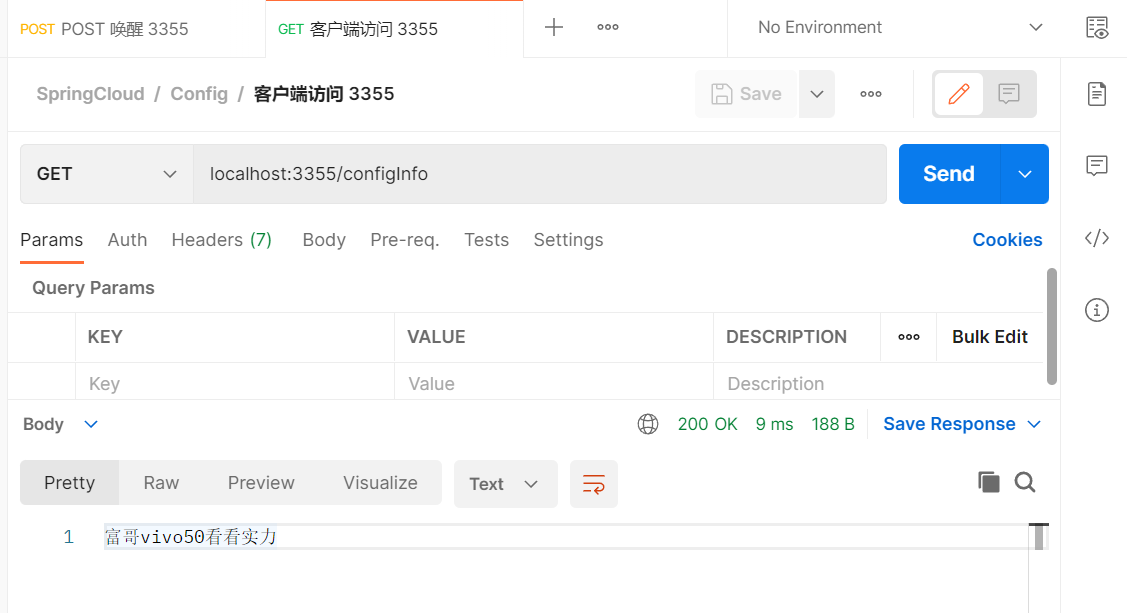
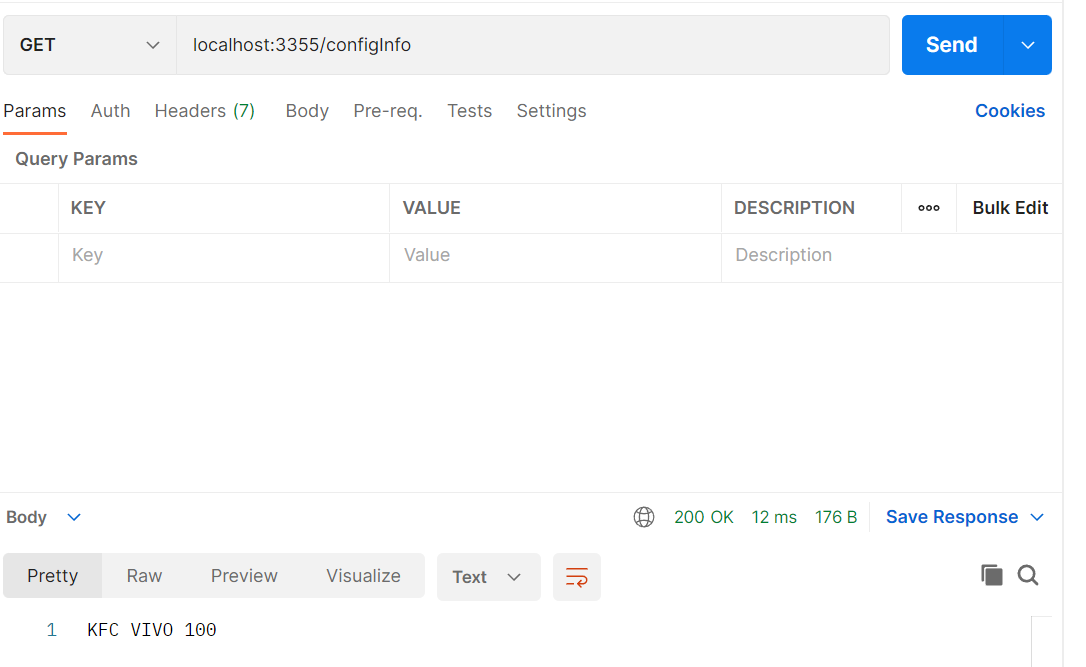
请求3355端口同样能获取Info的信息
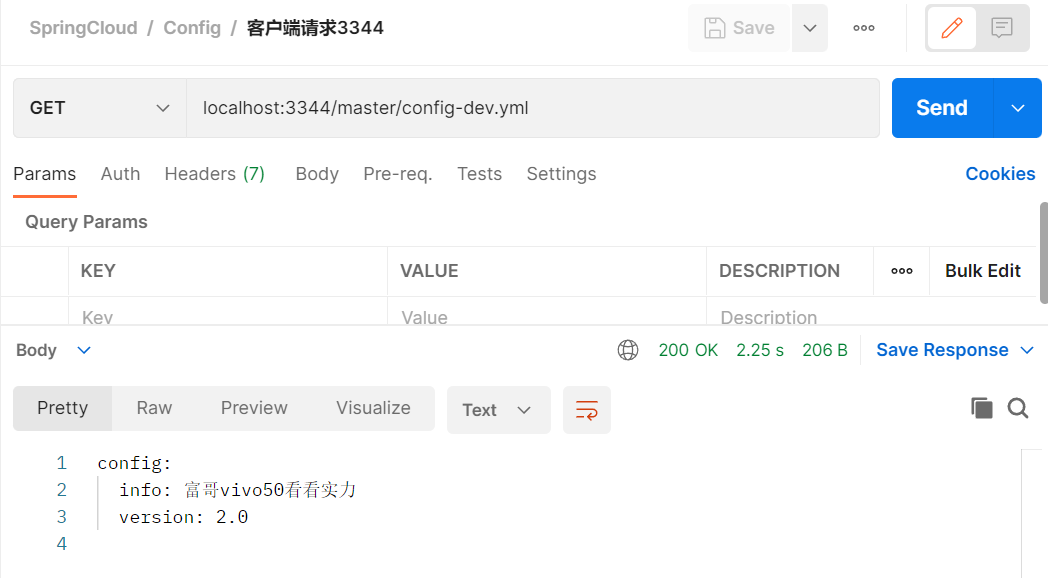
当gitee的配置中心的内容发生了变化, 3344可以请求可以立马反应过来,但是3355不能
需要重启3355才可以, 这样每次修改了配置,每次都重启就显得非常蛋疼, 所以就出现了动态刷新配置
动态刷新之手动版 确保pom中包含
1 2 3 4 <dependency>
yml暴露监控端点
1 2 3 4 5 6 7 8 9 10 11 12 13 14 15 16 17 18 19 20 21 22 23 24 25 26 server:3355 3 个综合:master分支上config-dev.yml的配置文件被读取http:"*"
controller添加注解@RefreshScope
1 2 3 4 5 6 7 8 9 10 11 12 @RestController @RefreshScope public class ConfigClientController @Value("${config.info}") private String configInfo;@GetMapping("/configInfo") public String getConfigInfo () {return configInfo;
配置完成之后重启了3355, 发现3355的请求获取info仍然没有缓过来, 3344已经缓过来了
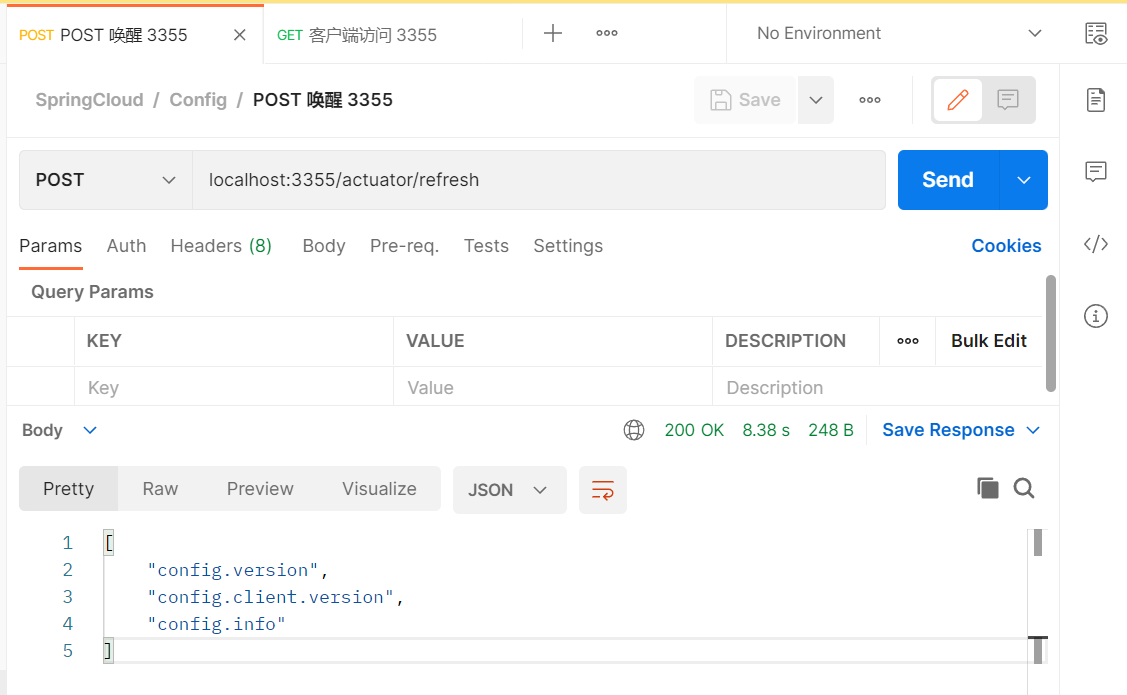
我们需要给3355发送一个post请求提醒一下3355
“嘿, 哥们, 别睡着了”
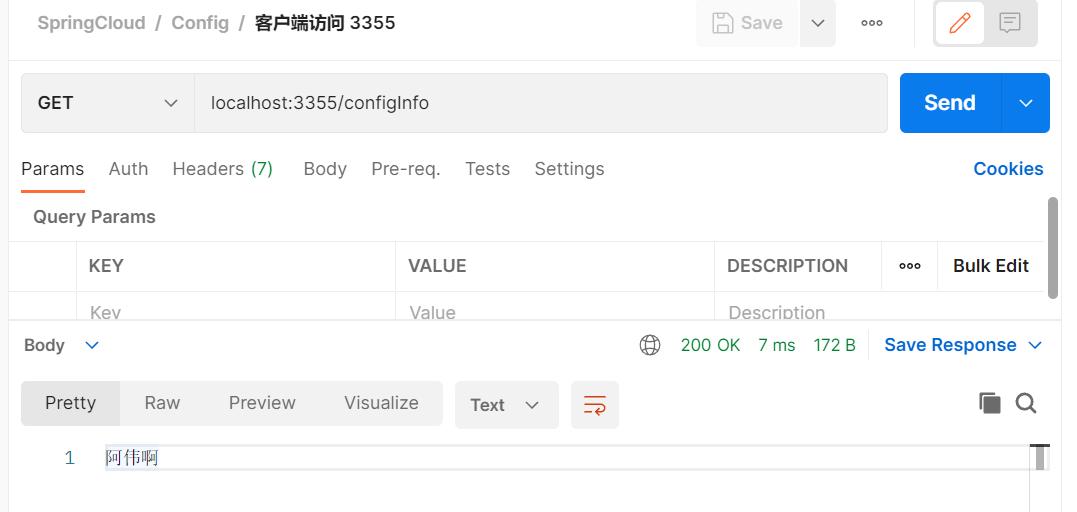
POST localhost:3355/actuator/refresh
之后3355就缓过来能获取到最新的Info信息了
如果微服务的数量达到了很多,这样做还是很麻烦, 由此就衍生出来了SpringCloud BUS总线Bus
Bus动态刷新全局广播配置实现 首先需要配置RabbitMQ的环境
对每一个*cloud-config-center-3344 ,* cloud-config-client-3355 ,cloud-config-client-3366
添加pom
1 2 3 4 5 <!--添加消息总线RabbitMQ支持-->
3344yml
1 2 3 4 5 6 7 8 9 10 11 12 13 14 15 16 17 18 19 20 21 22 23 24 25 26 27 28 29 30 31 32 33 34 35 36 server:3344 5672 123 'bus-refresh'
3355yml
1 2 3 4 5 6 7 8 9 10 11 12 13 14 15 16 17 18 19 20 21 22 23 24 25 26 27 28 29 30 31 32 server:3355 3 个综合:master分支上config-dev.yml的配置文件被读取http:15672 是Web管理界面的端口;5672 是MQ访问的端口5672 123 "*"
3366yml
1 2 3 4 5 6 7 8 9 10 11 12 13 14 15 16 17 18 19 20 21 22 23 24 25 26 27 28 29 30 31 32 server:3366 3 个综合:master分支上config-dev.yml的配置文件被读取http:15672 是Web管理界面的端口;5672 是MQ访问的端口5672 123 "*"
通知3344去踹醒其他微服务 POST localhost:3344/actuator/bus-refresh
localhost:3344/config-dev.yml
localhost:3355/configInfo
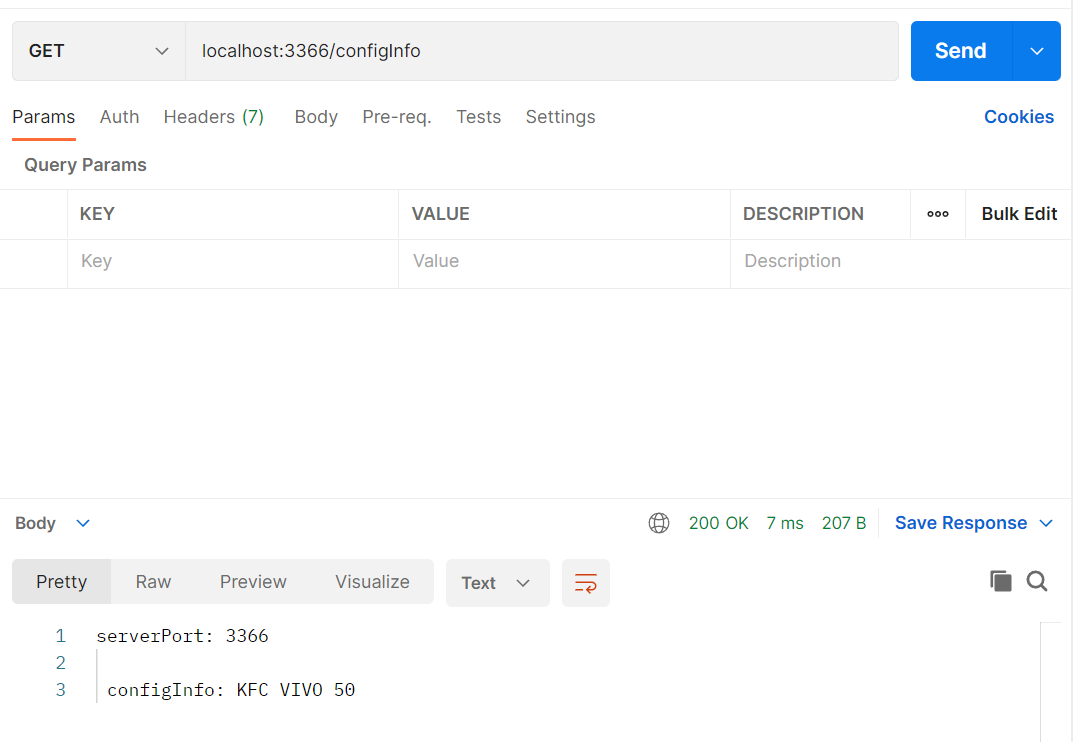
localhost:3366/configInfo
动态刷新顶点通知 只通知3355, 不通知3366
指定具体某一个实例生效而不是全部
公式: http://localhost:配置中心端口号/actuator/bus-refresh/{destination}
/bus/refresh请求不再发送到具体的服务实例上,而是发给config server并通过destination参数类指定需要更新配置的服务或实例
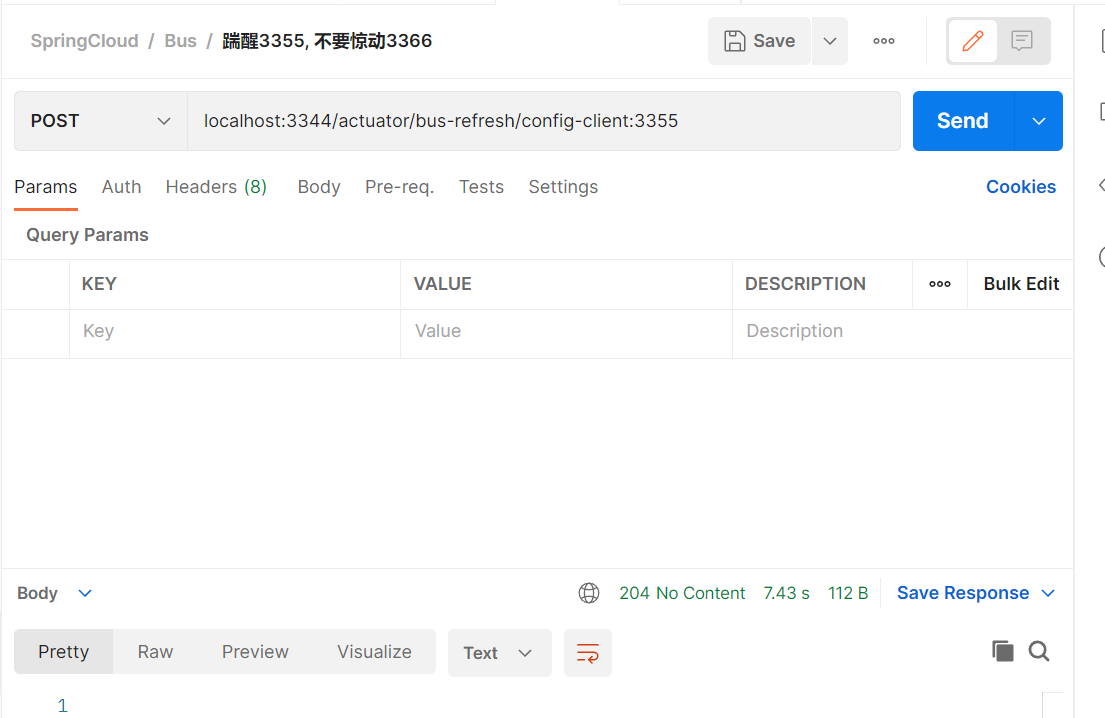
踹醒3355, 不要惊动3366
POST localhost:3344/actuator/bus-refresh/config-client:3355
此时3355更新了, 但是3366没有更新
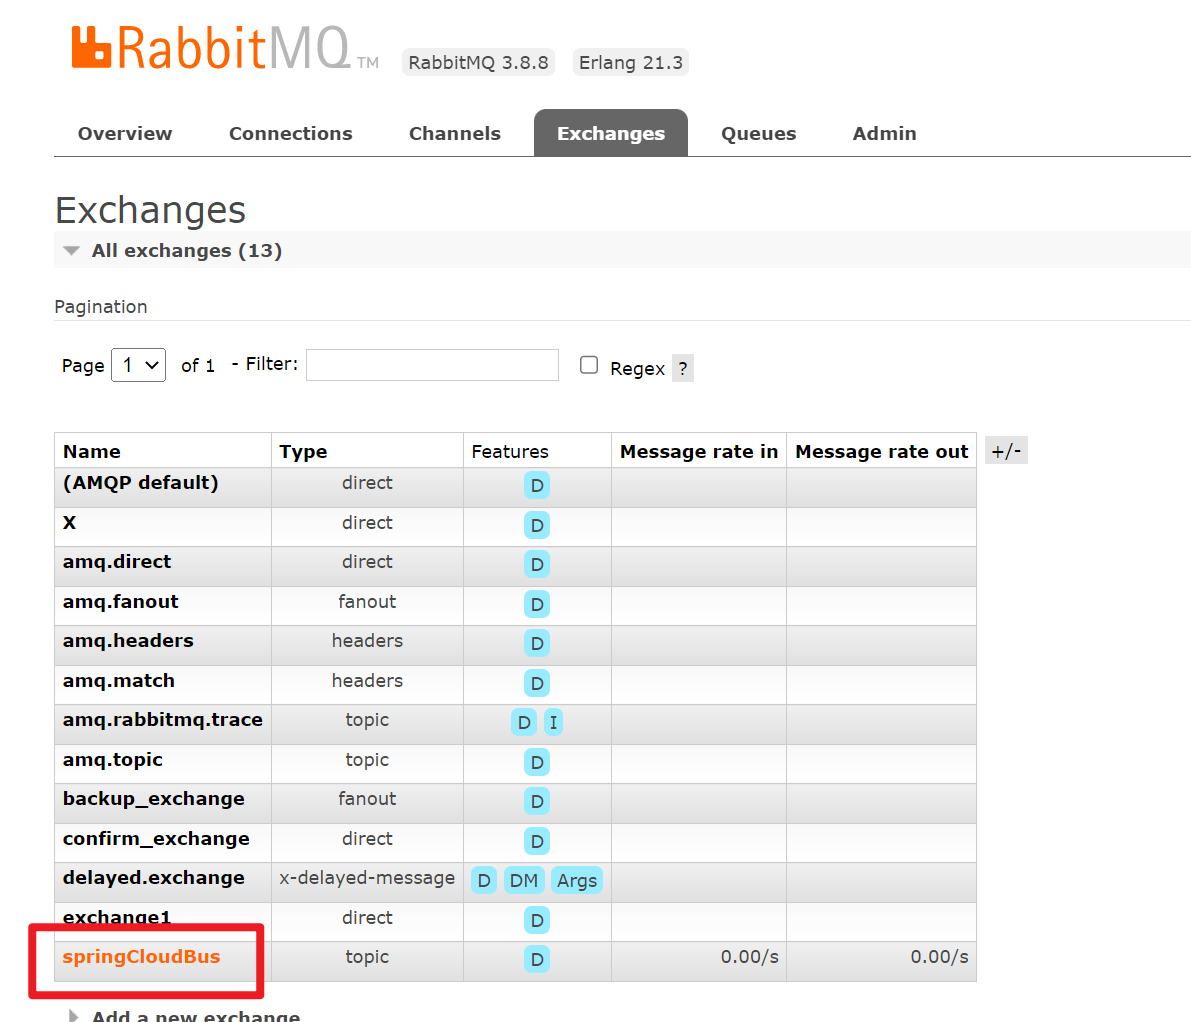
以上的配置执行的代码会在让rabbitmq的topic生成一个总线
消息驱动生产者 创建模块*cloud-stream-rabbitmq-provider8801*
pom
1 2 3 4 5 6 7 8 9 10 11 12 13 14 15 16 17 18 19 20 21 22 23 24 25 26 27 28 29 30 31 32 33 34 35 36 <dependencies>true </optional>true </optional>
yml
1 2 3 4 5 6 7 8 9 10 11 12 13 14 15 16 17 18 19 20 21 22 23 24 25 26 27 28 29 30 31 32 33 server:8801 5672 123 2 # 设置心跳的时间间隔(默认是30 秒)5 # 如果现在超过了5 秒的间隔(默认是90 秒)8801. com # 在信息列表时显示主机名称true # 访问的路径变为IP地址
service
1 2 3 4 5 package com.atguigu.springcloud.service;public interface IMessageProvider {public String send () ;
接口实现,类名上面不要加@Service注解, 这并不是像之前一样写的业务类
而是添加@EnableBinding
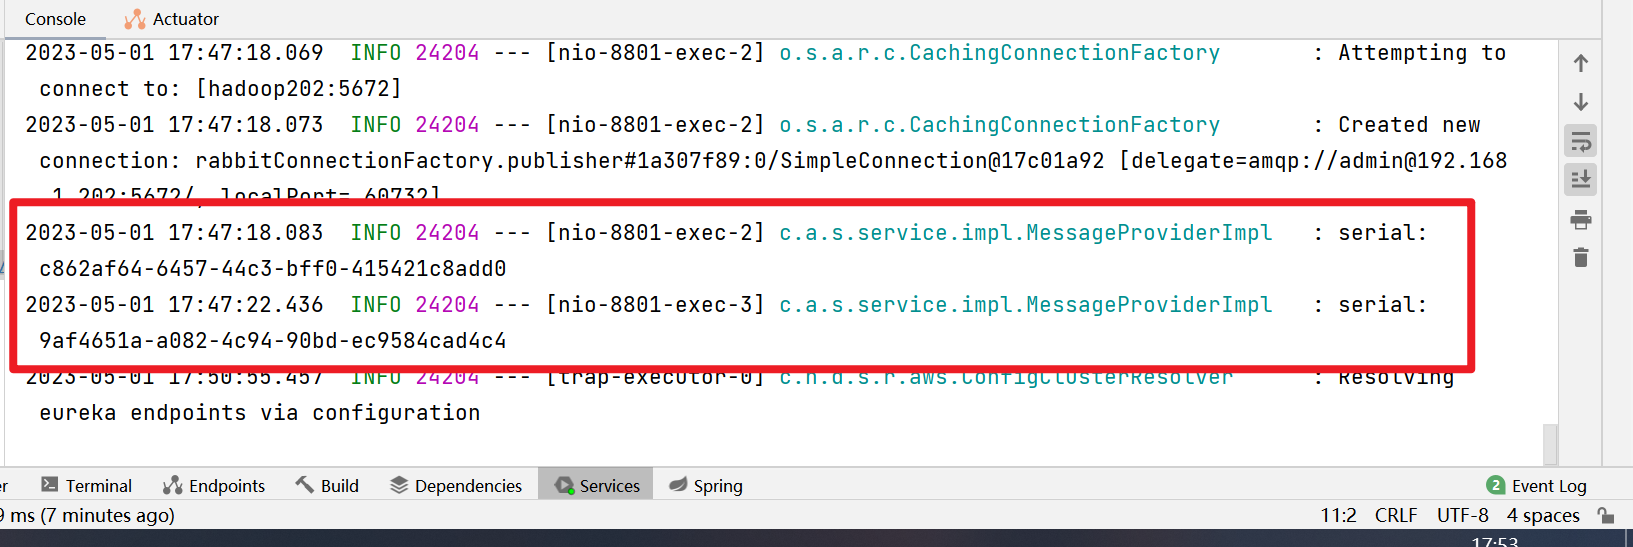
1 2 3 4 5 6 7 8 9 10 11 12 13 14 15 16 17 18 19 20 21 22 23 24 25 26 27 package com.atguigu.springcloud.service.impl;import com.atguigu.springcloud.service.IMessageProvider;import lombok.extern.slf4j.Slf4j;import org.springframework.cloud.stream.annotation.EnableBinding;import org.springframework.cloud.stream.messaging.Source;import org.springframework.integration.support.MessageBuilder;import org.springframework.messaging.MessageChannel;import javax.annotation.Resource;import java.util.UUID;@Slf4j @EnableBinding(Source.class) public class MessageProviderImpl implements IMessageProvider {@Resource private MessageChannel output; @Override public String send () {String serial = UUID.randomUUID().toString();this .output.send(MessageBuilder.withPayload(serial).build()); "serial: {}" , serial);return null ;
controller
1 2 3 4 5 6 7 8 9 10 11 12 13 14 15 16 17 18 package com.atguigu.springcloud.controller;import com.atguigu.springcloud.service.IMessageProvider;import org.springframework.web.bind.annotation.GetMapping;import org.springframework.web.bind.annotation.RestController;import javax.annotation.Resource;@RestController public class SendMessageController {@Resource private IMessageProvider messageProvider;@GetMapping("/sendMessage") public String sendMessage () {return messageProvider.send();
入口函数
1 2 3 4 5 6 7 8 9 10 11 package com.atguigu.springcloud;import org.springframework.boot.SpringApplication;import org.springframework.boot.autoconfigure.SpringBootApplication;@SpringBootApplication public class StreamMQMain8801 {public static void main (String[] args) {
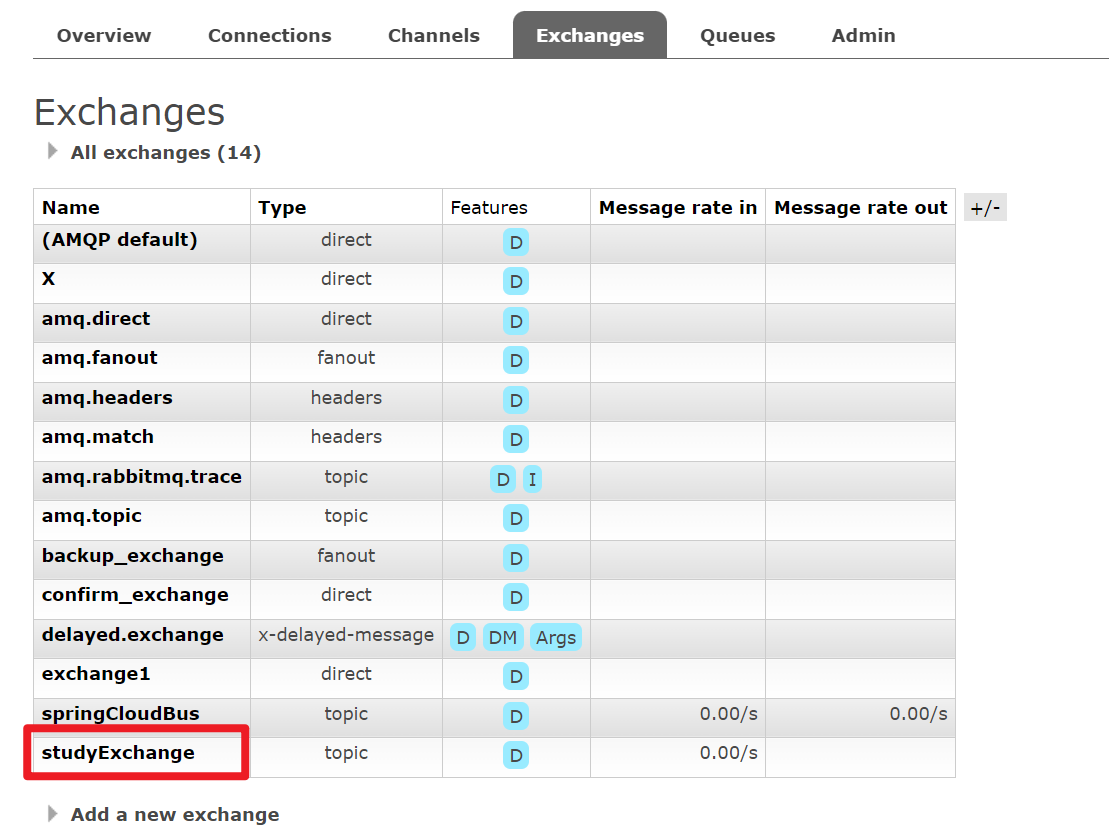
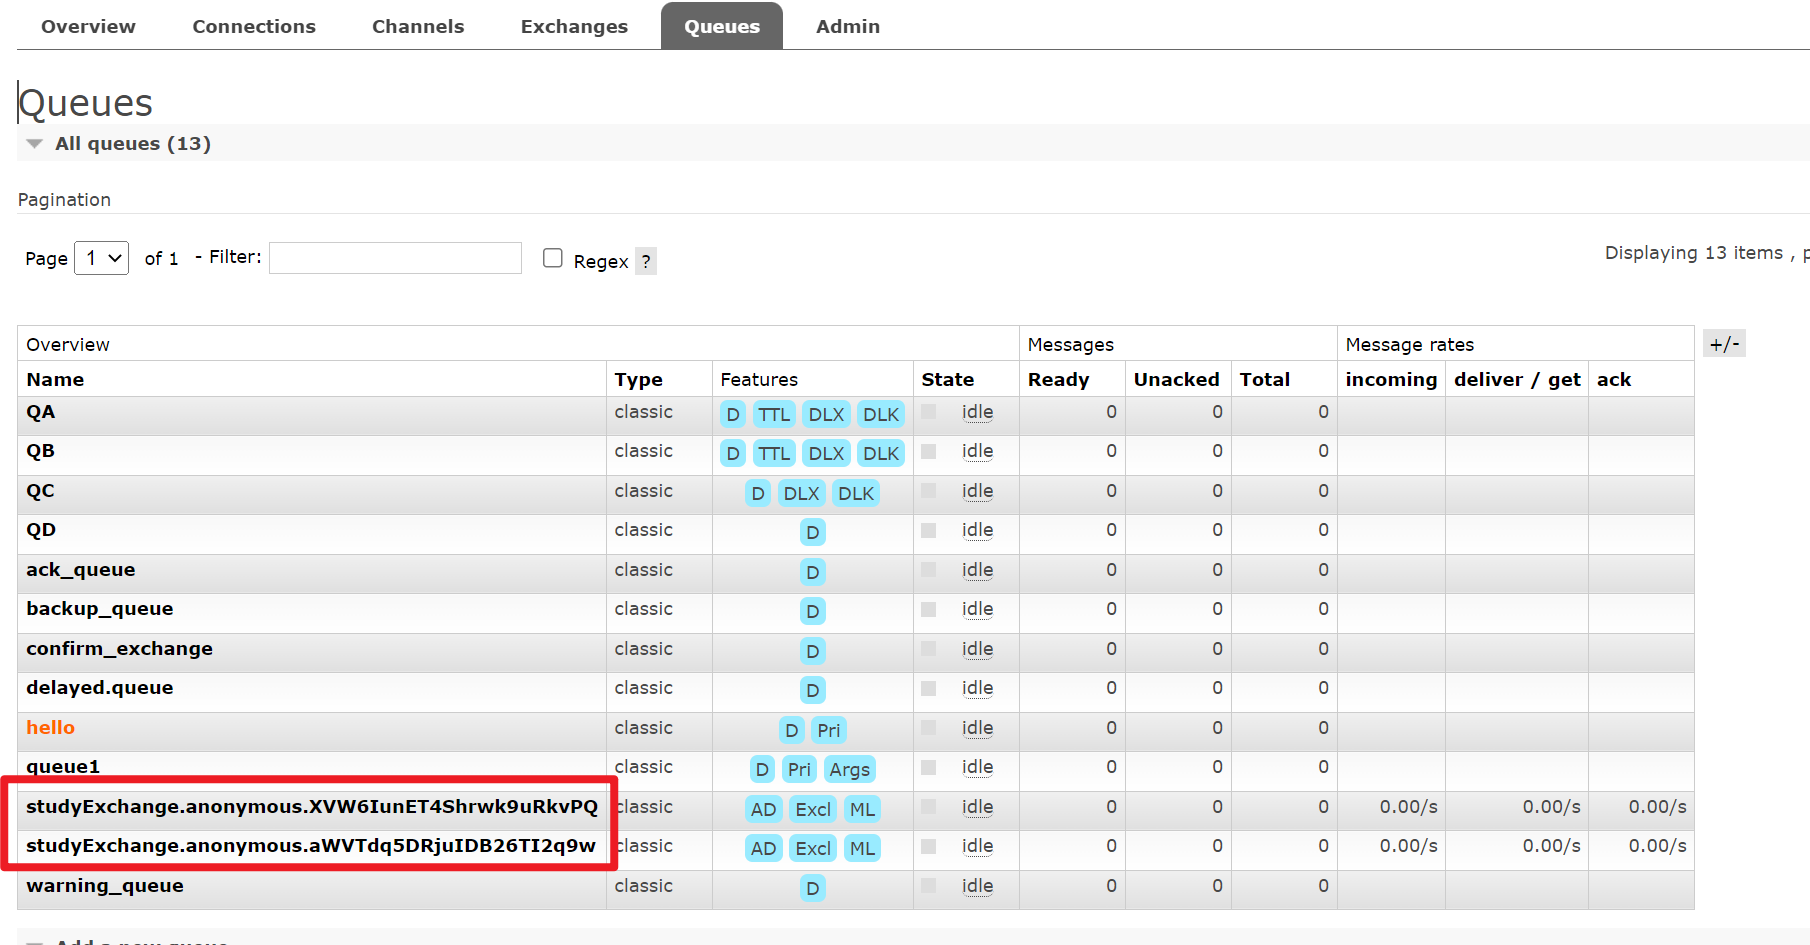
程序运行之后exchanges会出现studyExchange
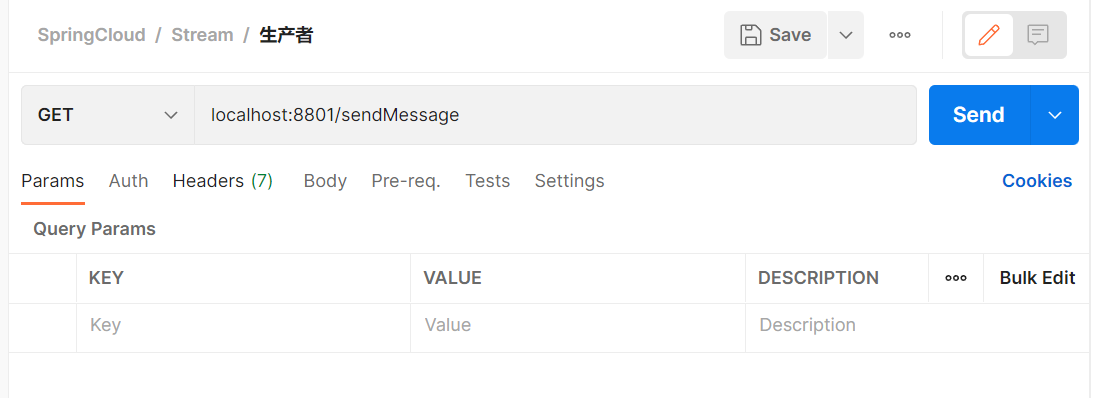
生产者: localhost:8801/sendMessage
消息驱动消费者 创建模块*cloud-stream-rabbitmq-consumer8802*
pom
1 2 3 4 5 6 7 8 9 10 11 12 13 14 15 16 17 18 19 20 21 22 23 24 25 26 27 28 29 30 31 32 33 34 35 <dependencies>true </optional>true </optional>
yml
1 2 3 4 5 6 7 8 9 10 11 12 13 14 15 16 17 18 19 20 21 22 23 24 25 26 27 28 29 30 31 32 33 server:8802 5672 123 2 # 设置心跳的时间间隔(默认是30 秒)5 # 如果现在超过了5 秒的间隔(默认是90 秒)8802. com # 在信息列表时显示主机名称true # 访问的路径变为IP地址
controller
1 2 3 4 5 6 7 8 9 10 11 12 13 14 15 16 17 18 19 20 21 22 23 package com.atguigu.springcloud.controller;import lombok.extern.slf4j.Slf4j;import org.springframework.beans.factory.annotation.Value;import org.springframework.cloud.stream.annotation.EnableBinding;import org.springframework.cloud.stream.annotation.StreamListener;import org.springframework.cloud.stream.messaging.Sink;import org.springframework.messaging.Message;import org.springframework.stereotype.Component;@Slf4j @Component @EnableBinding(Sink.class) public class ReceiveMessageListener {@Value("server.port") private String serverPort;@StreamListener(Sink.INPUT) public void input (Message<String> message) {"消费者1号 message: {}" , message.getPayload());"消费者1号 port: {}" , serverPort);
入口函数
1 2 3 4 5 6 7 8 9 10 11 package com.atguigu.springcloud;import org.springframework.boot.SpringApplication;import org.springframework.boot.autoconfigure.SpringBootApplication;@SpringBootApplication public class StreamMQMain8802 {public static void main (String[] args) {
GET localhost:8801/sendMessage
8801发送消息, 8802就能接收消息
分组消费 仿造*cloud-stream-rabbitmq-consumer8802相同的模块 cloud-stream-rabbitmq-consumer8803*
可以看见当8801发送了一条消息, 8802和8803都会接收到这个消息, 如果是在订单模块的话, 同样的订单被处理了两次,这显然不是我们想要的
8802和8803的队列名称不一样, 需要把这两个归为同一个组
给8802和8803的yml添加group配置, group的值需要保持一致
1 2 3 4 5 6 7 8 9 10 11 12 13 14 15 16 17 18 19 20 21 22 23 24 25 26 27 28 29 30 31 32 33 34 server:8802 5672 123 2 # 设置心跳的时间间隔(默认是30 秒)5 # 如果现在超过了5 秒的间隔(默认是90 秒)8802. com # 在信息列表时显示主机名称true # 访问的路径变为IP地址
1 2 3 4 5 6 7 8 9 10 11 12 13 14 15 16 17 18 19 20 21 22 23 24 25 26 27 28 29 30 31 32 33 34 server:8803 5672 123 2 # 设置心跳的时间间隔(默认是30 秒)5 # 如果现在超过了5 秒的间隔(默认是90 秒)8803. com # 在信息列表时显示主机名称true # 访问的路径变为IP地址
代码测试
8801发送了两次请求, 8802和8803都分别接收到了一次
持久化 停止8802和8803服务
然后去除掉8802的group: atguiguA
保留8803的group: atguiguA
8801发送了4条消息, 先启动8802, 8802没有接收消息, 然后启动8803, 全部在8803接收到了
总结: 添加了group就自动支持了持久化
Sleuth之zipkin搭建安装 https://zipkin.io/pages/quickstart
直接点击latest release 点击下载zipkin
下载完成之后直接在控制台输入
java -jar zipkin-server-2.24.1-exec.jar
然后在浏览器中访问http://127.0.0.1:9411/zipkin/
这样就搭建完成了
Nacos的下载 https://github.com/alibaba/nacos
Nacos = Eureka + Config + Bus
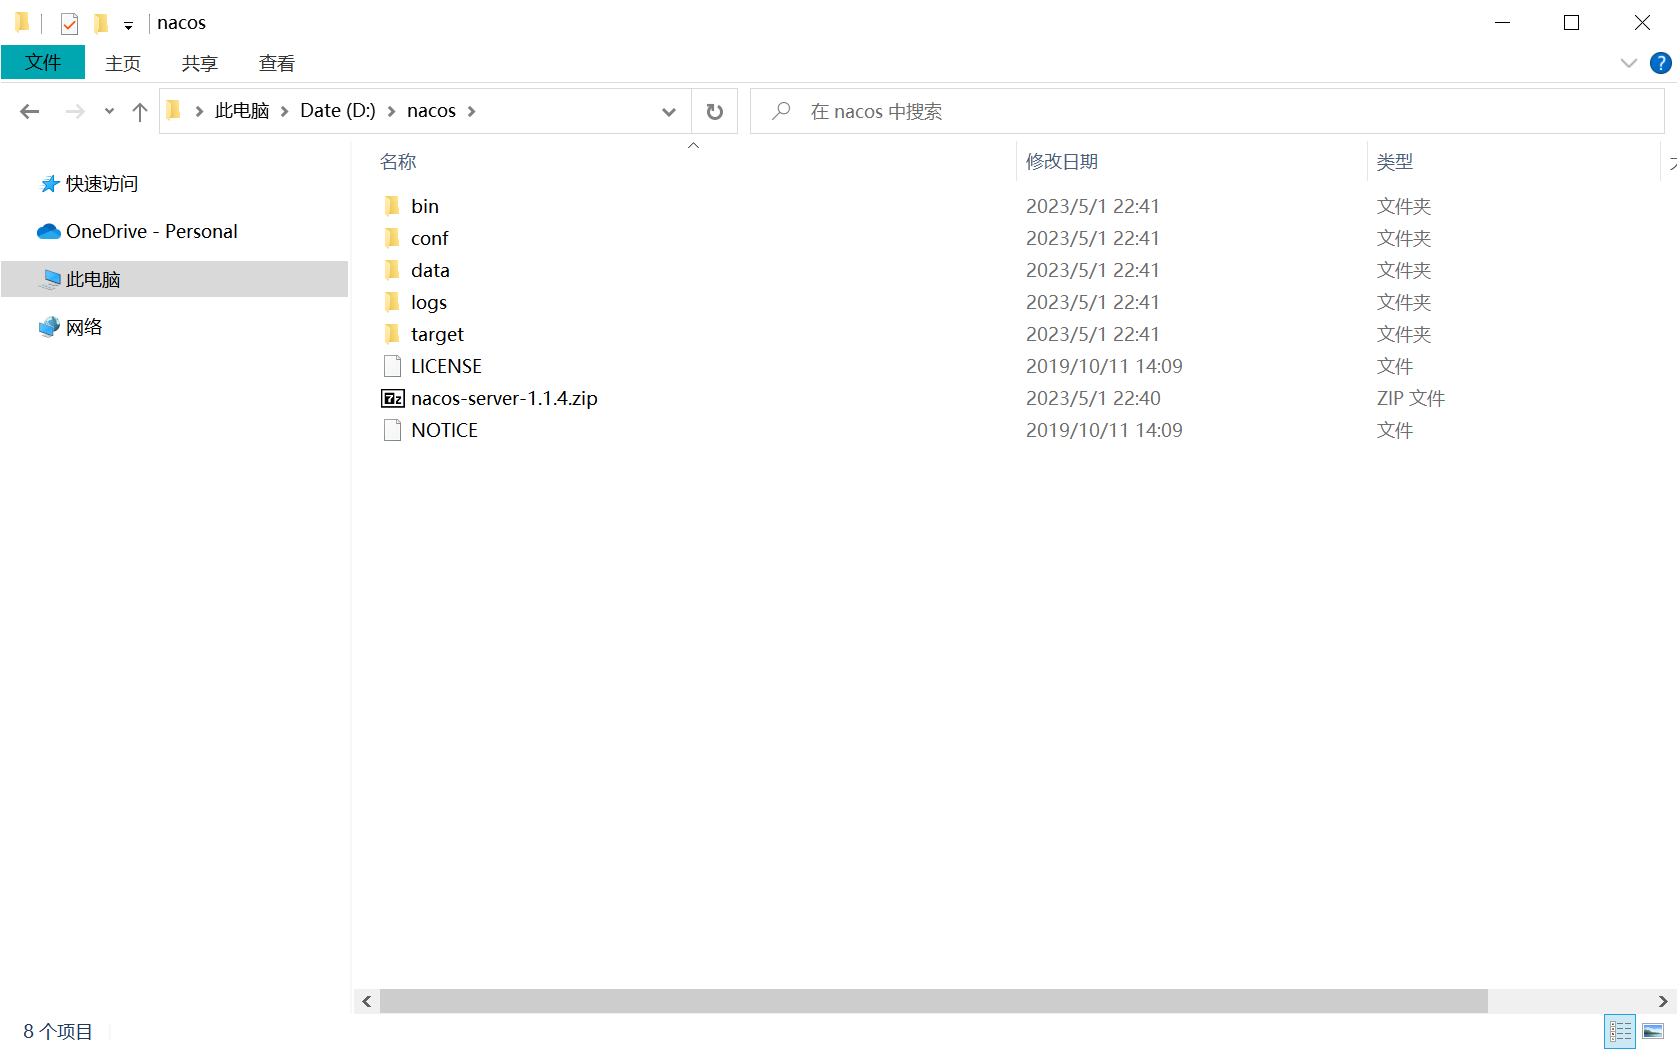
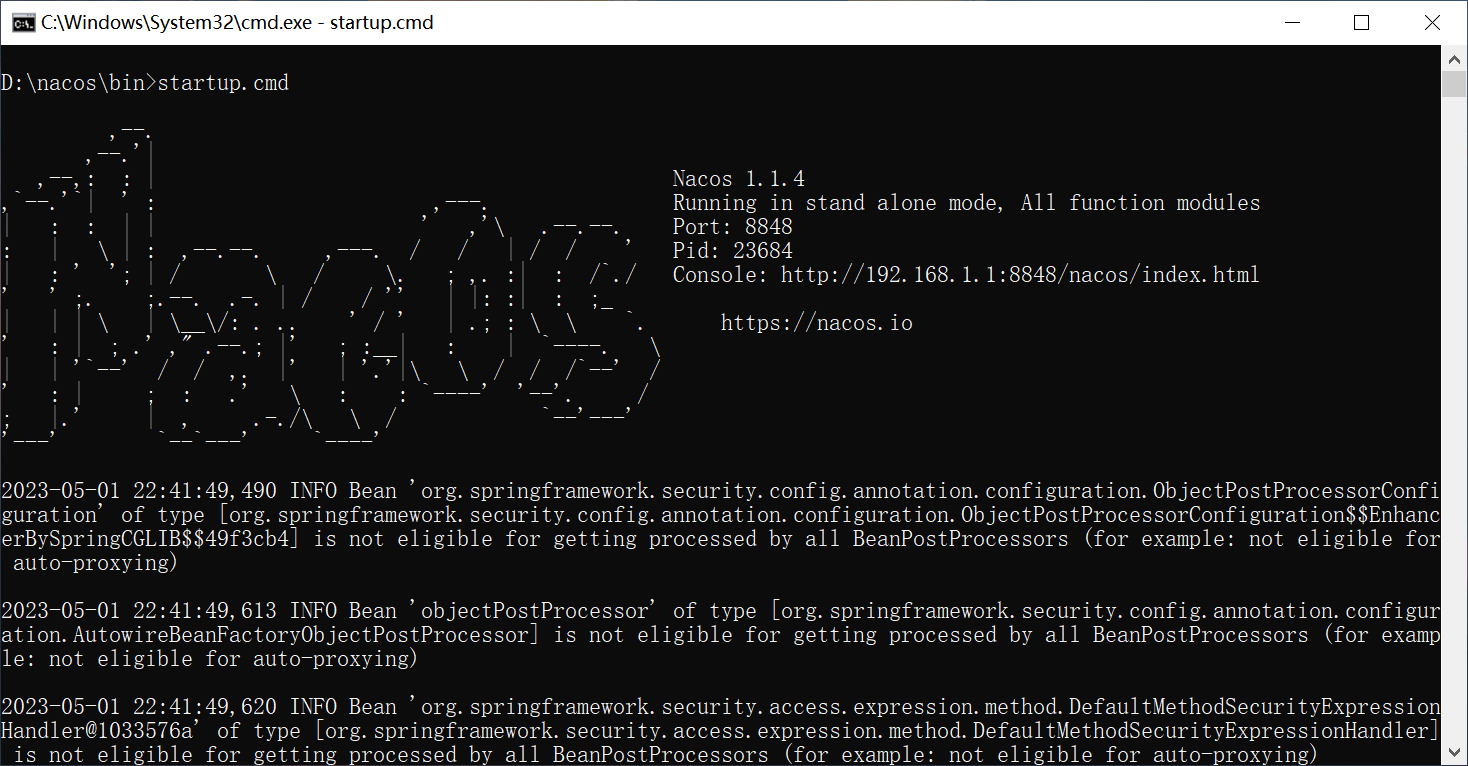
下载完成之后解压, 直接使用命令bin/startup.cmd就可以运行
运行完成之后浏览器输入http://localhost:8848/nacos 进入控制台
用户名和密码都是nacos
将服务注册到nacos 新建*cloudalibaba-provider-payment9001*模块
父POM
1 2 3 4 5 6 7 8 9 10 11 12 <dependencyManagement>2.1 .0 .RELEASE-->2.1 .0 .RELEASE</version>import </scope>
子pom
1 2 3 4 5 6 7 8 9 10 11 12 13 14 15 16 17 18 19 20 21 22 23 24 25 26 27 28 29 30 31 32 33 <dependencies>true </optional>true </optional>
application.yml
1 2 3 4 5 6 7 8 9 10 11 12 13 14 15 16 server:9001 8848 #配置Nacos地址'*'
controller
1 2 3 4 5 6 7 8 9 10 11 @RestController public class PaymentController {@Value("server.port") private String serverPort;@GetMapping(value = "/payment/nacos/{id}") public String getPayment (@PathVariable("id") Integer id) return "nacos registry, serverPort: " + serverPort+"\t id" +id;
入口函数
1 2 3 4 5 6 7 @EnableDiscoveryClient @SpringBootApplication public class PaymentMain9001 {public static void main (String[] args) {
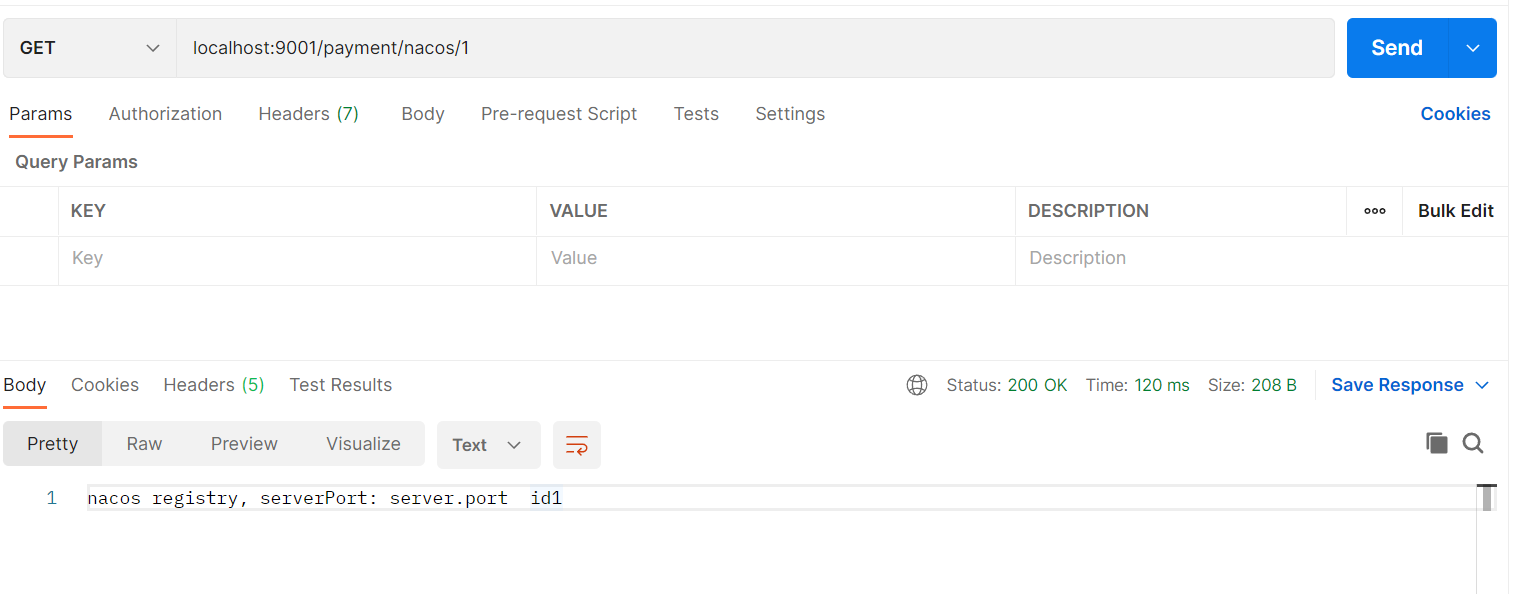
代码测试GET localhost:9001/payment/nacos/1
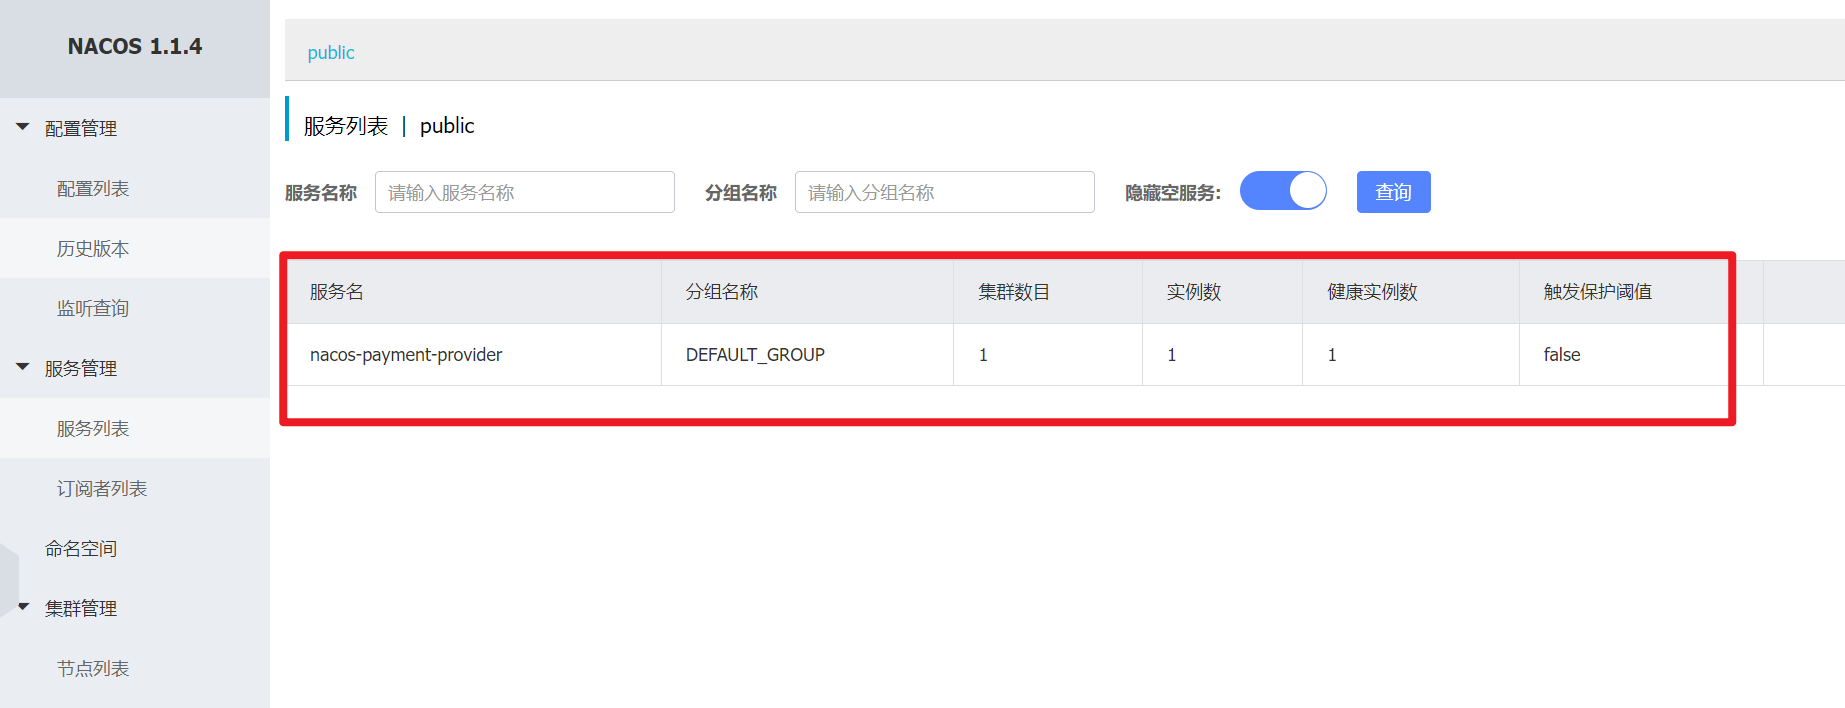
服务列表中出现了刚刚注册的微服务
Nacos的负载均衡 与之对应的,创建出来*cloudalibaba-provider-payment9002*模块
再创建一个消费者cloudalibaba-consumer-nacos-order83
pom
1 2 3 4 5 6 7 8 9 10 11 12 13 14 15 16 17 18 19 20 21 22 23 24 25 26 27 28 29 30 31 32 33 34 35 36 37 38 39 <dependencies > <dependency > <groupId > com.alibaba.cloud</groupId > <artifactId > spring-cloud-starter-alibaba-nacos-discovery</artifactId > </dependency > <dependency > <groupId > com.atguigu.springcloud</groupId > <artifactId > cloud-api-commons</artifactId > <version > $ {project.version} </version > </dependency > <dependency > <groupId > org.springframework.boot</groupId > <artifactId > spring-boot-starter-web</artifactId > </dependency > <dependency > <groupId > org.springframework.boot</groupId > <artifactId > spring-boot-starter-actuator</artifactId > </dependency > <dependency > <groupId > org.springframework.boot</groupId > <artifactId > spring-boot-devtools</artifactId > <scope > runtime</scope > <optional > true</optional > </dependency > <dependency > <groupId > org.projectlombok</groupId > <artifactId > lombok</artifactId > <optional > true</optional > </dependency > <dependency > <groupId > org.springframework.boot</groupId > <artifactId > spring-boot-starter-test</artifactId > <scope > test</scope > </dependency > </dependencies >
yml
1 2 3 4 5 6 7 8 9 10 11 12 13 14 server : port : 83 spring : application : name : nacos-order-consumer cloud : nacos : discovery : server-addr : localhost:8848 service-url : nacos-user-service : http://nacos-payment-provider
config
1 2 3 4 5 6 7 8 @Configuration @Bean @LoadBalanced getRestTemplate () {return new RestTemplate ();
controller
1 2 3 4 5 6 7 8 9 10 11 12 13 14 15 16 @RestController public class OrderNacosController {@Resource private RestTemplate restTemplate;@Value("service-url.nacos-user-service" ) private String serverURL;@GetMapping(value = "consumer/payment/nacos/{id}" ) public String getPayment(@PathVariable("id" ) Integer id)return restTemplate.getForObject(serverURL + "/payment/nacos/" + id, String.class );
入口函数
1 2 3 4 5 6 7 8 @SpringBootApplication @EnableDiscoveryClient public static void main (String[] args) {SpringApplication .run (OrderNacosMain83.class, args);
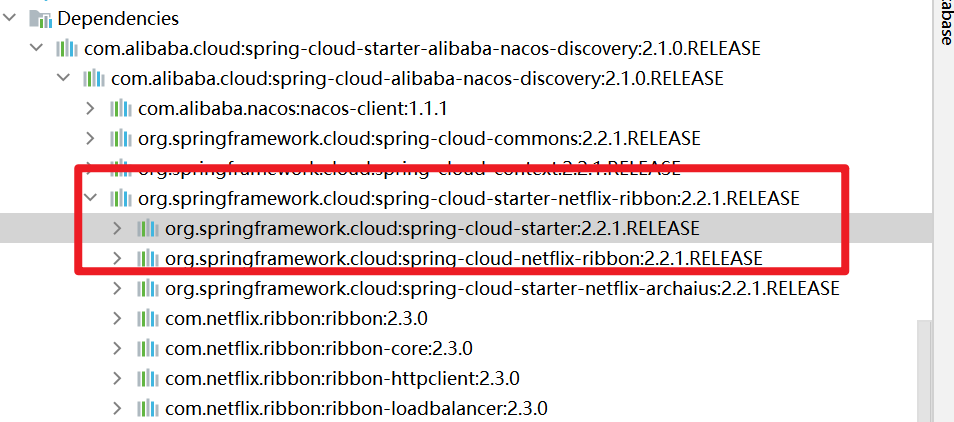
nacos中的依赖自带了ribbon, 所以能够支持负载均衡
代码测试
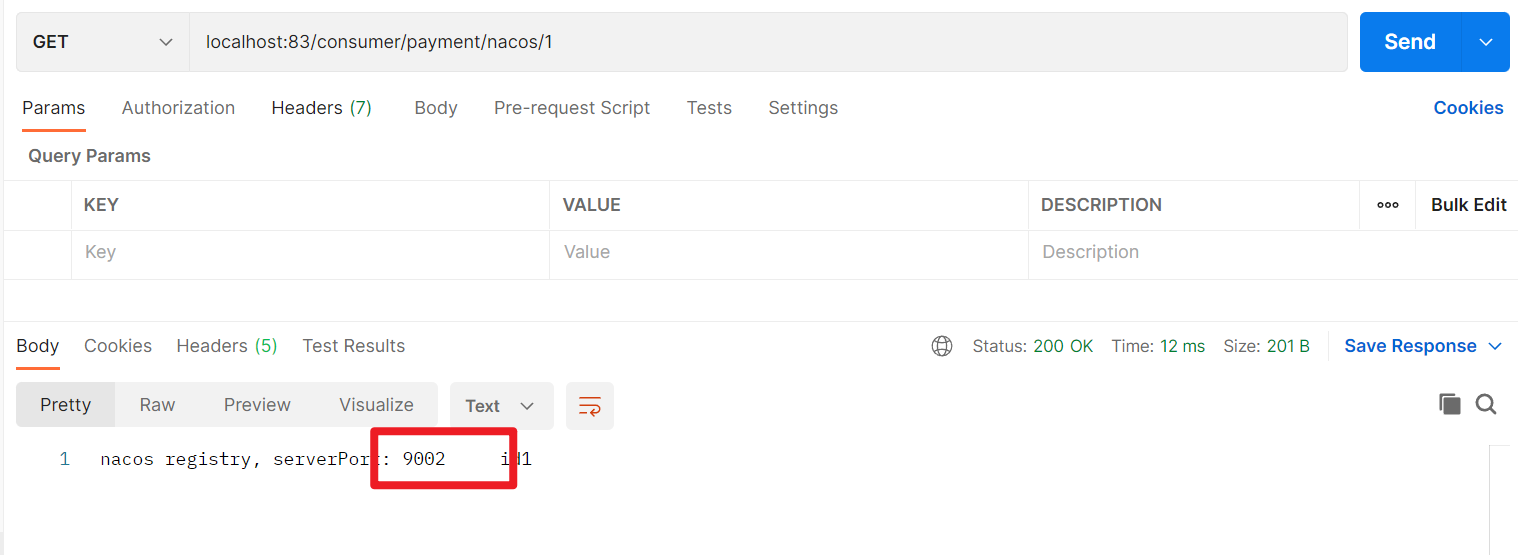
GET localhost:83/consumer/payment/nacos/1
一次9001,一次9002, 负载均衡实现
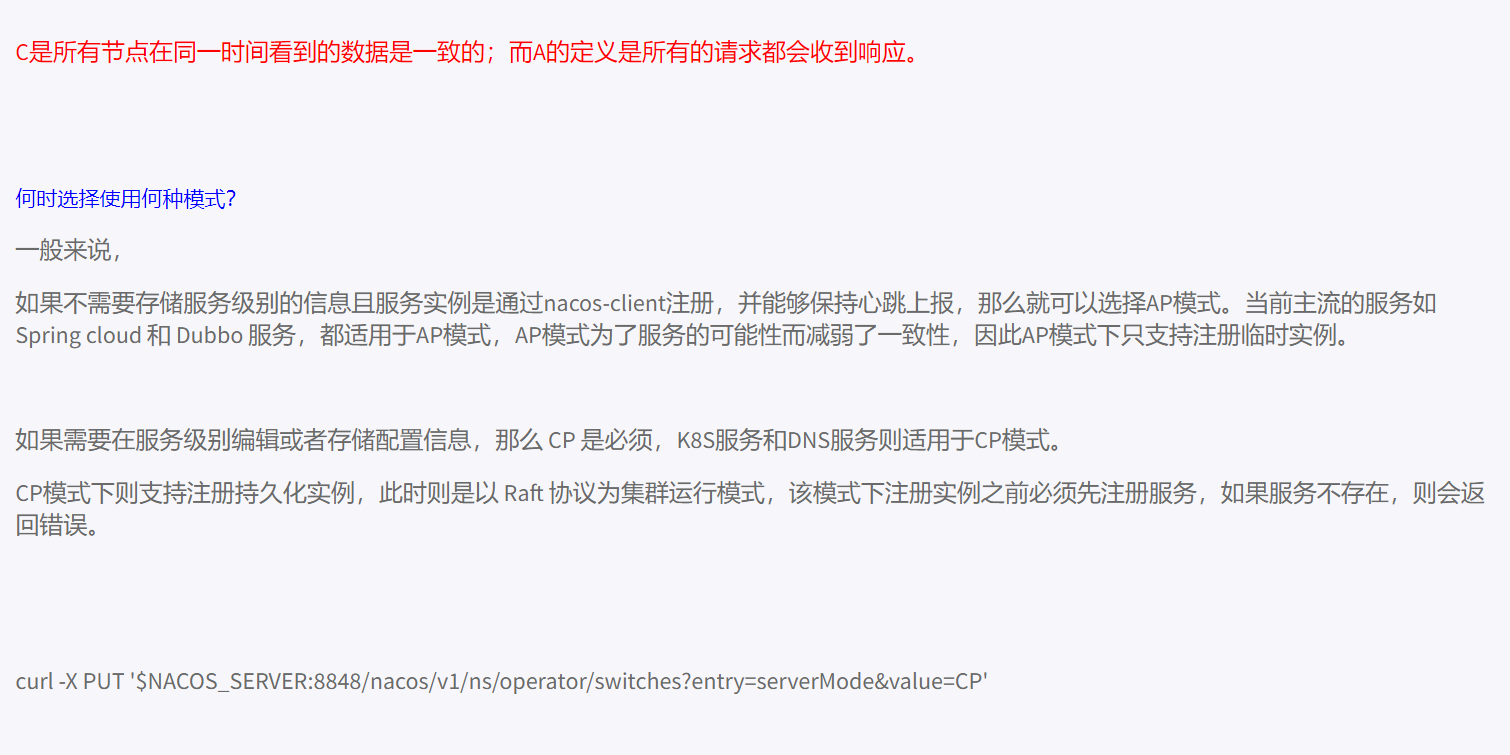
Nacos的CP和AP的切换 Nacos默认是AP, 可以使用如下请求切换成CP
curl -X PUT ‘$NACOS_SERVER:8848/nacos/v1/ns/operator/switches?entry=serverMode&value=CP’
Nacos的配置中心 创建模块*cloudalibaba-config-nacos-client3377*
pom
1 2 3 4 5 6 7 8 9 10 11 12 13 14 15 16 17 18 19 20 21 22 23 24 25 26 27 28 29 30 31 32 33 34 35 36 37 38 <dependencies > <dependency > <groupId > com.alibaba.cloud</groupId > <artifactId > spring-cloud-starter-alibaba-nacos-config</artifactId > </dependency > <dependency > <groupId > com.alibaba.cloud</groupId > <artifactId > spring-cloud-starter-alibaba-nacos-discovery</artifactId > </dependency > <dependency > <groupId > org.springframework.boot</groupId > <artifactId > spring-boot-starter-web</artifactId > </dependency > <dependency > <groupId > org.springframework.boot</groupId > <artifactId > spring-boot-starter-actuator</artifactId > </dependency > <dependency > <groupId > org.springframework.boot</groupId > <artifactId > spring-boot-devtools</artifactId > <scope > runtime</scope > <optional > true</optional > </dependency > <dependency > <groupId > org.projectlombok</groupId > <artifactId > lombok</artifactId > <optional > true</optional > </dependency > <dependency > <groupId > org.springframework.boot</groupId > <artifactId > spring-boot-starter-test</artifactId > <scope > test</scope > </dependency > </dependencies >
bootstrap.yml
注意这个file-extension: yml#指定yaml格式的配置
这个yml跟nacos-config-client-dev.yml这个后缀名要保持一致
要么都叫yaml, 要么都叫yml
1 2 3 4 5 6 7 8 9 10 11 12 13 14 15 16 17 server: port: 3377 spring: application: name: nacos-config-client cloud: nacos: discovery: server-addr: localhost:8848#Nacos服务注册中心地址 config: server-addr: localhost:8848#Nacos作为配置中心地址 file-extension: yml#指定yaml格式的配置
application.yml
1 2 3 spring: profiles: active: dev#表示开发环境
controller
1 2 3 4 5 6 7 8 9 10 11 12 @RefreshScope @RestController public class ConfigClientController {@Value("${config.info}") private String configInfo;@GetMapping("/config/info") public String getConfigInfo () {return configInfo;
main
1 2 3 4 5 6 7 @EnableDiscoveryClient @SpringBootApplication public class NacosConfigClientMain3377 {public static void main (String[] args) {
创建好模块运行
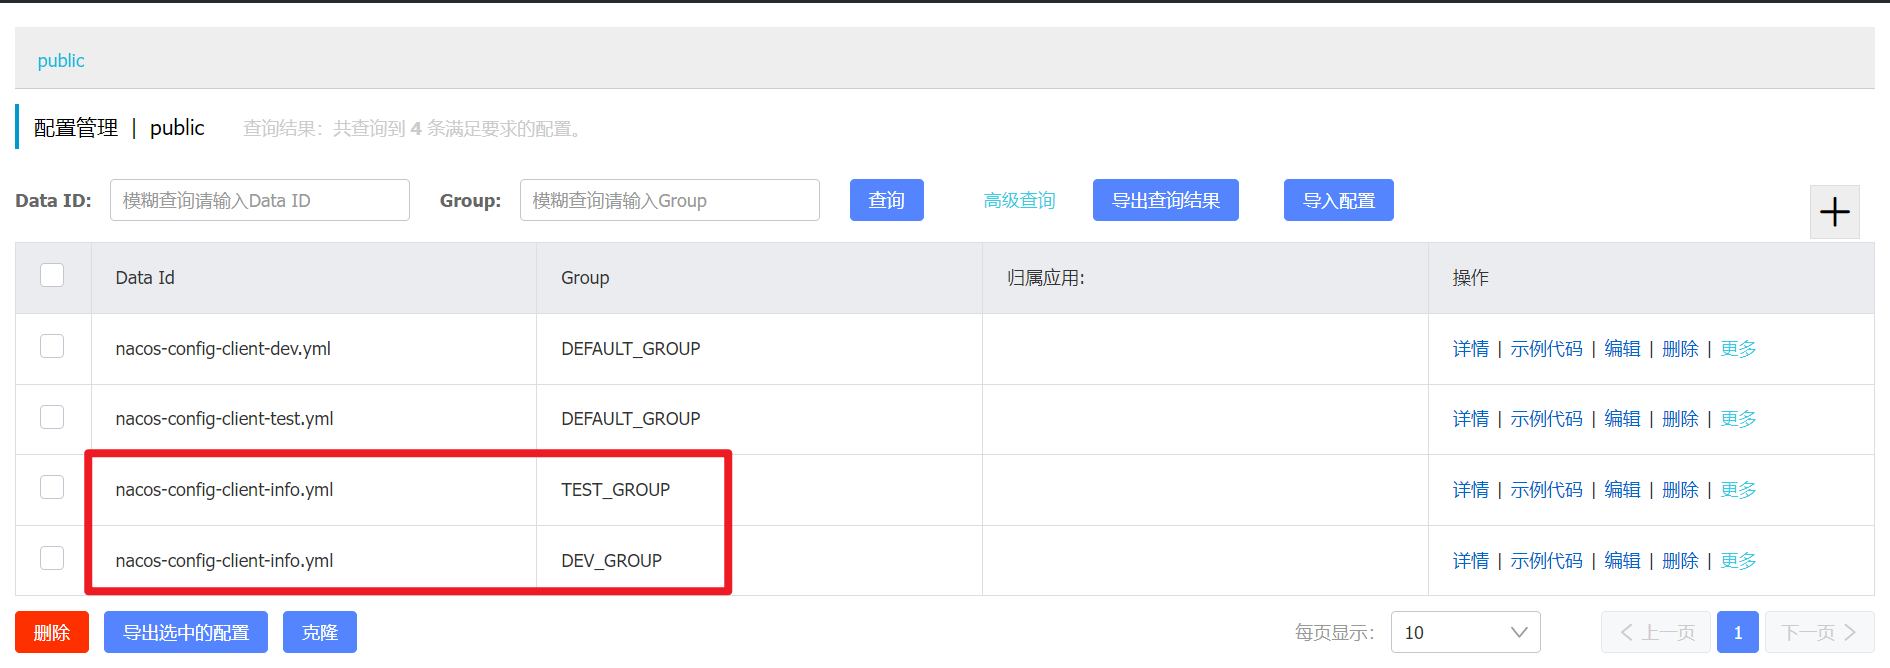
在nacos的配置列表创建配置
1 2 config:
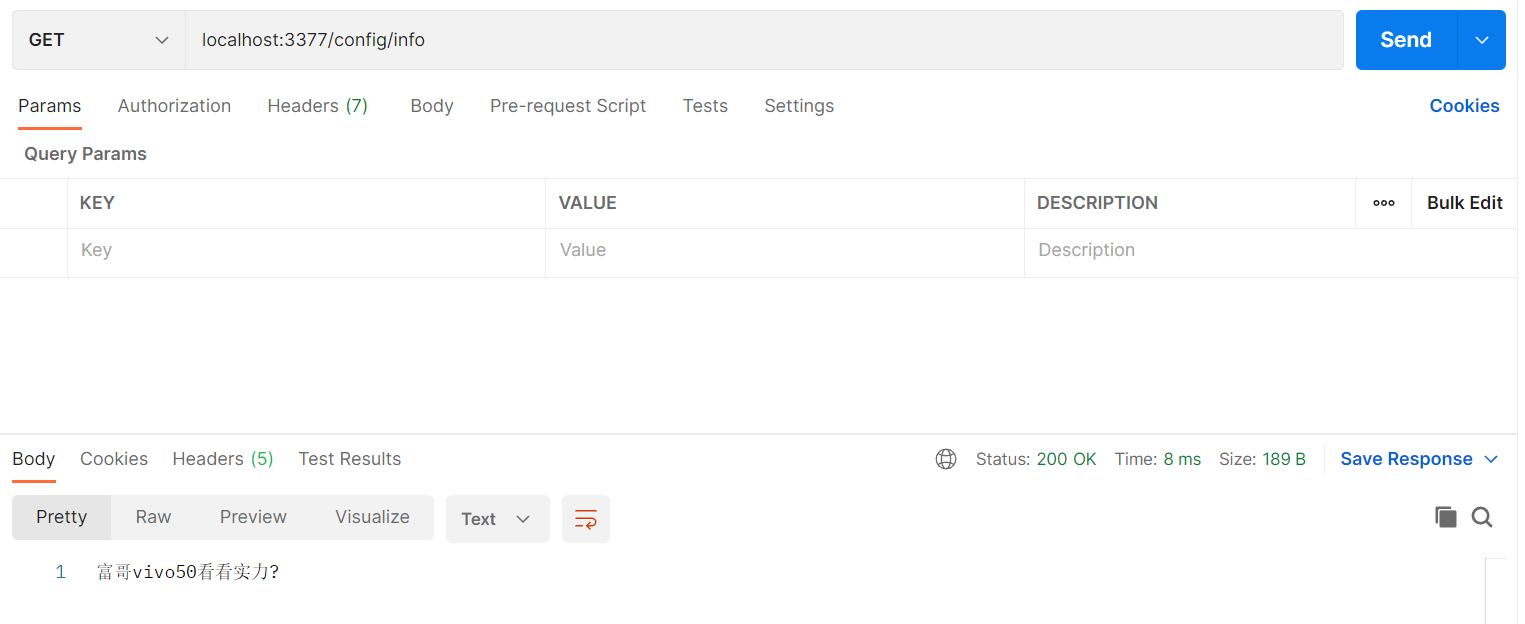
代码测试
GET localhost:3377/config/info
以上这些代码是支持动态刷新的, 但是记得Controller头上要添加@RefreshScope注解才会开启自动刷新
Nacos的DataID配置 创建第二个配置文件nacos-config-client-test.yml
配置了什么就是什么环境
将3377的application.yml配置文件换成test
1 2 3 4 spring: profiles: # active: dev #表示开发环境 active: test#表示测试环境
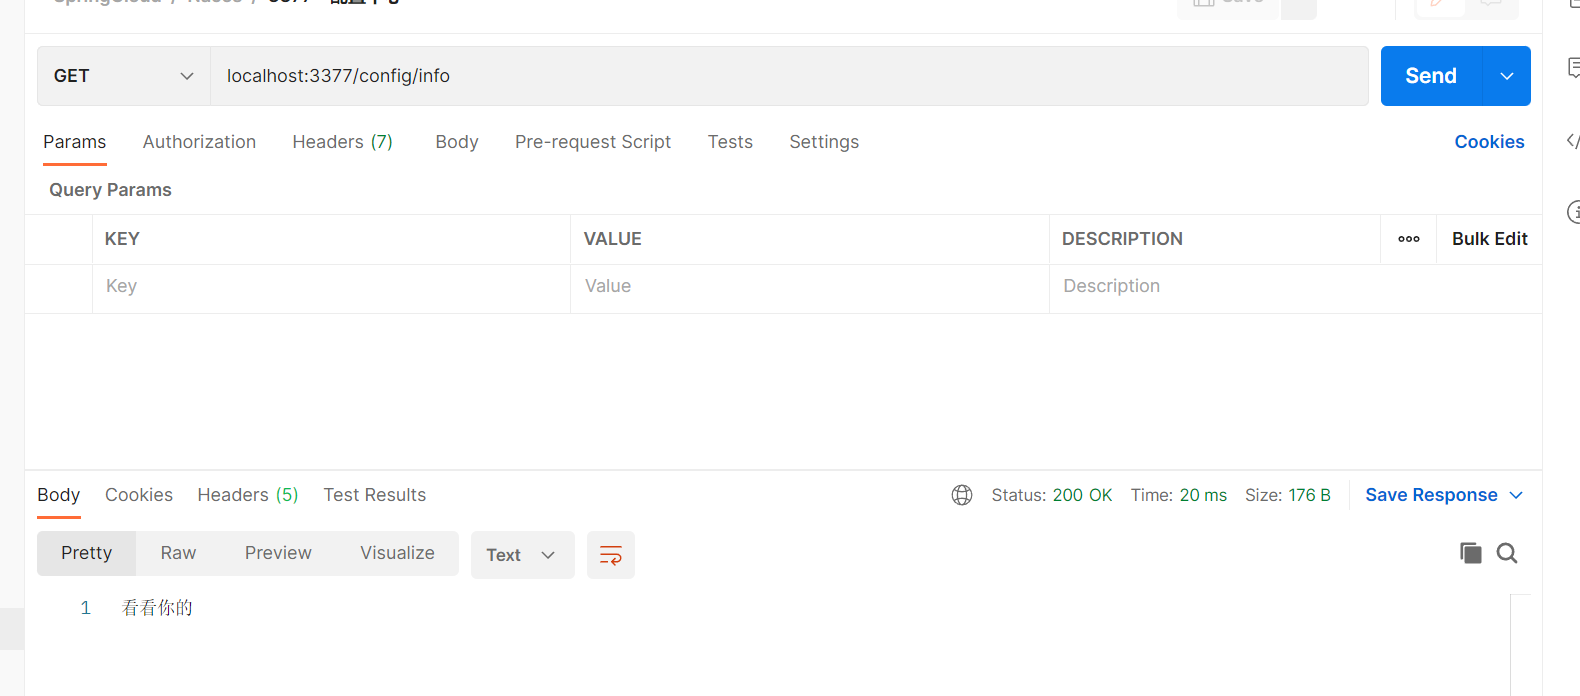
postman测试, 成功读取到了test环境的info
Nacos的group分组方案 创建两个group
nacos-config-client-info.yml TEST_GROUP
1 2 config:
nacos-config-client-info.yml DEV_GROUP
1 2 config:
然后修改application.yml和bootstrap.yml
bootstrap.yml添加group
1 2 3 4 5 6 7 8 9 10 11 12 13 14 15 16 17 18 # nacos配置3377 8848 #Nacos服务注册中心地址8848 #Nacos作为配置中心地址
application.yml切换active
1 2 3 4 5 spring:
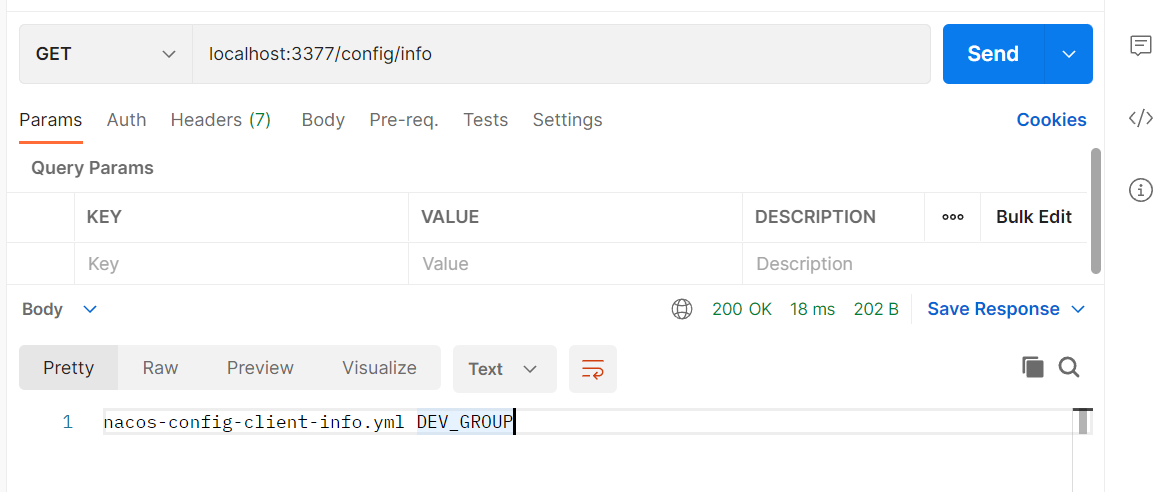
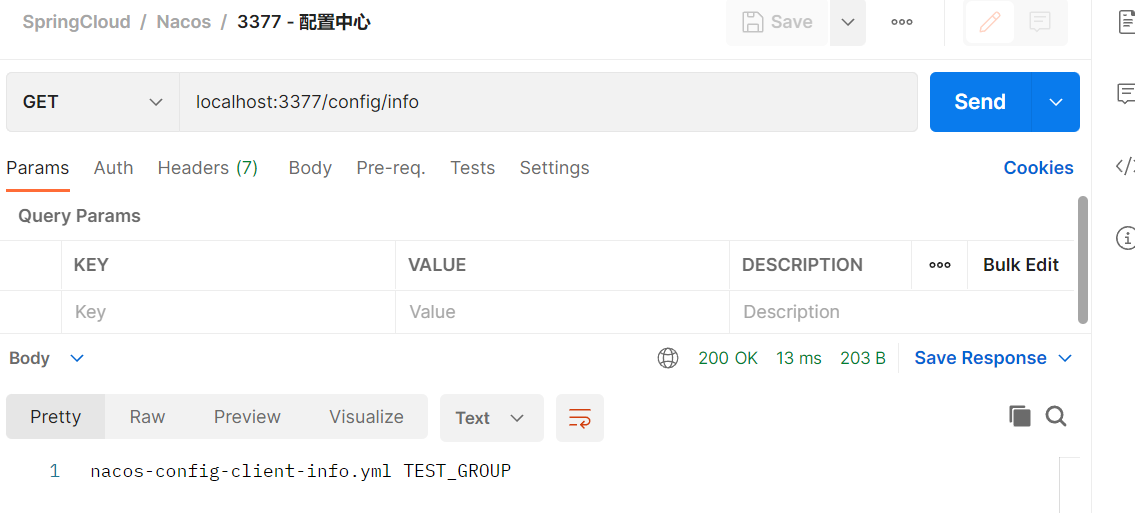
当处于DEV组的时候代码测试
当处于TEST组的时候代码测试
Nacos的命名空间namespace 创建一个命名空间dev, 然后创建几个不同环境的配置文件
bootstrap.yml
1 2 3 4 5 6 7 8 9 10 11 12 13 14 15 16 17 18 19 # nacos配置3377 8848 #Nacos服务注册中心地址8848 #Nacos作为配置中心地址
application.yml
1 2 3 4 5 spring:
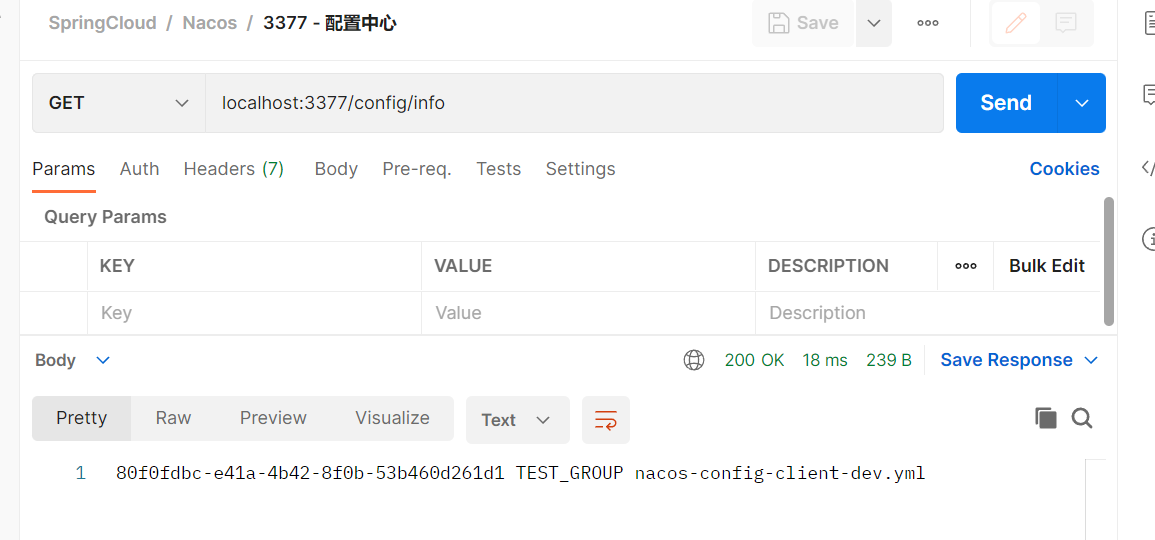
代码测试:
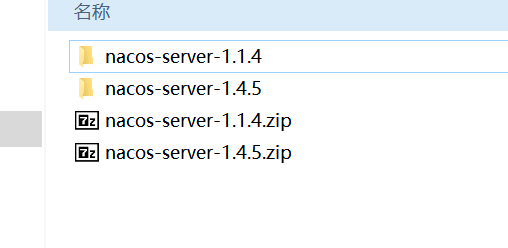
Nacos持久化切换配置 之前用的版本是1.1.4, 貌似不是很适配mysql8,所以我换了个版本
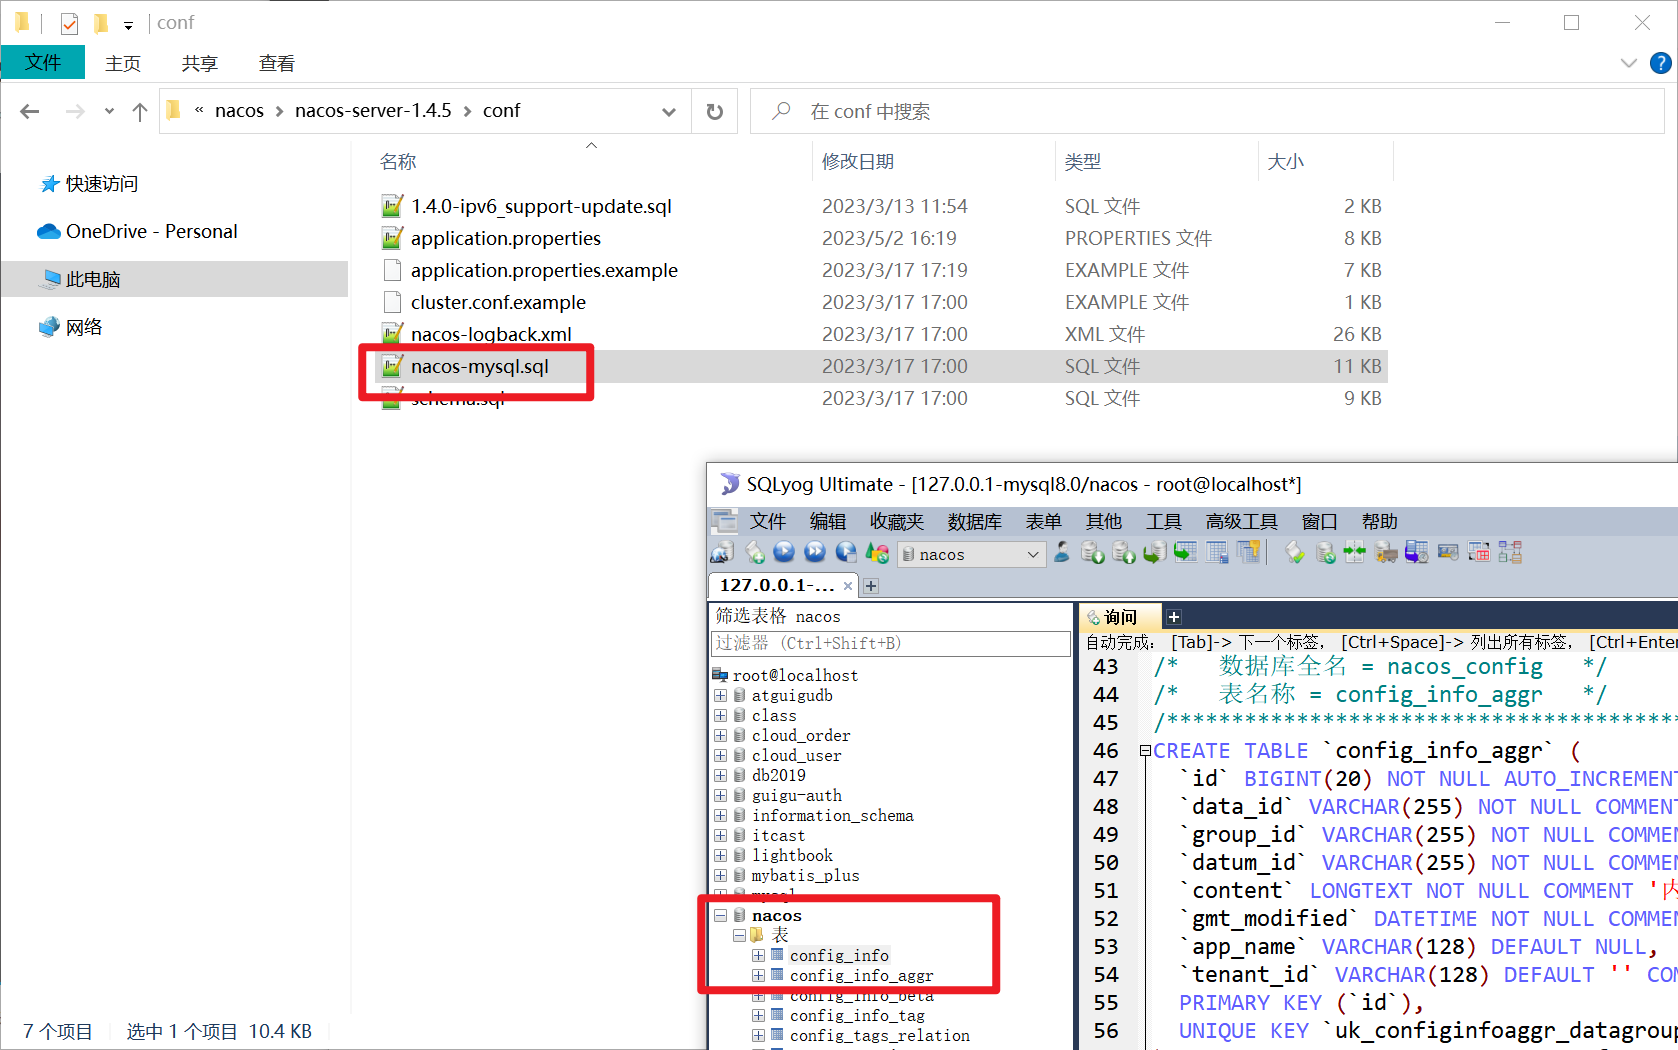
数据库中运行nacos-mysql.sql文件, 数据库创建名称是nacos
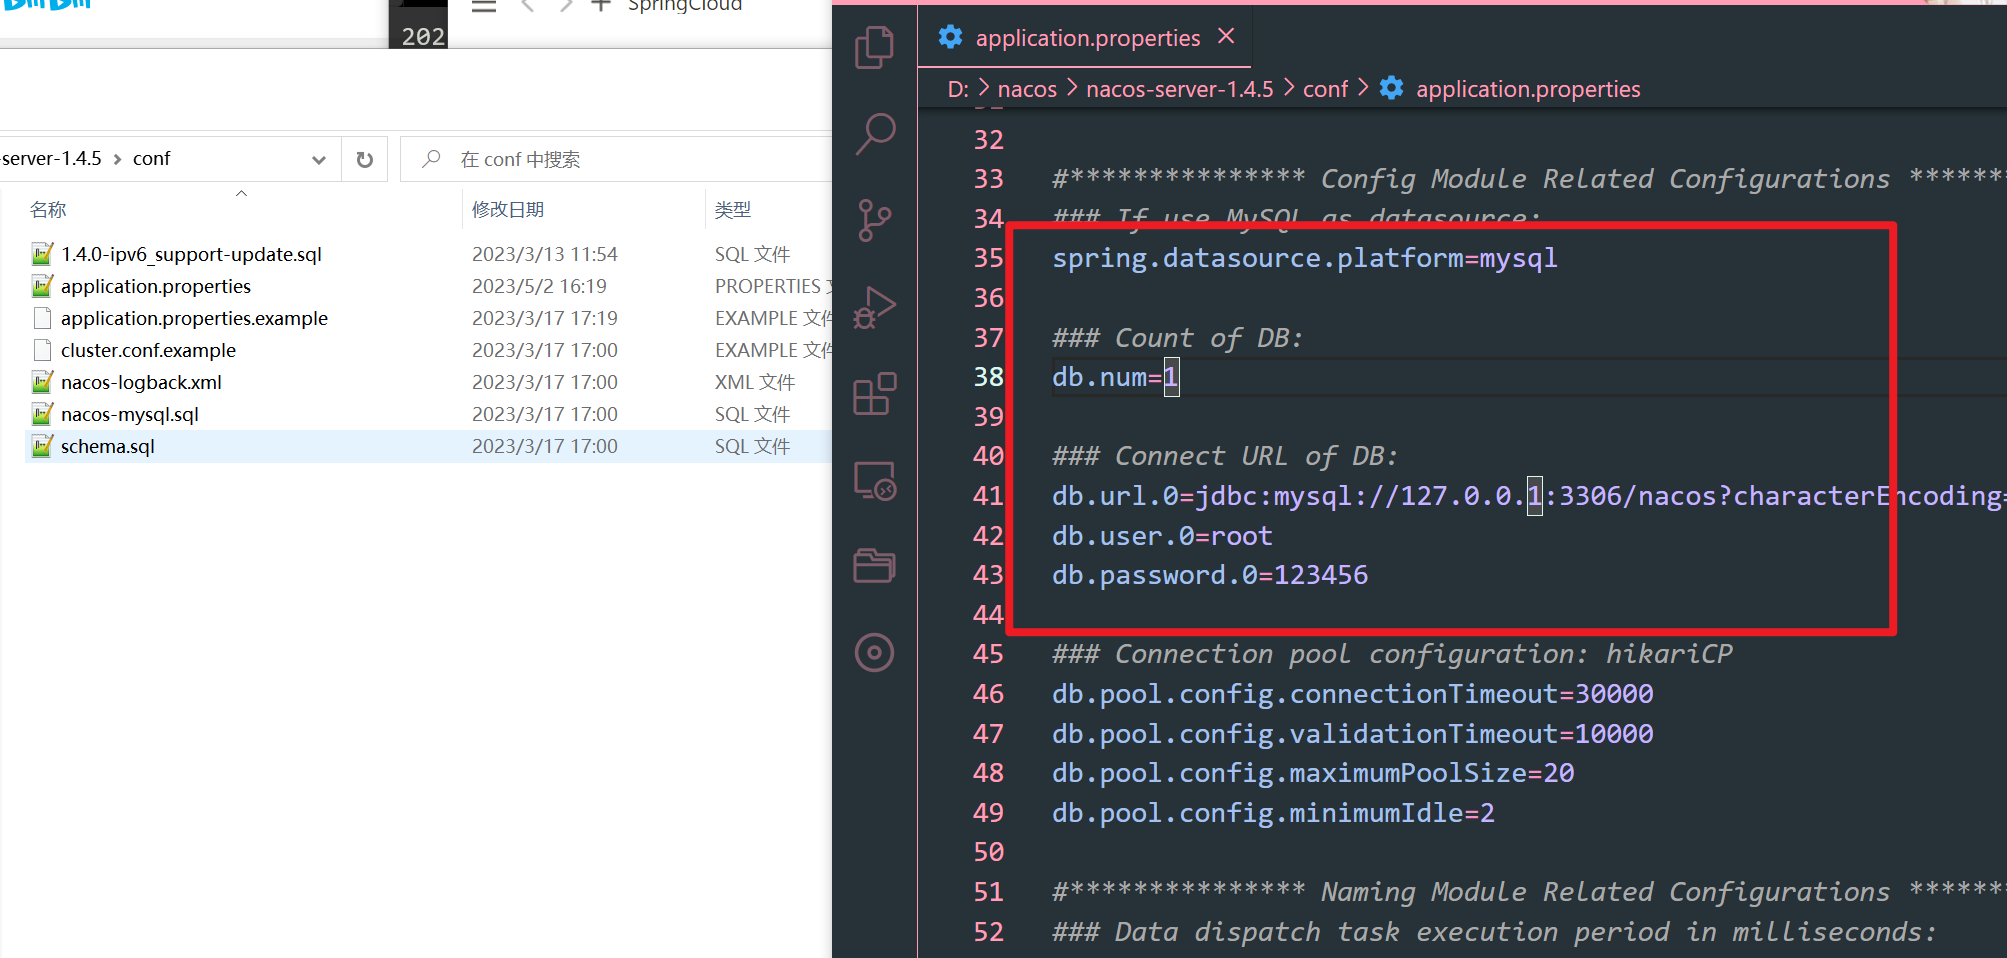
然后解开配置文件中的相关配置,让nacos切换成mysql数据库
由于1.4.5的启动方式是默认用的集群模式启动的
此时我们为了简单,可以直接先用单机模式(单机启动)启动一下
1 ./startup.cmd -m standalone
启动完成登录进入,随便创建一个配置文件, 到数据库查看, 发现创建出来文件成功的保存到了数据库中
此时的持久化操作配置就完成了
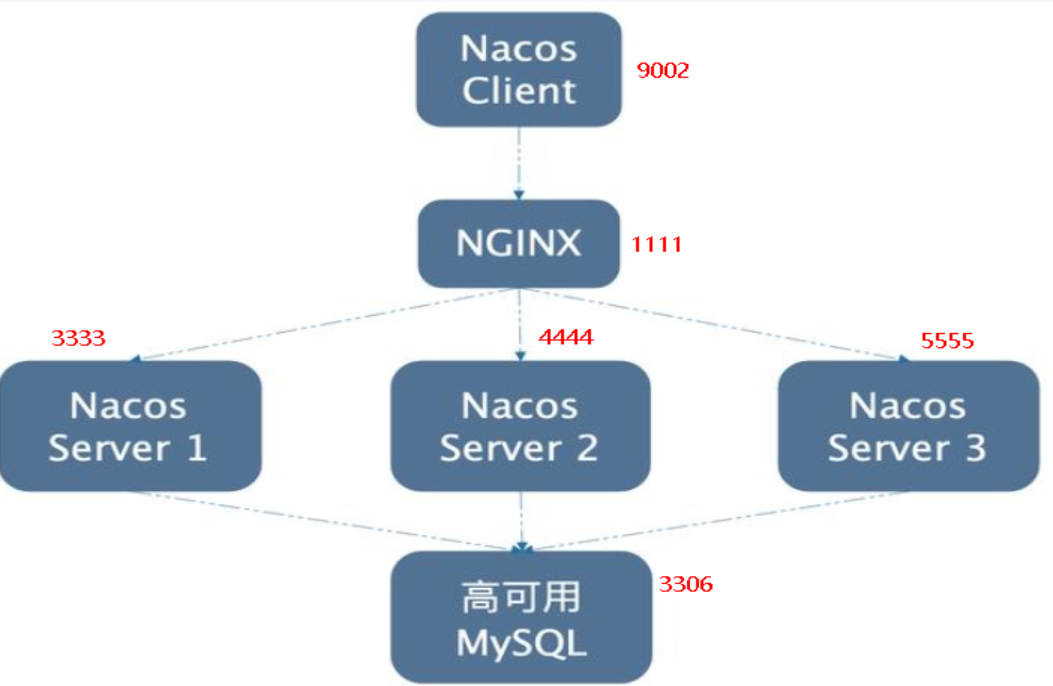
搭建Nacos集群环境 我的linux用的是mysql5.7版本,所以这懒得切换了直接用的是1.1.4版本
https://github.com/alibaba/nacos/releases/tag
下载nacos
1 $ wget https://github.com/alibaba/nacos/releases/download/2.2.2/nacos-server-1.1.4.tar.gz
解压
1 2 $ tar -zxvf nacos-server-1.1.4.tar.gz -C /opt/module/cd /opt/module/nacos/conf
进入mysql,导入nacos的配置文件
1 2 3 4 5 6 7 8 9 10 $ mysql -uroot -psource nacos-mysql.sqlexit
修改application.properties
1 2 3 4 5 6 7 8 9 10 11 12 13 $ vim application.propertiestrue &useUnicode=true &useSSL=false &serverTimezone=UTC
配置cluster
1 2 3 4 5 6 7 8 9 10 11 12 13 14 $ cp cluster.conf.example cluster.conf
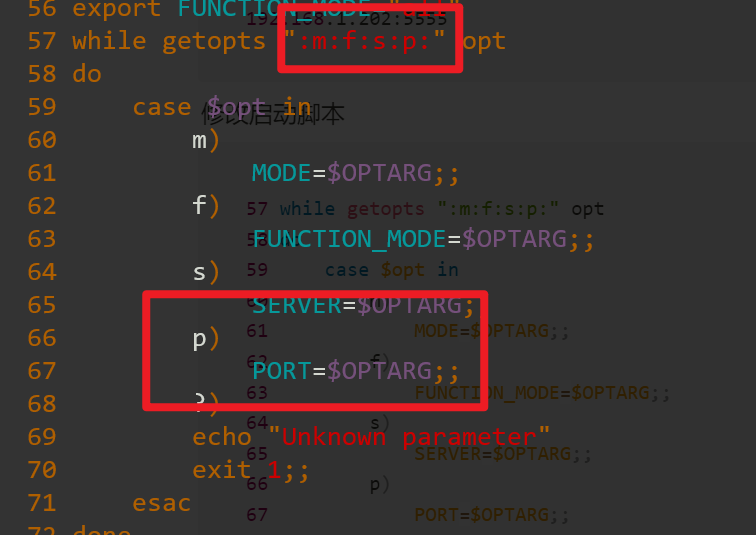
修改启动脚本
1 2 3 4 5 6 7 8 9 10 11 12 13 14 15 16 17 18 19 57 while getopts ":m:f:s:p:" optdo case $opt in $OPTARG ;;$OPTARG ;;$OPTARG ;;$OPTARG ;;echo "Unknown parameter" exit 1;;esac done nohup $JAVA -Dserver.port=${PORT} ${JAVA_OPT} nacos.nacos >> ${BASE_DIR} /logs/start.out 2>&1 &
启动集群
1 2 3 4 5 6 $ /opt/module/nacos/bin/startup.sh -p 3333wc -l
配置nginx
1 2 3 4 5 6 7 8 9 10 11 12 13 14 15 16 17 18 19 20 21 22 23 24 25 $ pwd
之后浏览器访问http://192.168.1.202:1111/nacos
说明集群配置成功
将*cloudalibaba-provider-payment9001* 微服务注册注册到nacos
修改yml,换成nginx的地址
1 2 3 4 5 6 7 8 9 10 11 12 13 14 15 16 17 server:'*'
可以看见服务列表中出现了刚刚注册进去的微服务
总结
下载Sentinel 下载地址: https://github.com/alibaba/Sentinel/releases/tag/1.7.0
下载之后直接使用命令运行java -jar .\sentinel-dashboard-1.7.0.jar
浏览器访问http://localhost:8080/
账号密码都是sentinel
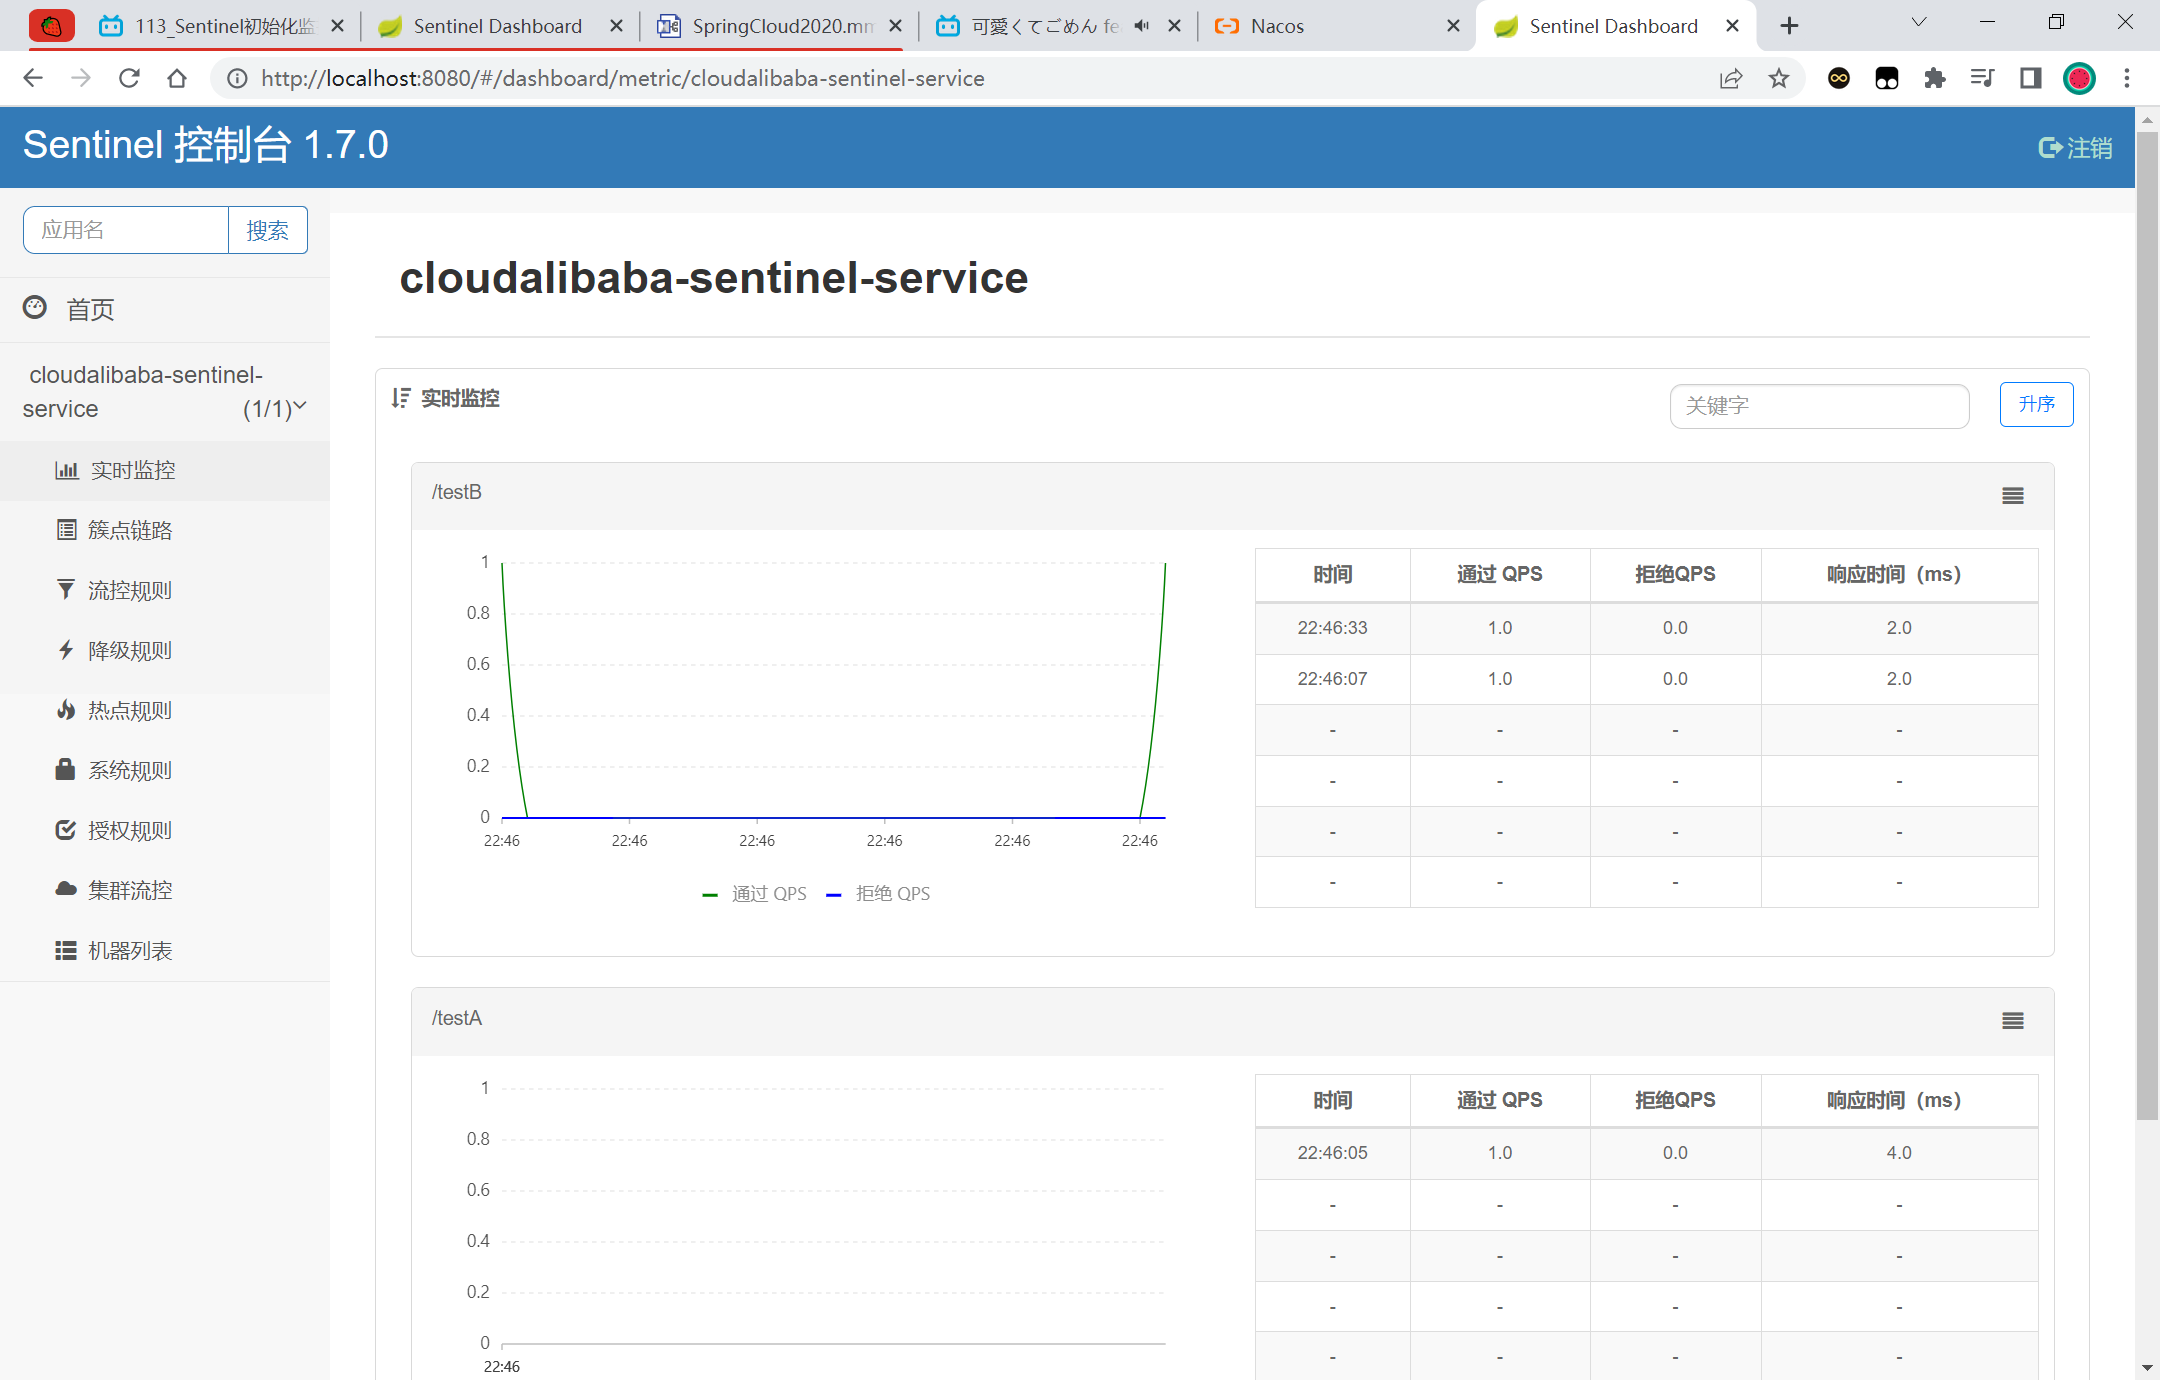
初始化监控 创建*cloudalibaba-sentinel-service8401*模块
pom
1 2 3 4 5 6 7 8 9 10 11 12 13 14 15 16 17 18 19 20 21 22 23 24 25 26 27 28 29 30 31 32 33 34 35 36 37 38 39 40 41 42 43 44 45 46 47 48 49 50 51 52 53 54 <dependencies>true </optional>true </optional>test </scope>
yml
1 2 3 4 5 6 7 8 9 10 11 12 13 14 15 16 17 18 19 20 21 22 23 server:'*'
Controller
1 2 3 4 5 6 7 8 9 10 11 12 13 14 15 16 17 18 19 package com.atguigu.springcloud.alibaba.controller;"/testA" )testA return "------testA" ;"/testB" )testB return "------testB" ;
入口函数
1 2 3 4 5 6 7 @EnableDiscoveryClient
记得先要启动nacos把服务注册上去,同时也要启动sentinel在后台挂着
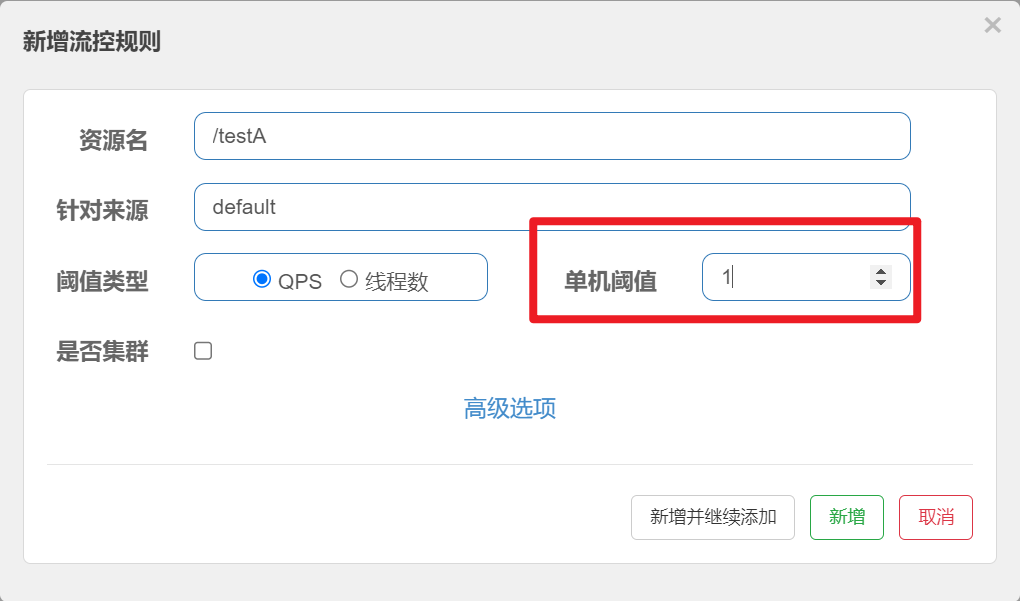
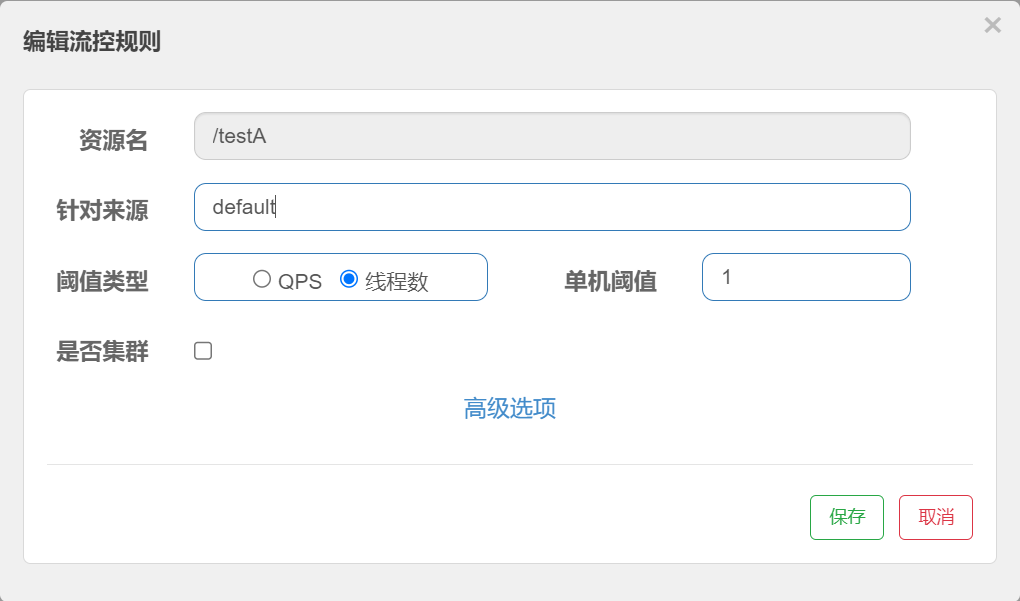
流控 - QPS直接失败 对A进行流控
单机阈值设置成1, 表示一秒只能请求一次,多了就会限流
QPS的意思是: 每秒钟的请求数量
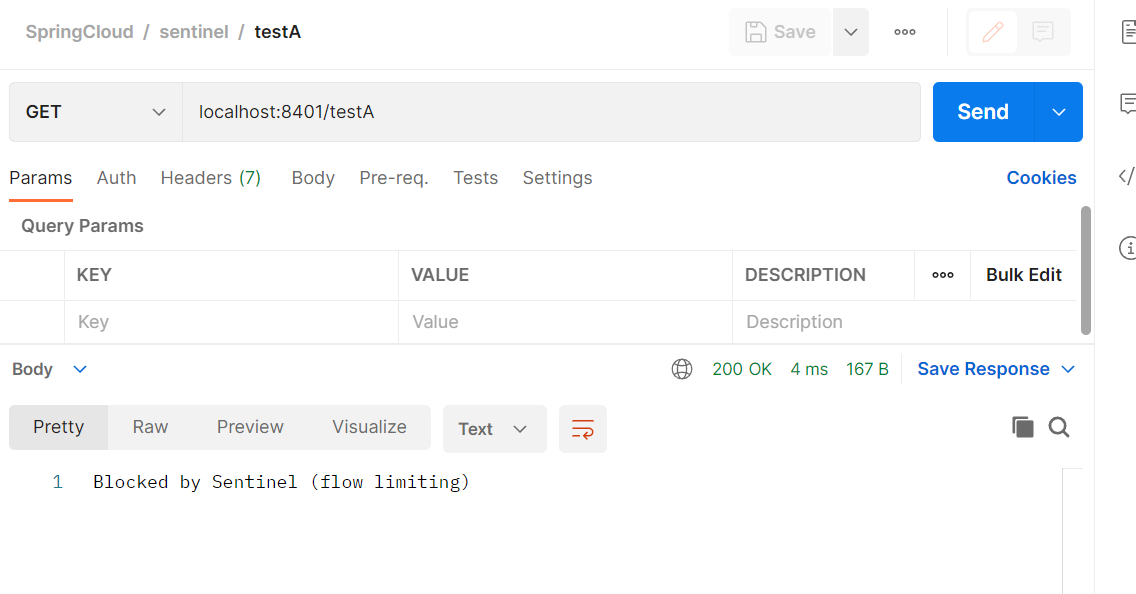
限流就会提示Blocked by Sentinel (flow limiting)
流控 - 线程数直接失败 配置流控规则线程数规则,单机阈值为1
然后修改Controller业务代码
1 2 3 4 5 6 7 8 9 10 11 12 13 14 15 16 17 18 19 @RestController"/testA" )testA sleep (2000);return "------testA" ;"/testB" )testB return "------testB" ;
让请求testA睡上两秒,来了一堆,请求, 但是实际处理线程的数量只有一个
第一个来了的可以立马处理, 第二个第三个.…后面来得请求就不能得到立刻处理, 所以被限流
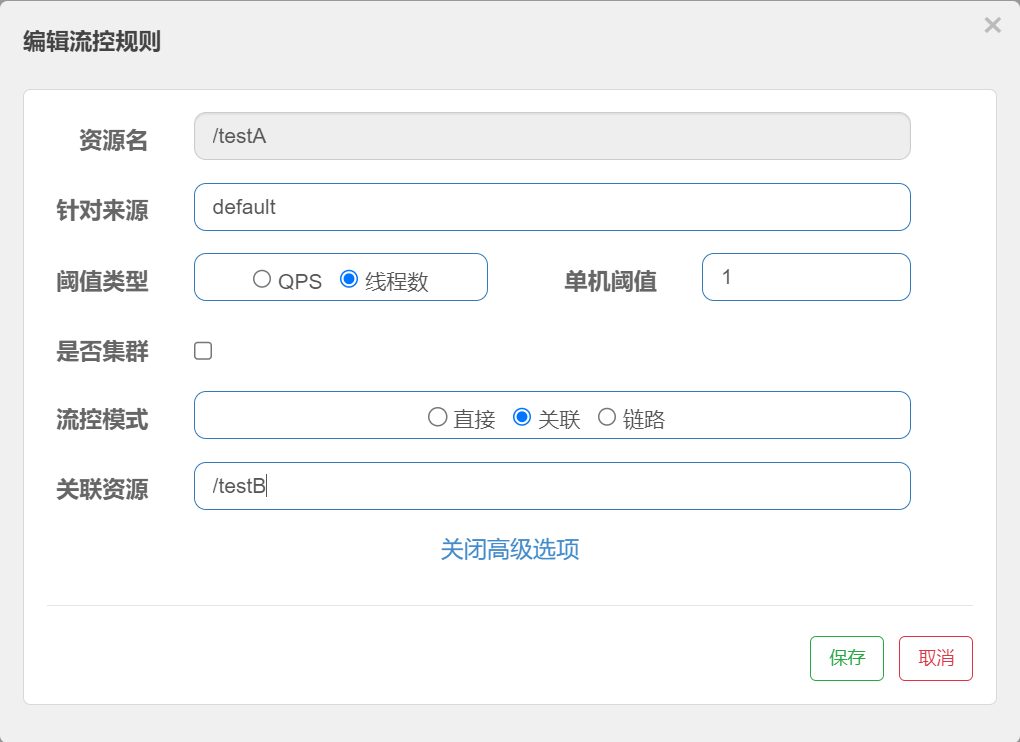
流控 -关联 有点像连坐
当B犯事了, A也就被限流了
修改业务类Controller
1 2 3 4 5 6 7 8 9 10 11 12 13 14 @RestController"/testA" )testA return "------testA" ;"/testB" )testB return "------testB" ;
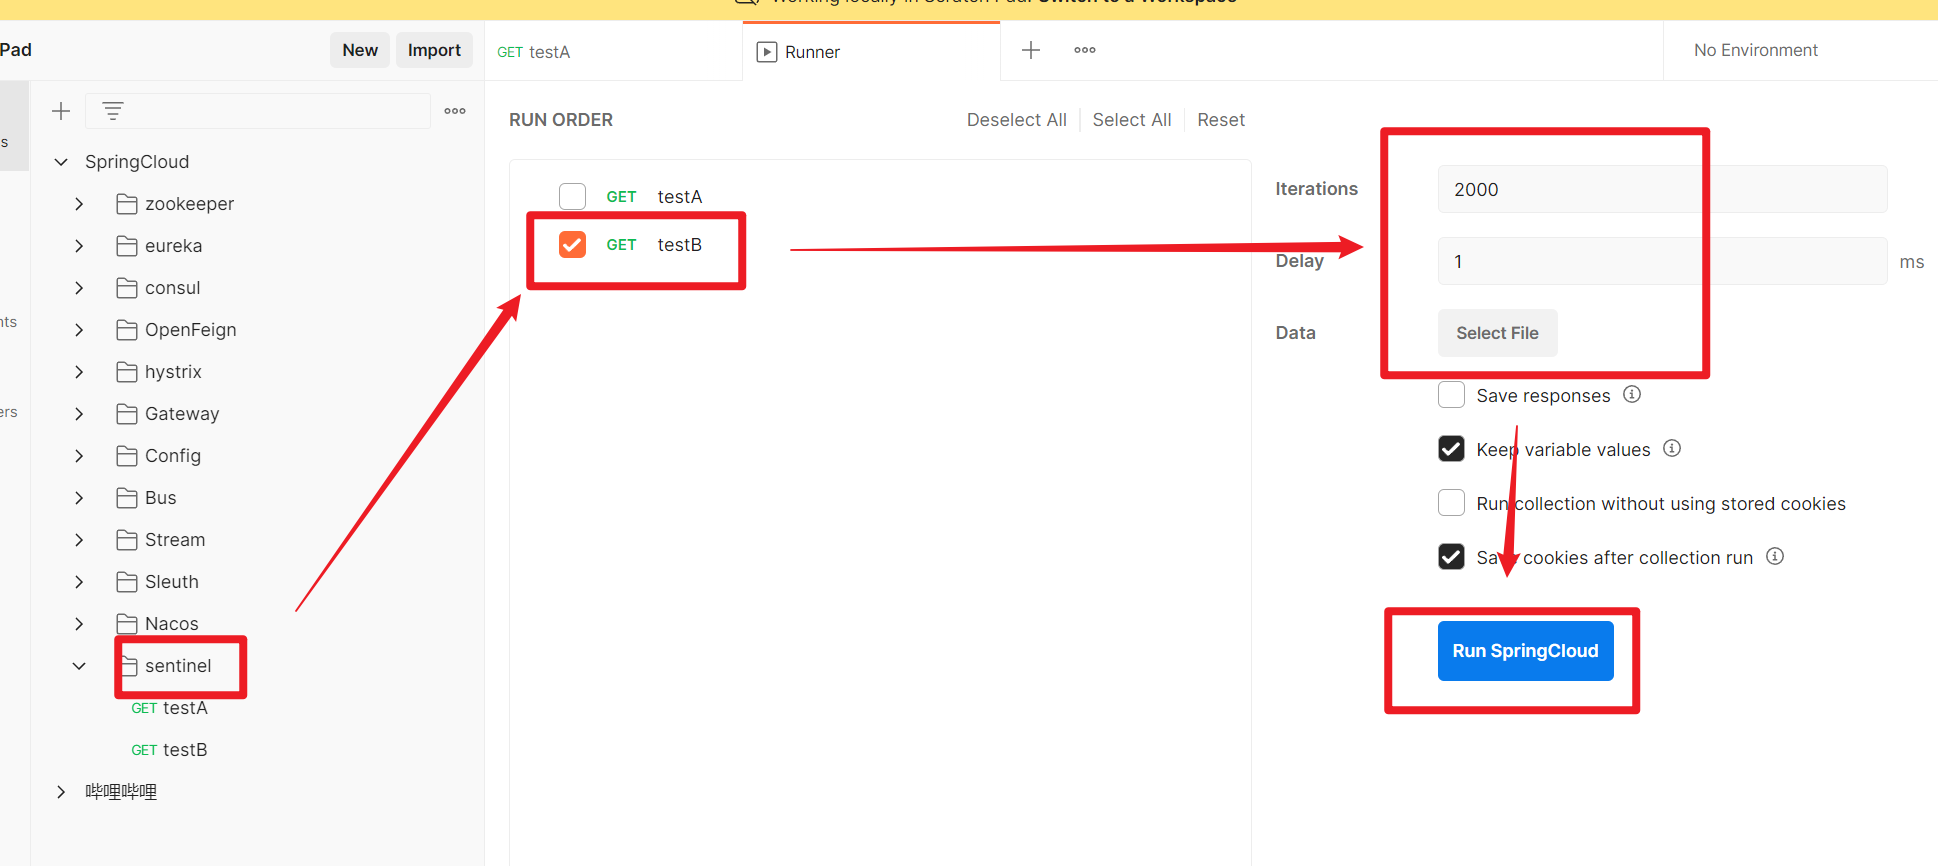
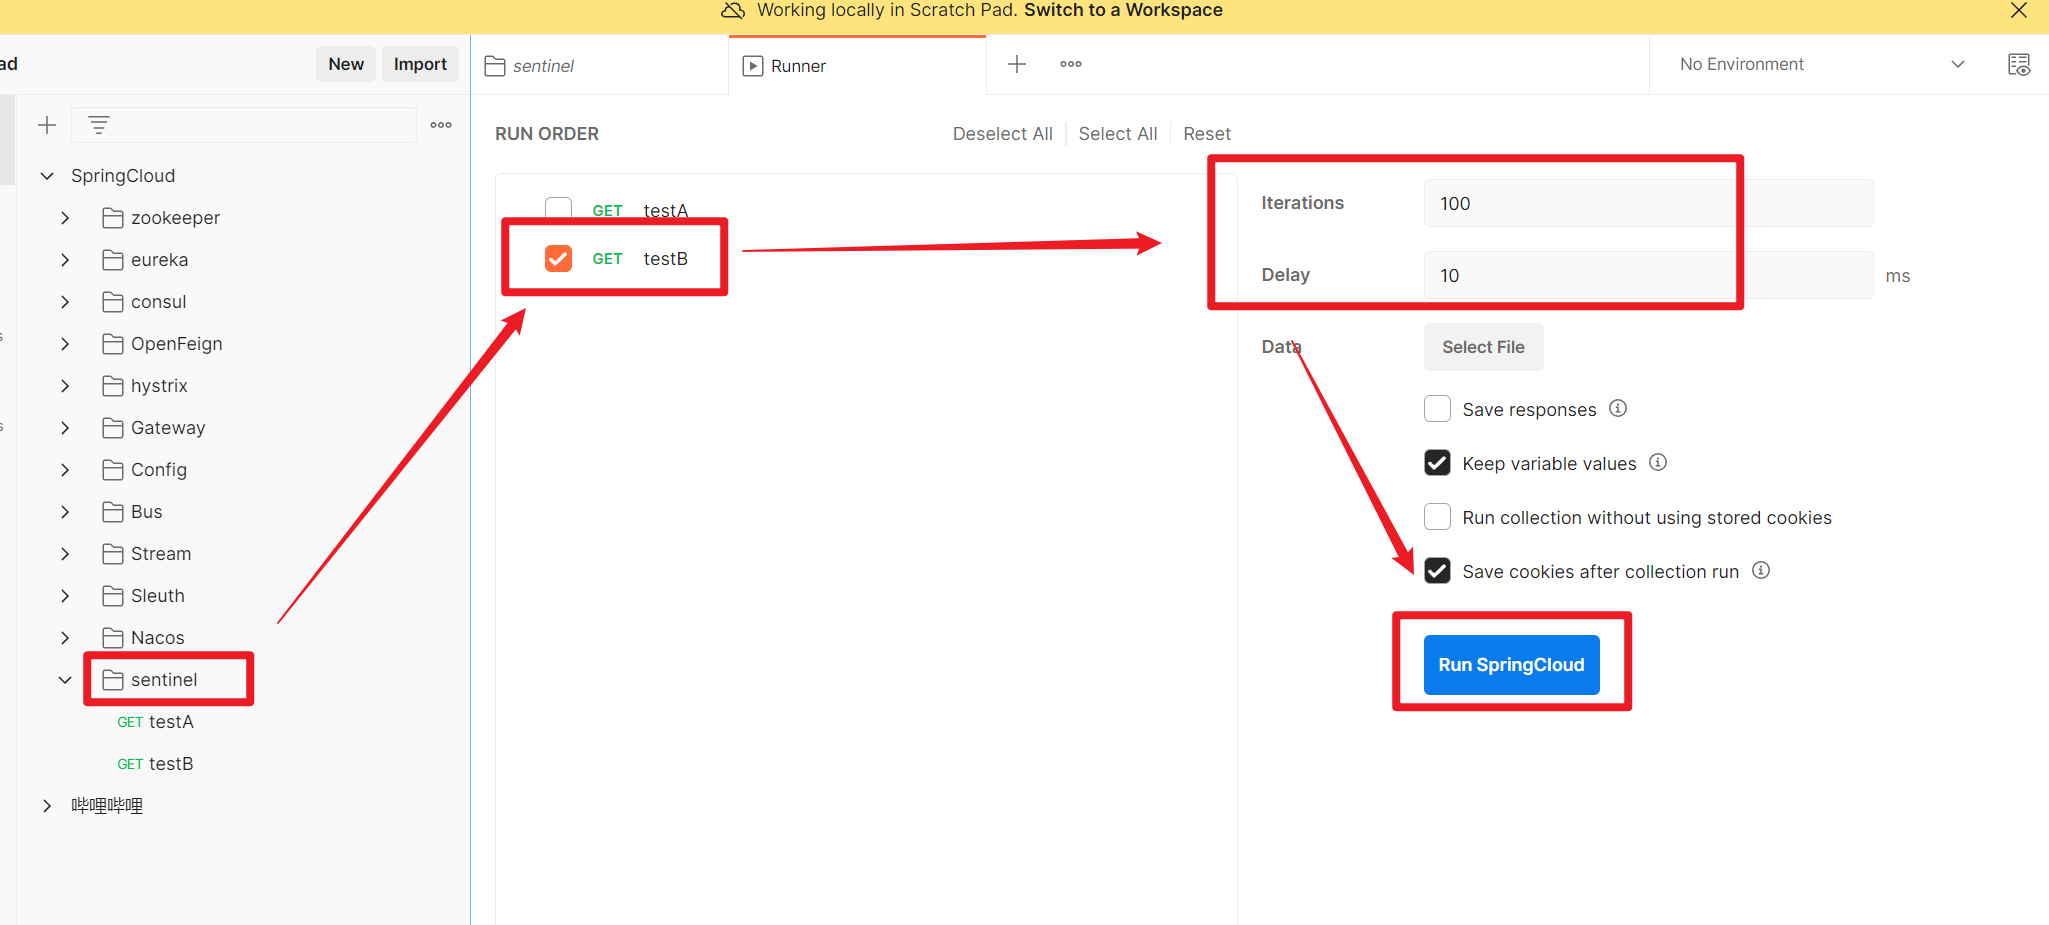
使用postman进行测试
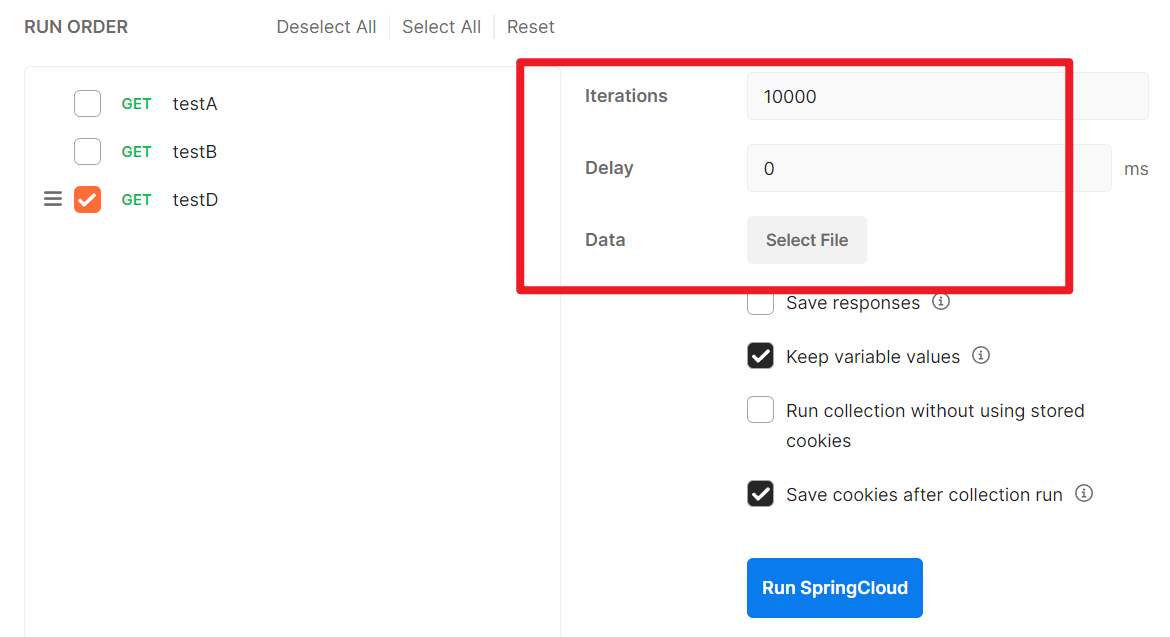
循环2000次请求, 间隔1毫秒
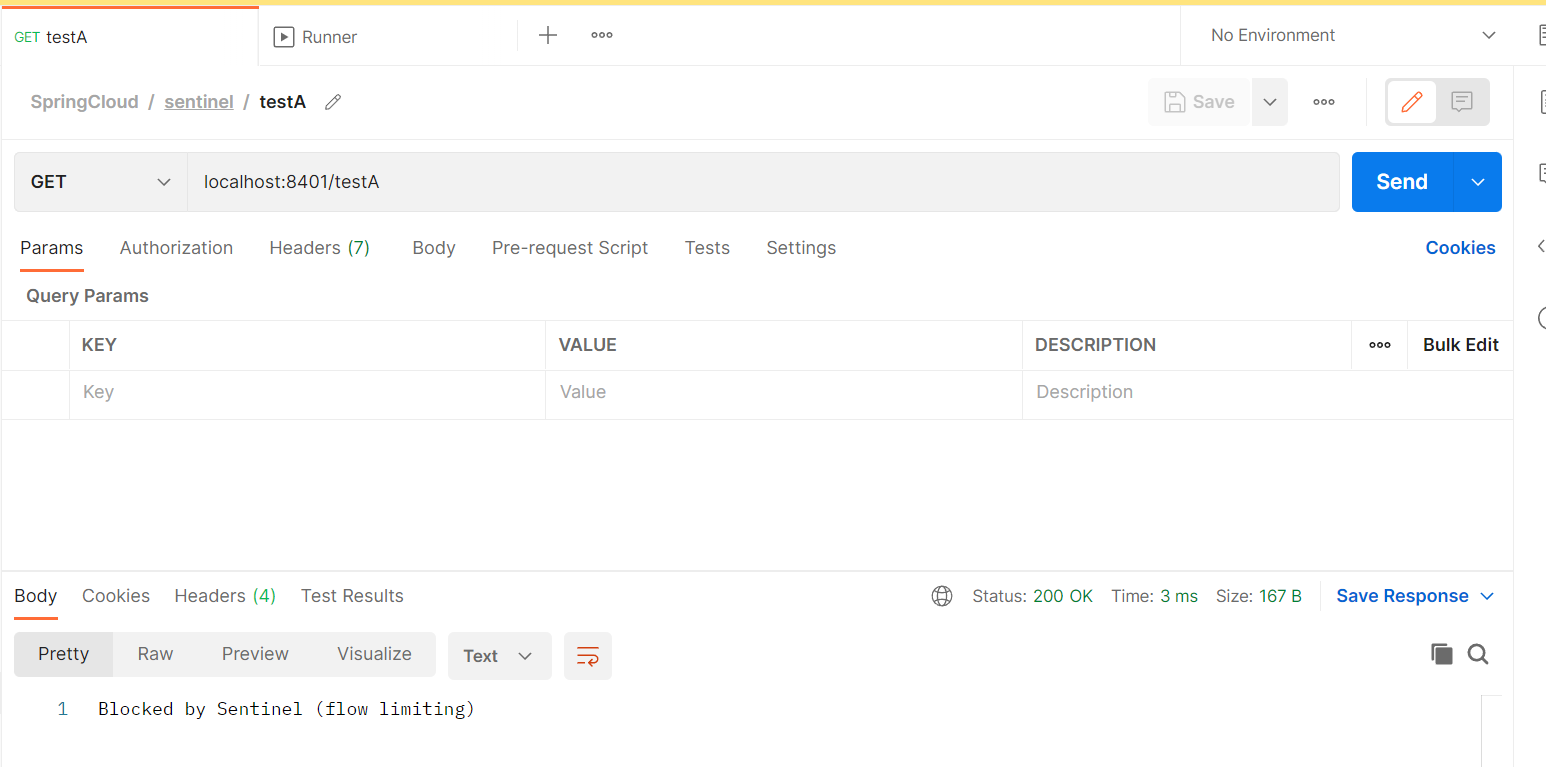
然后切换到testA给A发送请求, 此时的B已经被限流了
由于这个限流规则是关联的, 所以A也被限流了
流控 - 预热效果
对着浏览器狂点, 前5秒的阈值是10/3=3, 五秒之后的阈值就慢慢的预热到了10
默认 coldFactor 为 3,即请求QPS从(threshold / 3) 开始,经多少预热时长才逐渐升至设定的 QPS 阈值。
案例,阀值为10+预热时长设置5秒。
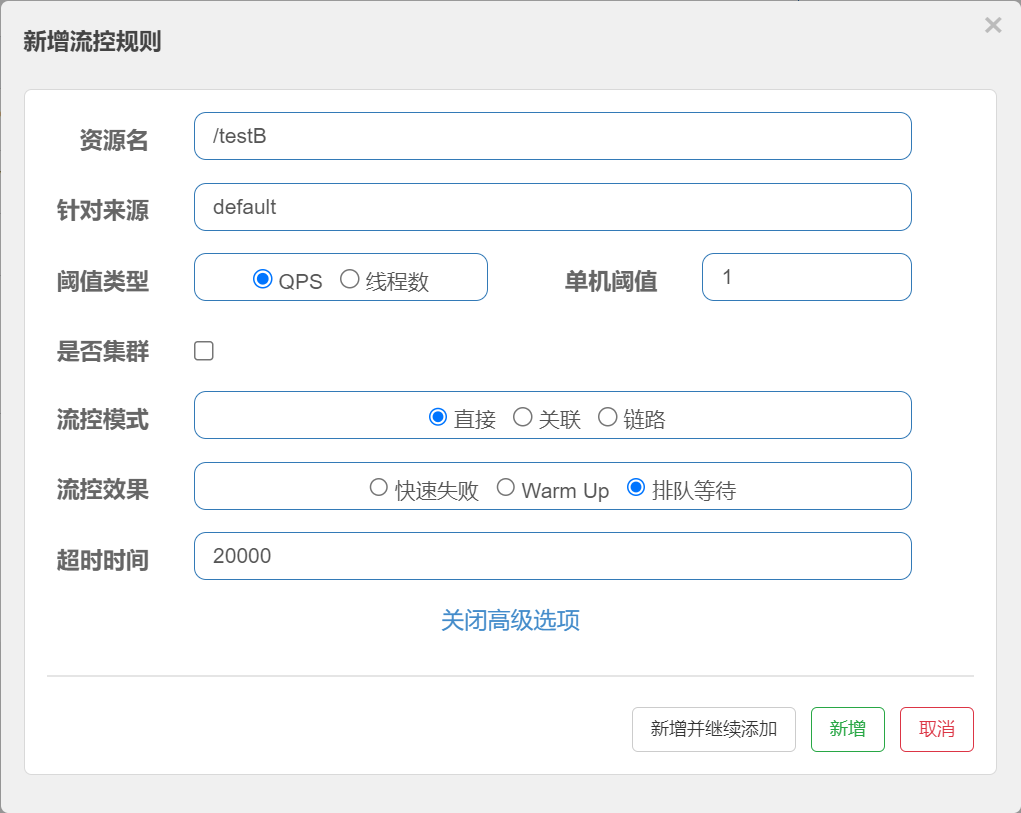
流控 - 排队等待 配置如下流控规则, 单机阈值是1, 每次只能处理一个请求, 多了的请求就在后面排队等待
等待的时间超过了20秒, 就会超时
模拟并发请求
可以发现testB控制每一秒处理一个请求
降级-RT
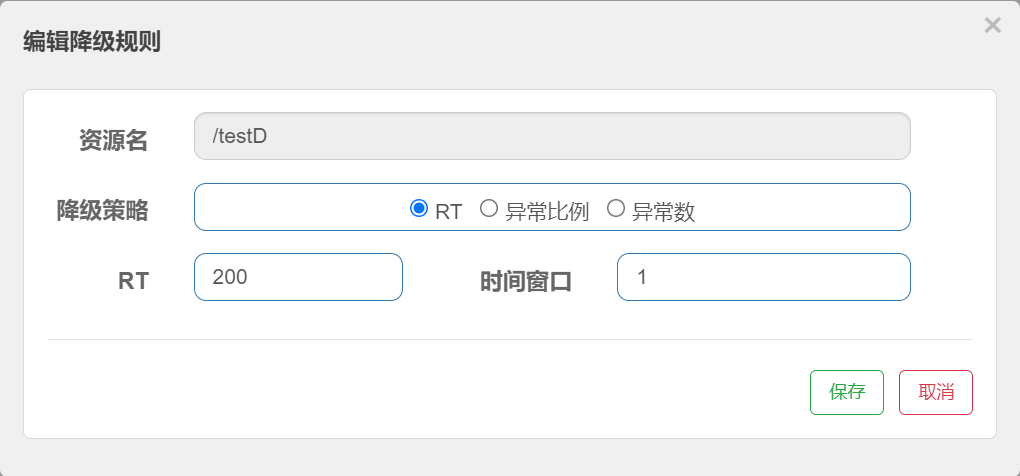
配置降级规则
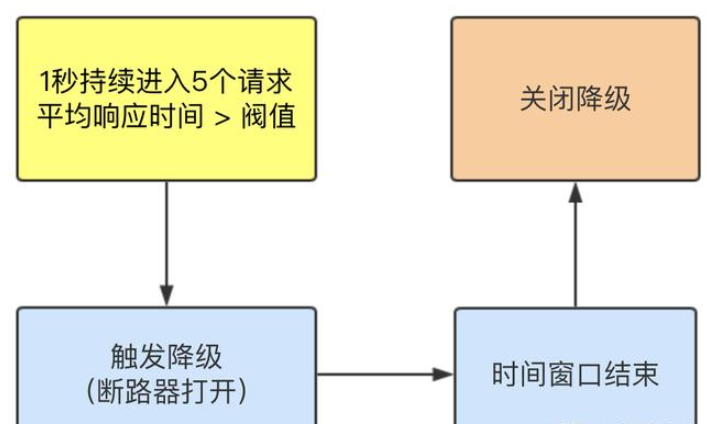
在200毫秒内的响应时间没有响应, 断路器将会在未来的1秒内打开(保险丝跳闸),微服务就不可用了
使用postman发送多个请求,间隔0毫秒
由于testD的请求是1秒中才处理完一个请求, 1秒钟比200毫秒的阈值要大, 所以会被降级
1 2 3 4 5 6 7 8 @GetMapping("/testD" )testD sleep (1); } catch (InterruptedException e) { e.printStackTrace(); }"testD 测试RT" );return "------testD" ;
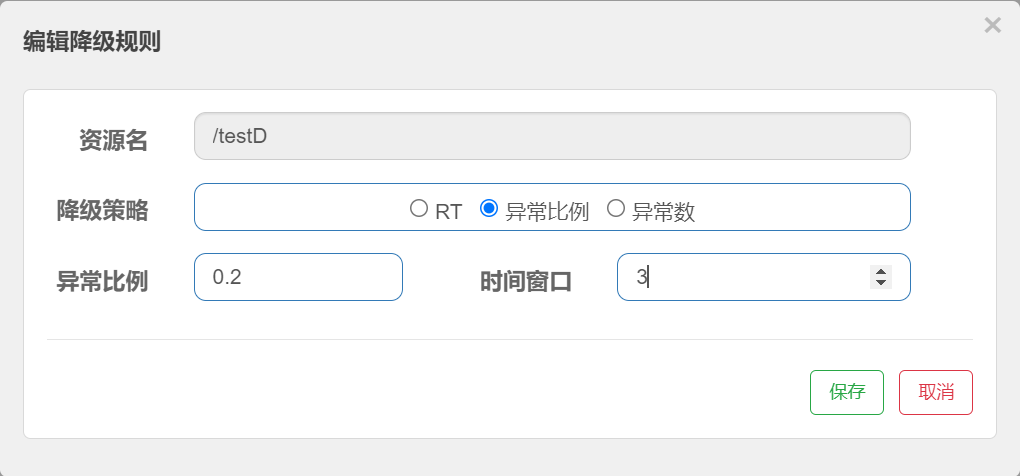
降级 - 异常比例 Controller
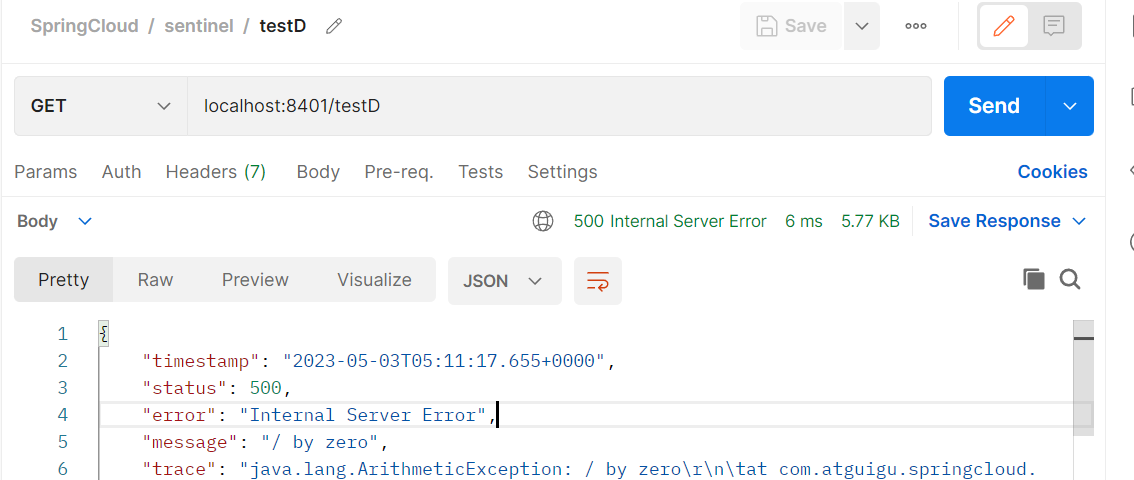
1 2 3 4 5 6 7 8 9 10 @GetMapping ("/testD" )public String testD (1 /0 ;info ("testD 测试异常比例" );return "------testD" ;
代码测试
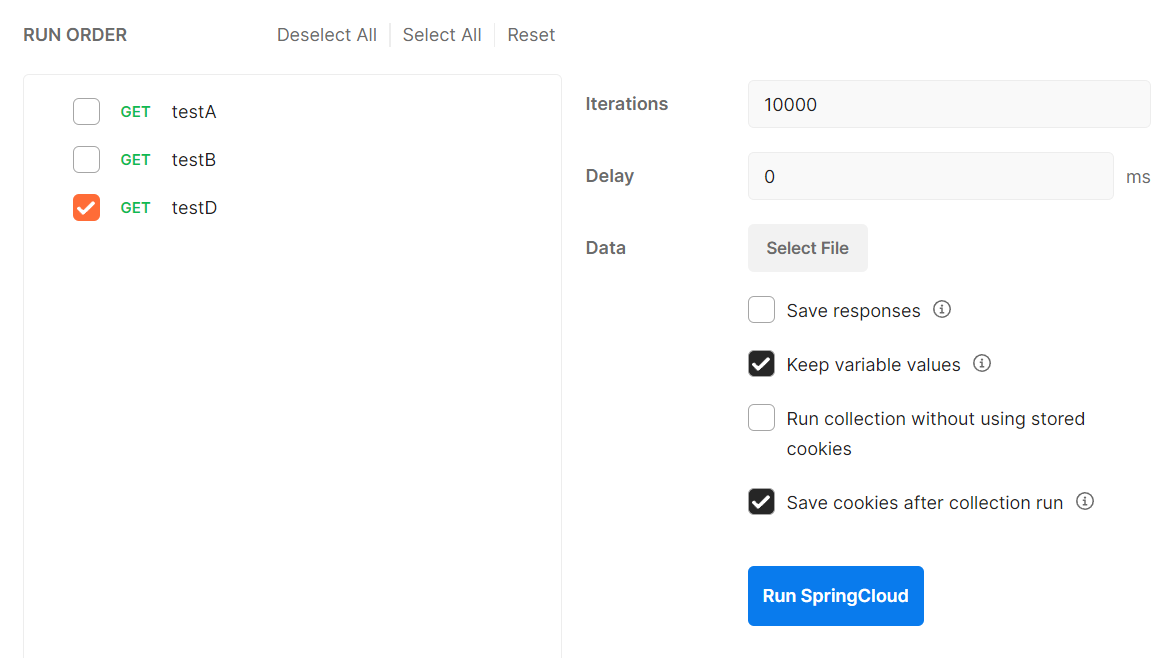
发送大量请求,每一次请求都会触发一个异常 , 每秒的请求的数量大于了5,并且异常的比例大于了20%,这必然会触发降级
当stop大量请求之后 , 服务降级就恢复了
降级 - 异常数 Controller
1 2 3 4 5 6 7 @GetMapping ("/testE" )public String testE (info ("testE 测试异常比例" );10 /0 ;return "------testE 测试异常比例" ;
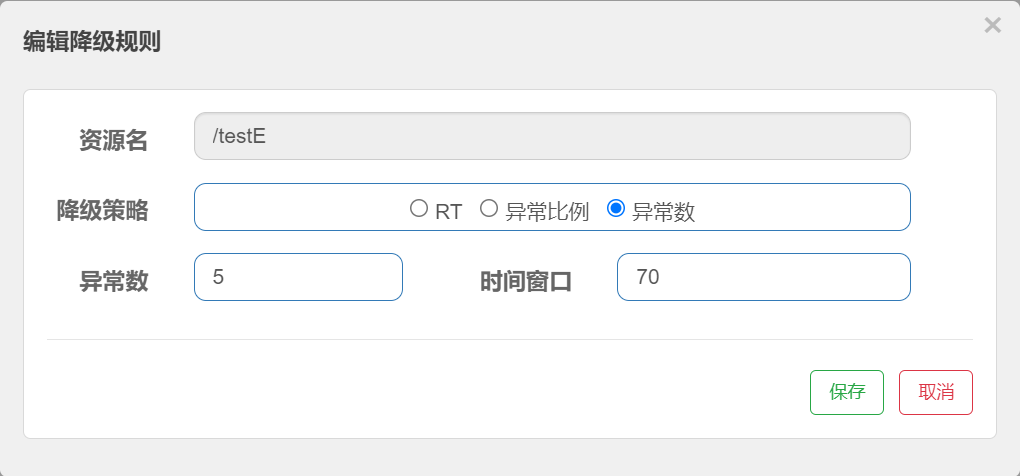
配置降级规则
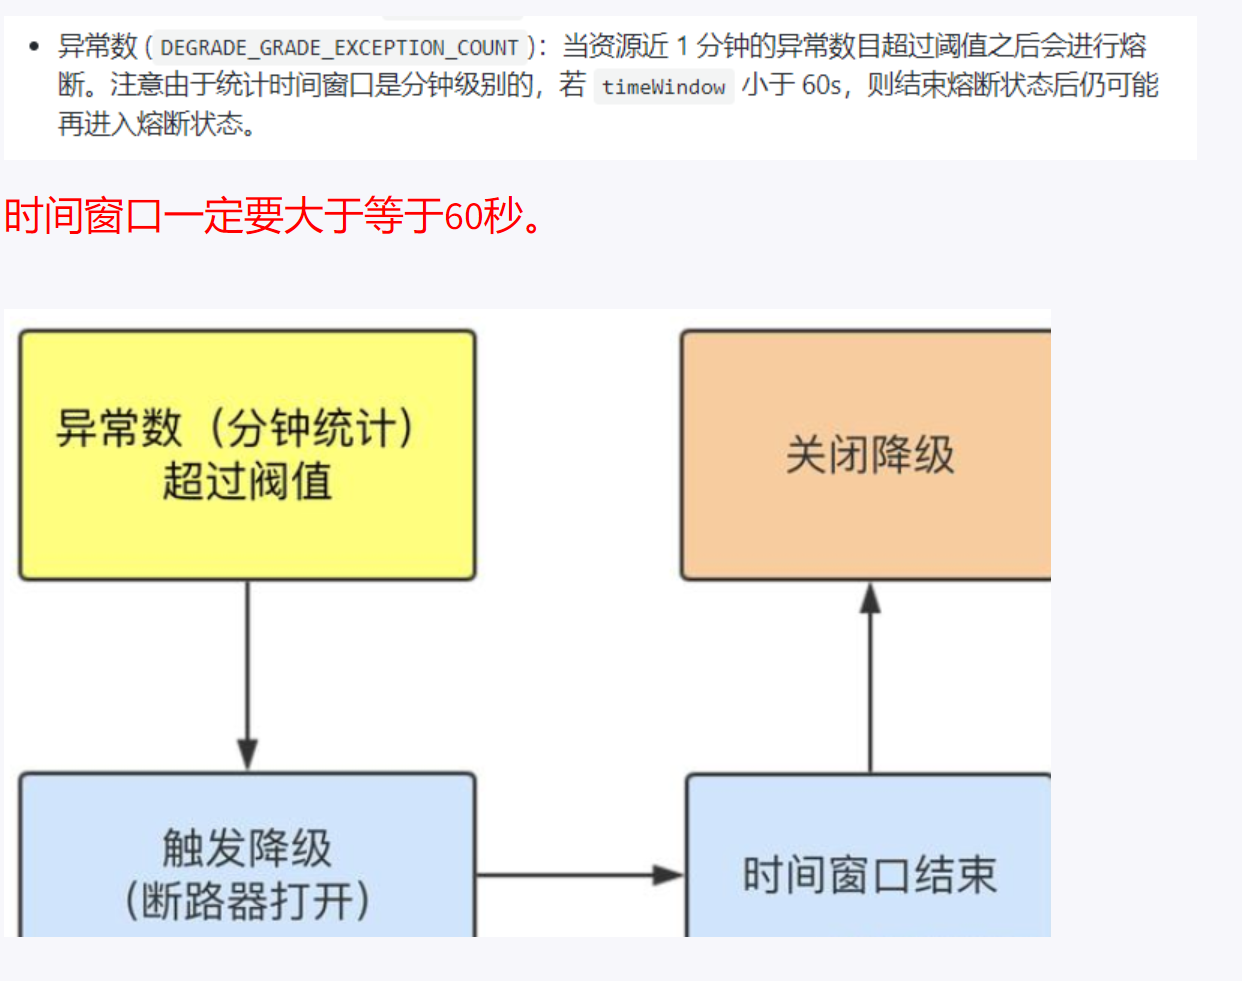
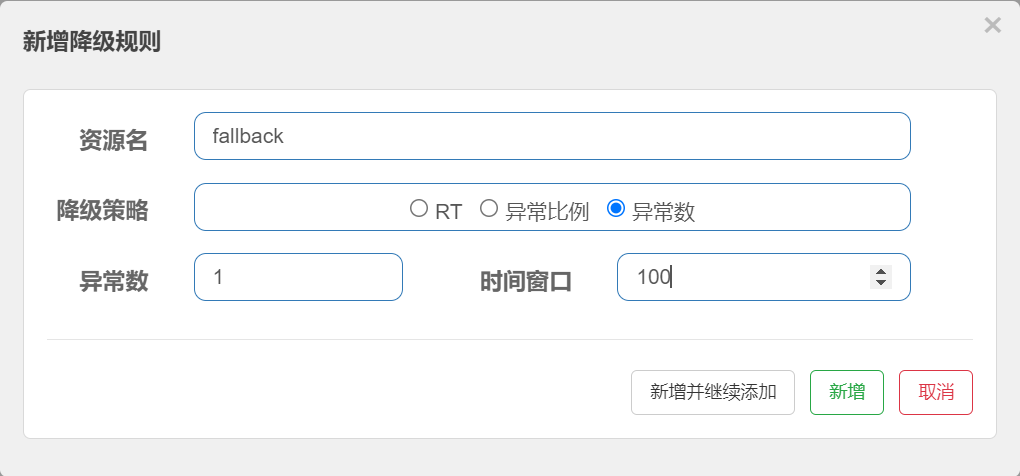
时间窗口期一定要大于等于60秒
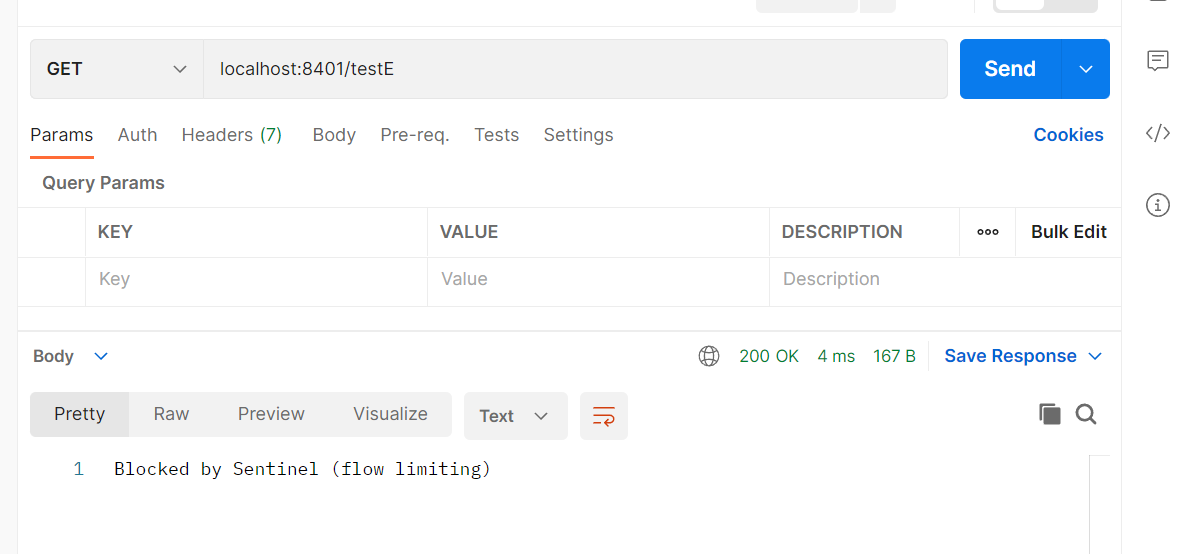
代码测试, 连续点击send发送五次请求, 就会触发熔断降级, 因为每一次请求都是会触发异常的
热点Key 热点规则
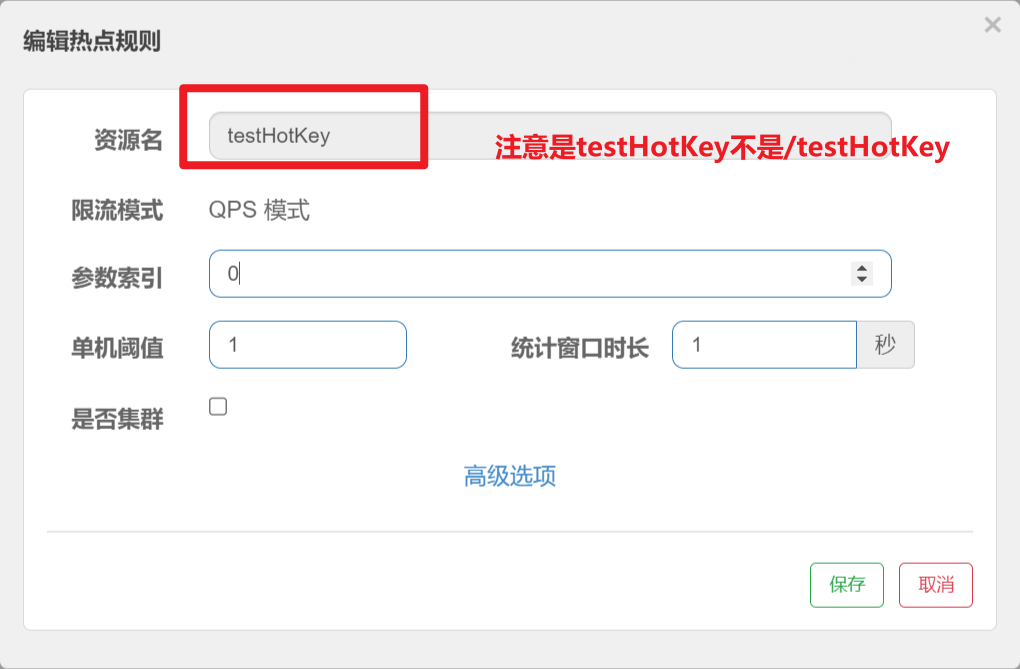
注意资源名配置的应该是testHotKey, 而不是/testHotKey, 跟sentinel的SentinelResource的value保持一致
参数索引表示是第0个参数(下面Controller中的参数p1), 单机阈值表示QPS每秒请求的数量是1,请求多了就会在1秒的窗口时间降级处理
Controller
1 2 3 4 5 6 7 8 9 10 @GetMapping("/testHotKey" )"testHotKey" , blockHandler = "dealHandler_testHotKey" )"p1" , required = false ) String p1,"p2" , required = false ) String p2) {return "------testHotKey" ;return "-----dealHandler_testHotKey" ;
代码测试:
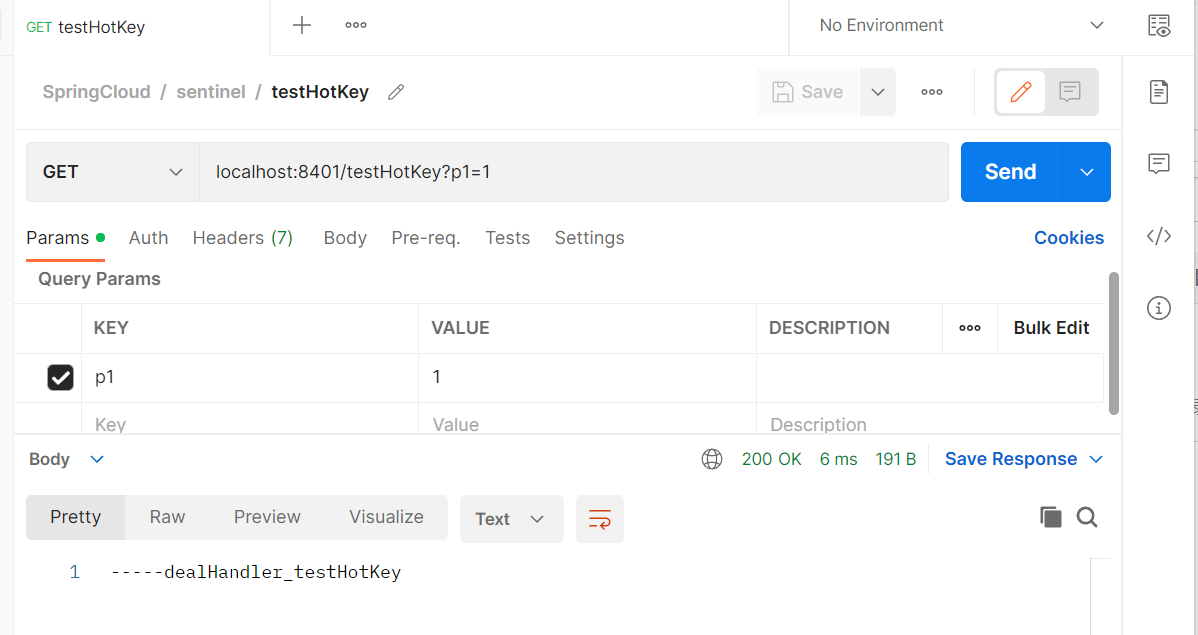
localhost:8401/testHotKey?p1=1 限流
localhost:8401/testHotKey?p1=1&p2=1 限流
localhost:8401/testHotKey?p2=1 不限流
狂点send,当QPS超过秒就马上被限流
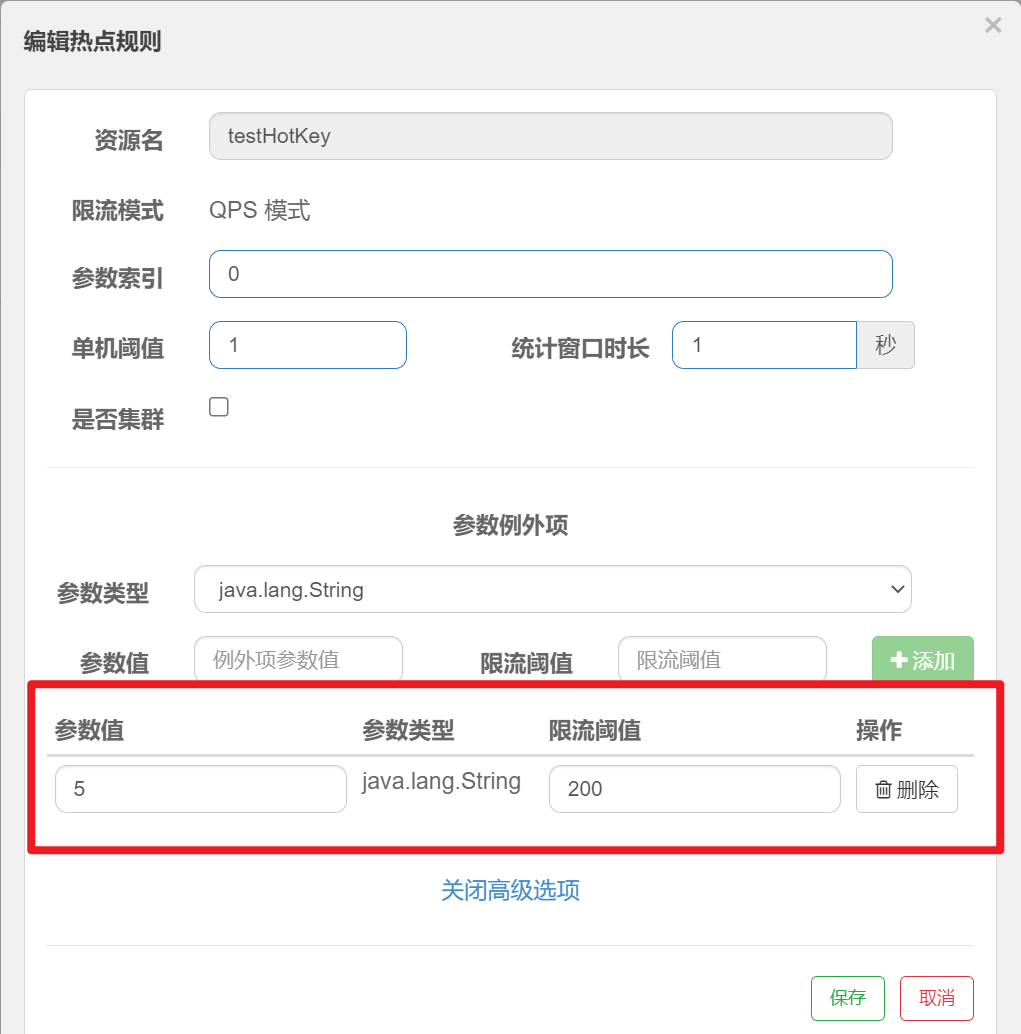
修改热点规则
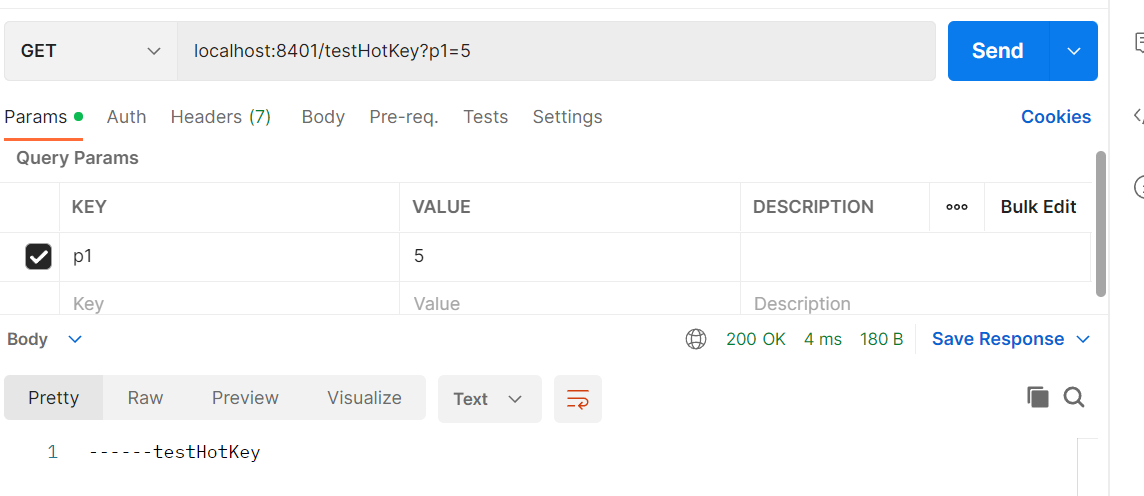
当参数值等于p1=5的时候,限流的阈值就不再是1了,而是两百
瞎点send也是—–testHotKey
SentinelResource配置 在cloudalibaba-sentinel-service8401模块
pom添加common
1 2 3 4 5 <dependency><!-- 引入自己定义的api通用包,可以使用Payment支付Entity -->${project.version} </version>
编写一个新的Controller
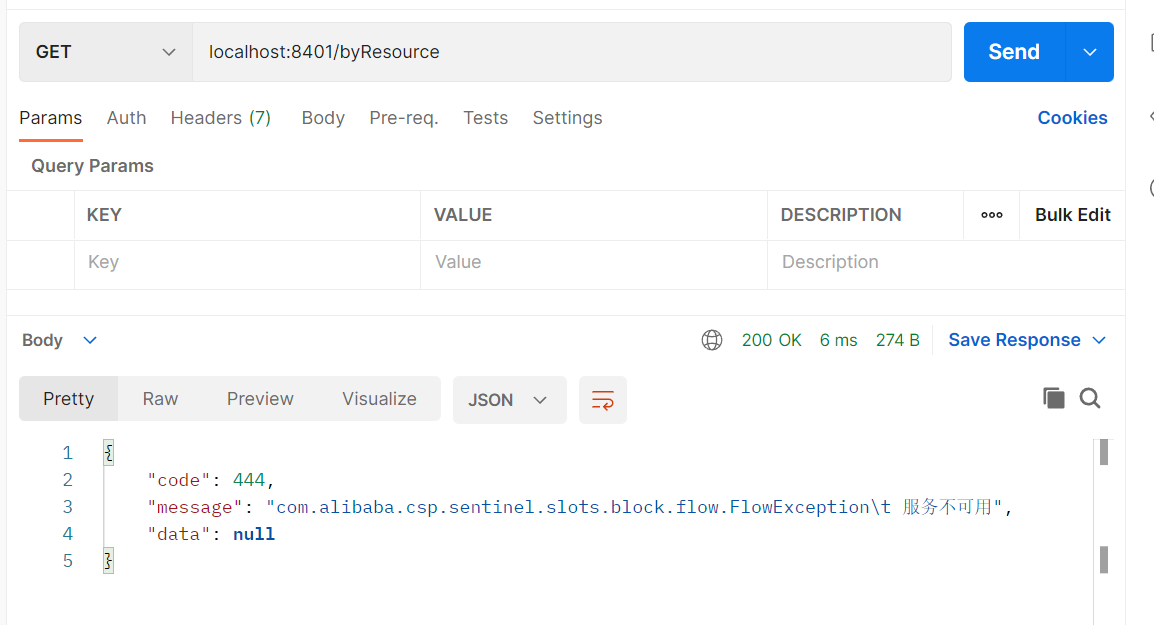
1 2 3 4 5 6 7 8 9 10 11 12 13 14 @RestController"/byResource" )"byResource" ,blockHandler = "handleException" )byResource return new CommonResult(200,"按资源名称限流测试OK" ,new Payment(2020L,"serial001" ));return new CommonResult(444,exception.getClass().getCanonicalName()+"\t 服务不可用" );
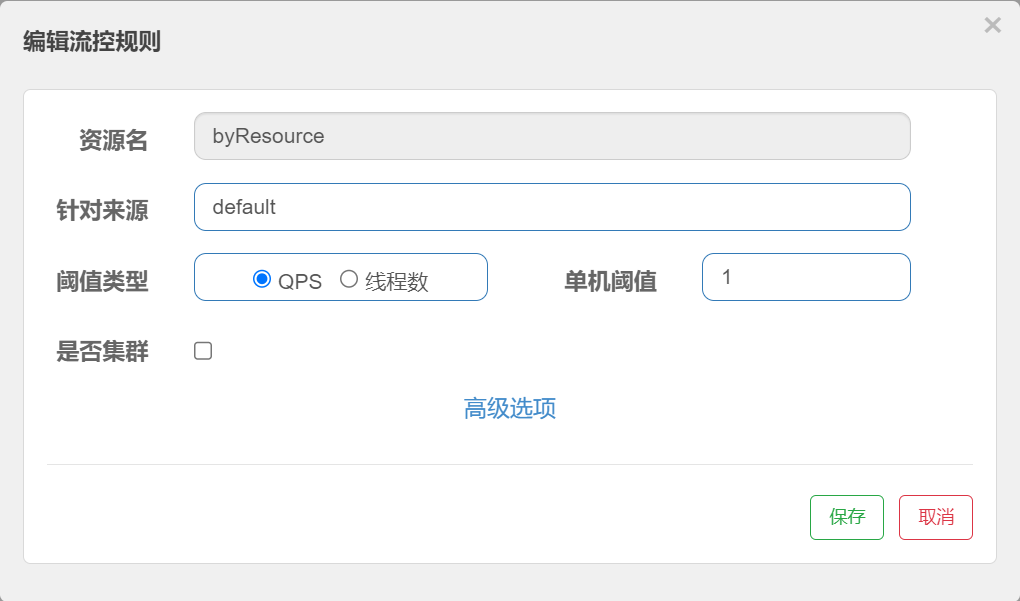
添加流控规则
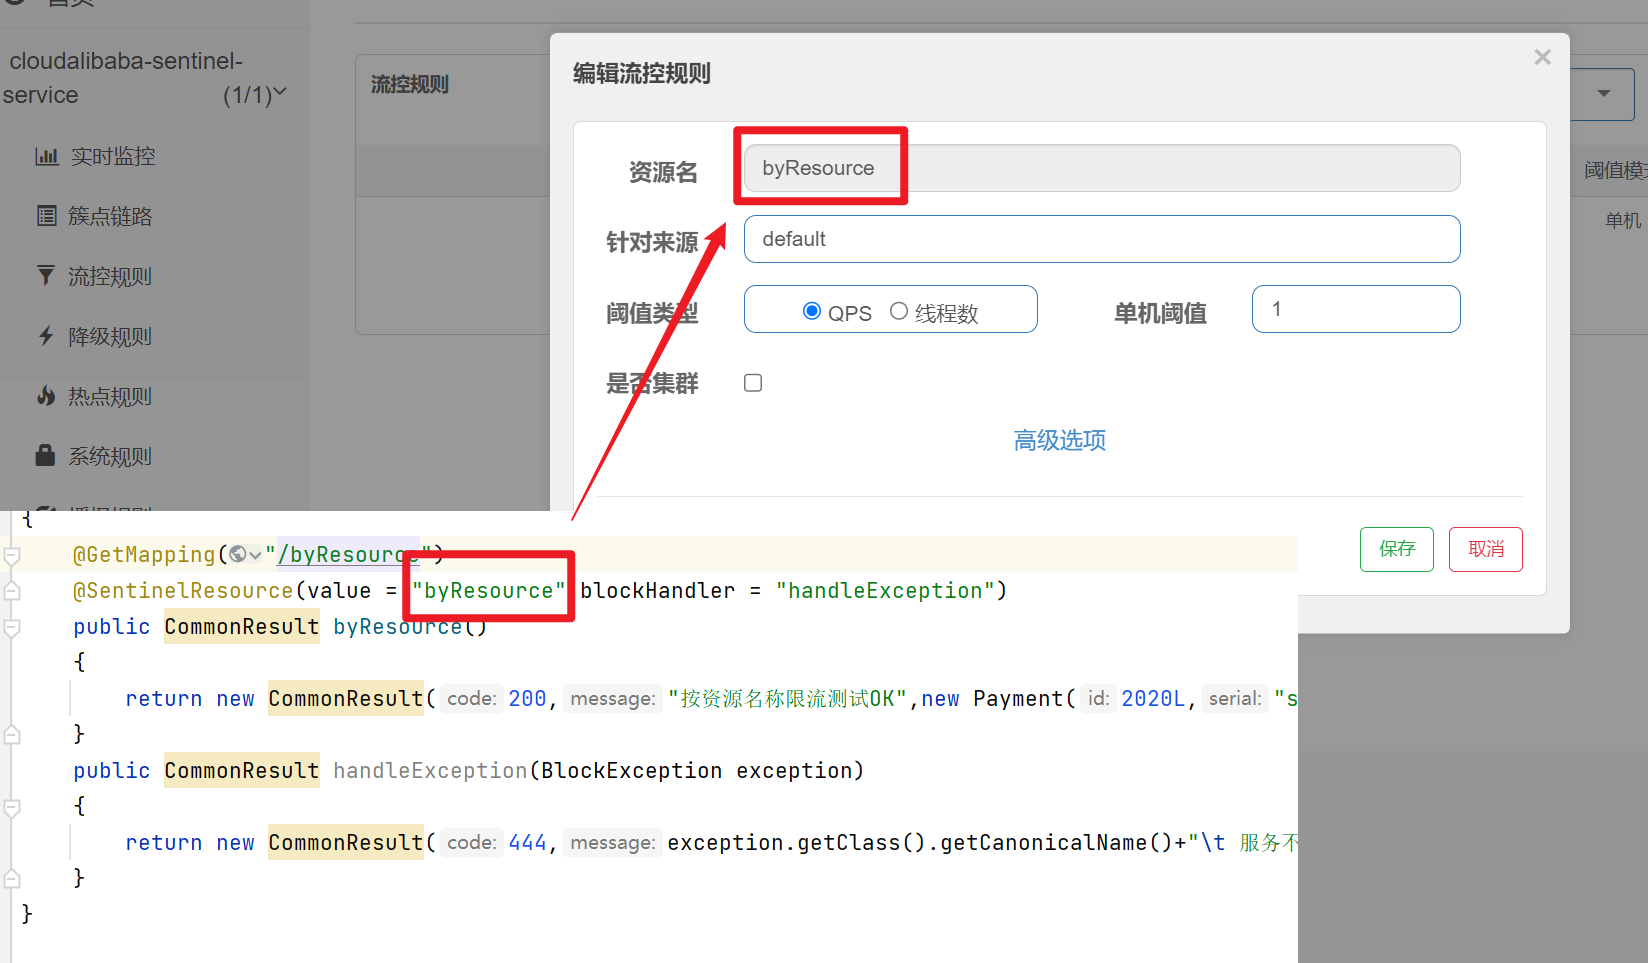
资源名可以写请求的mapping,也可以填写Sentinel的value
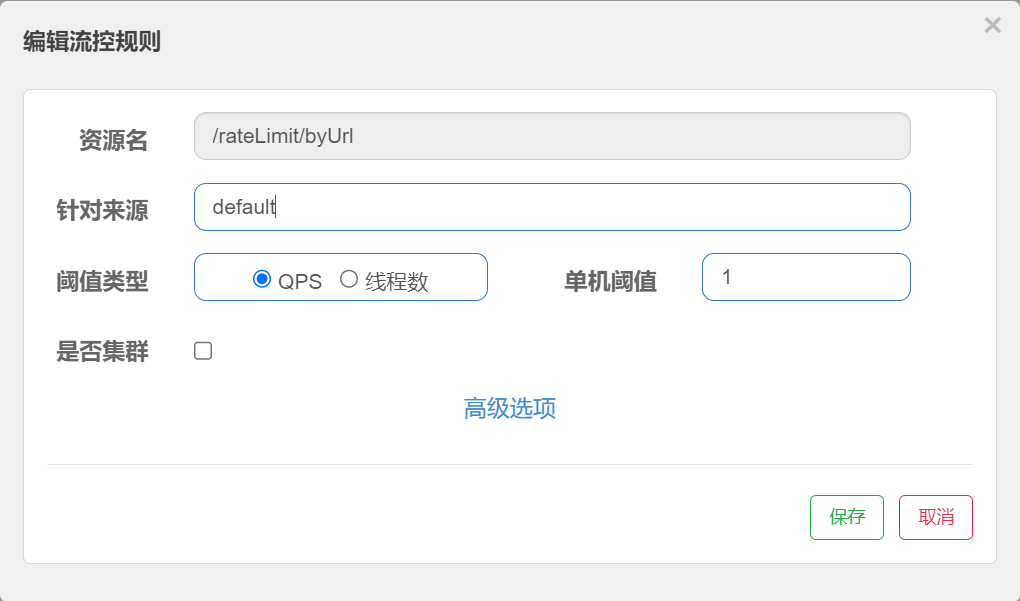
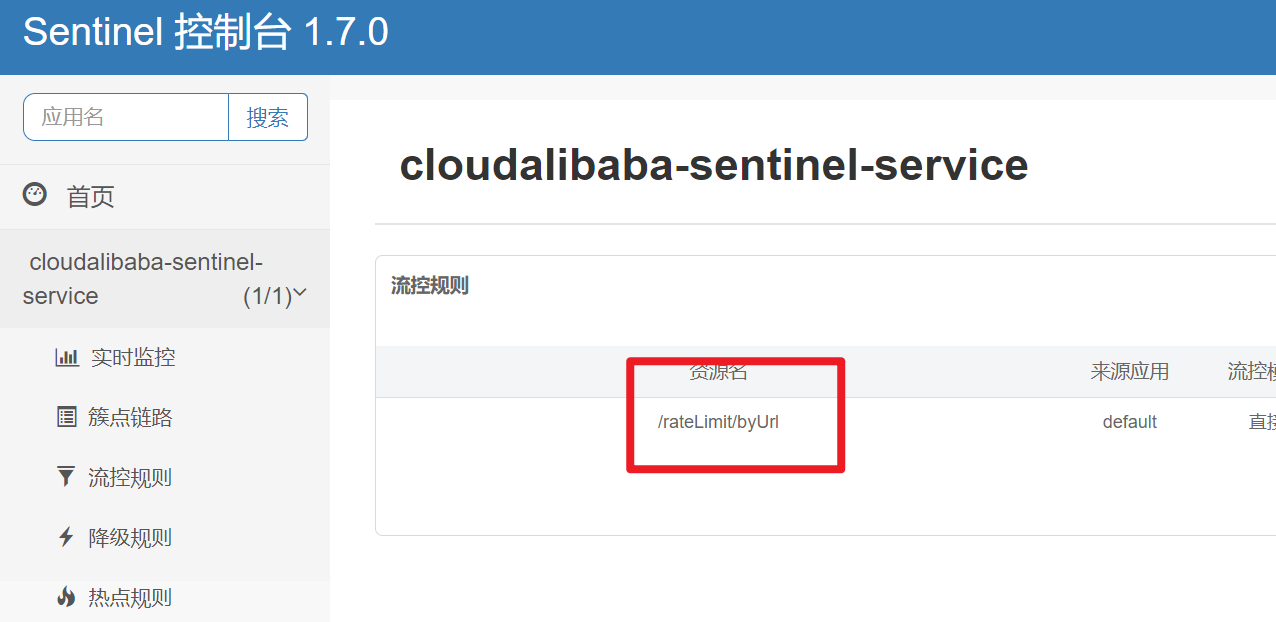
同样的可以按照url进行限流
编写Controller
1 2 3 4 5 6 @GetMapping("/rateLimit/byUrl" )"byUrl" )byUrl return new CommonResult(200,"按url限流测试OK" ,new Payment(2020L,"serial002" ));
添加配置
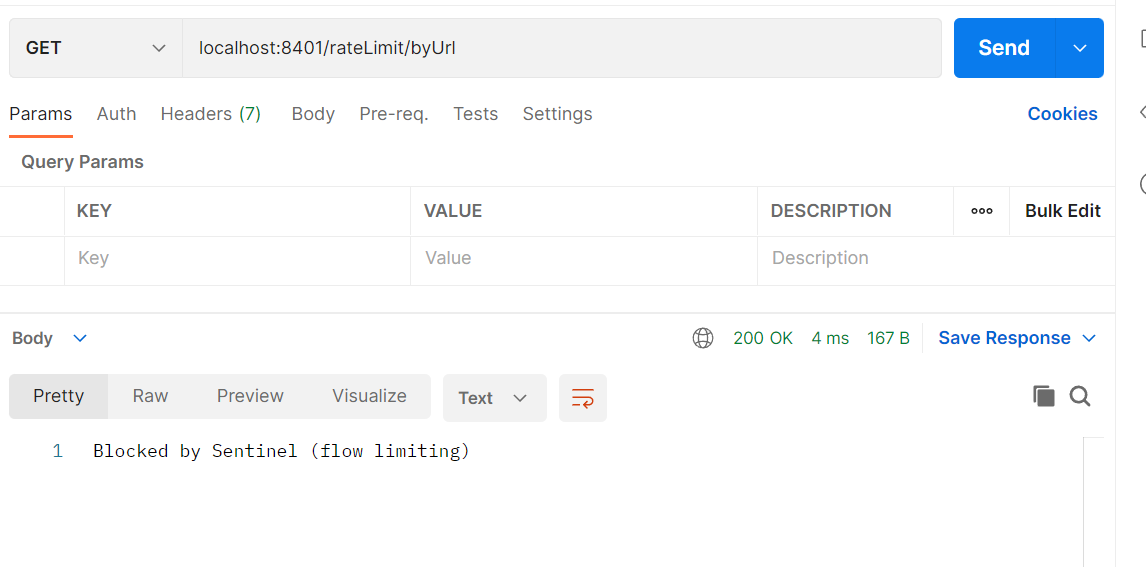
代码测试, 同样可以达到限流的效果
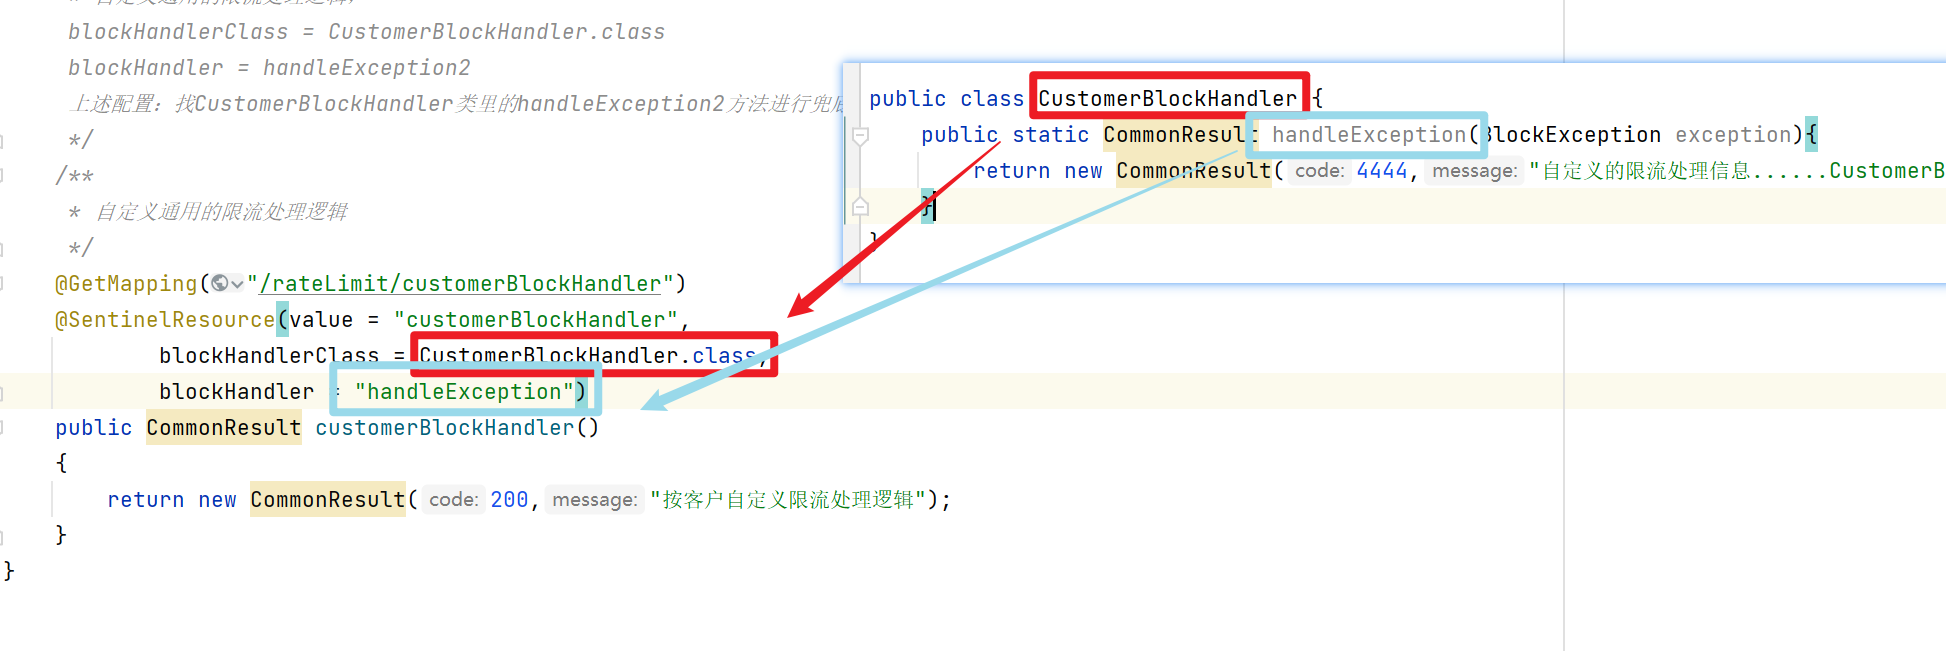
客户自定义限流处理逻辑 编写handler
1 2 3 4 5 public class CustomerBlockHandler {return new CommonResult(4444,"自定义的限流处理信息......CustomerBlockHandler" );
编写Controller
1 2 3 4 5 6 7 8 9 10 11 12 13 14 15 16 17 /**"/rateLimit/customerBlockHandler" )"customerBlockHandler" ,"handleException" )customerBlockHandler return new CommonResult(200,"按客户自定义限流处理逻辑" );
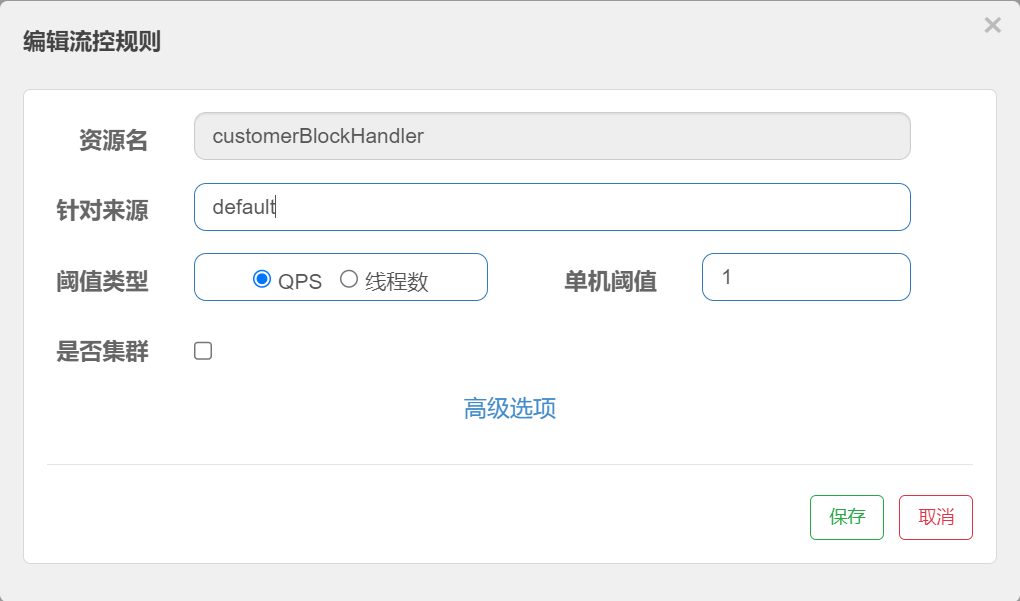
添加配置
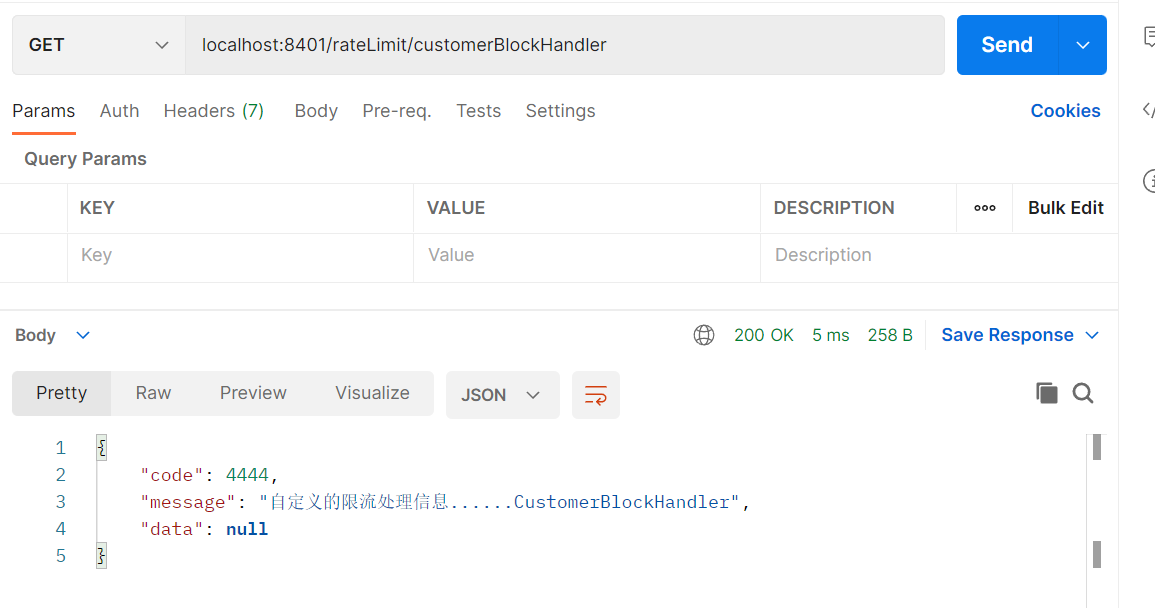
代码测试:
当每秒请求的数量大于1了, 通过@SentinelResource注解中的blockHandlerClass属性指定将由哪一个类来处理异常, blockHandler 指定哪一个类的哪一个方法
这样做的好处就是可以将业务代码和自定义的处理方法进行解构, 而不会混在一起,还可以实现全局统一的处理异常
服务熔断-Ribbon 创建cloudalibaba-provider-payment9003``cloudalibaba-provider-payment9004模块
pom
1 2 3 4 5 6 7 8 9 10 11 12 13 14 15 16 17 18 19 20 21 22 23 24 25 26 27 28 29 30 31 32 33 34 35 36 37 38 <dependencies>${project.version} </version>true </optional>true </optional>test </scope>
yml
1 2 3 4 5 6 7 8 9 10 11 12 13 14 15 16 server:'*'
controller
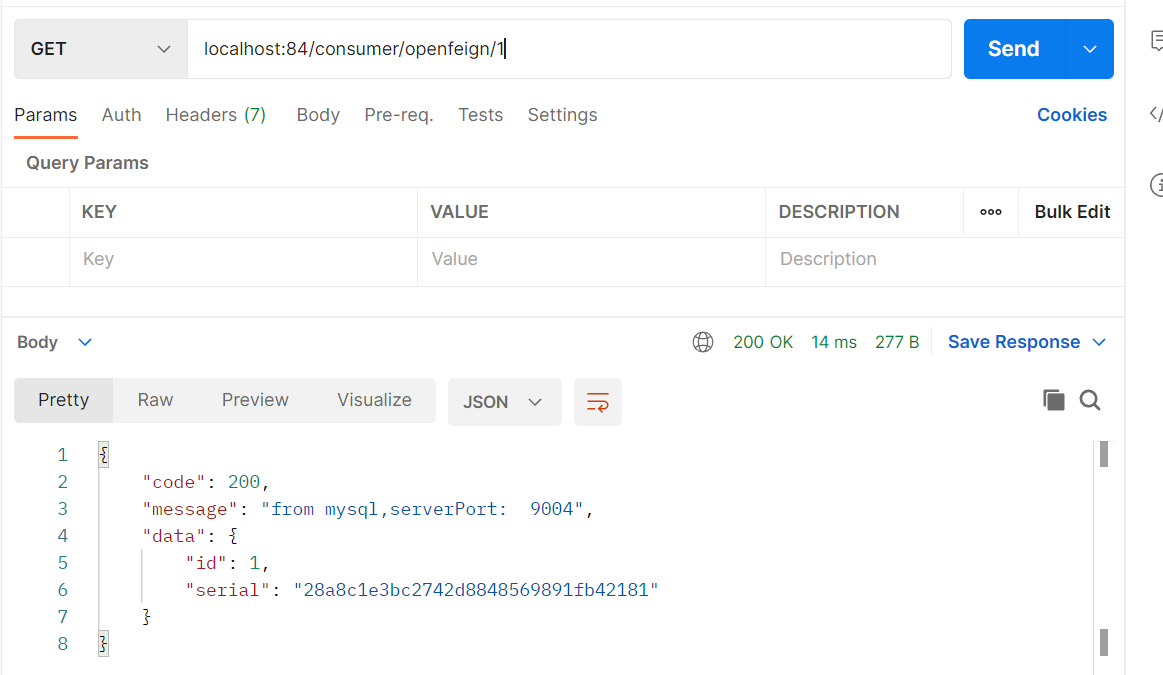
1 2 3 4 5 6 7 8 9 10 11 12 13 14 15 16 17 18 19 20 21 @RestController"${server.port} " )"28a8c1e3bc2742d8848569891fb42181" ));"bba8c1e3bc2742d8848569891ac32182" ));"6ua8c1e3bc2742d8848569891xt92183" ));"/paymentSQL/{id}" )"id" ) Long id )id );"from mysql,serverPort: " +serverPort,payment);return result;
入口函数
1 2 3 4 5 6 7 @SpringBootApplication
然后创建cloudalibaba-consumer-nacos-order84模块
pom
1 2 3 4 5 6 7 8 9 10 11 12 13 14 15 16 17 18 19 20 21 22 23 24 25 26 27 28 29 30 31 32 33 34 35 36 37 38 39 40 41 42 43 44 <dependencies>${project.version} </version>true </optional>true </optional>test </scope>
yml
1 2 3 4 5 6 7 8 9 10 11 12 13 14 15 16 17 18 19 20 server:84 8848 8080 8719 端口,假如被占用会自动从8719 开始依次+1 扫描,直至找到未被占用的端口8719
config
1 2 3 4 5 6 7 8 @Configuration public class ApplicationContextConfig {@Bean @LoadBalanced public RestTemplate getRestTemplate () {return new RestTemplate ();
controller
1 2 3 4 5 6 7 8 9 10 11 12 13 14 15 16 17 18 19 20 21 22 23 24 25 @RestController @Slf4j public class CircleBreakerController public static final String SERVICE_URL = "http://nacos-payment-provider" ;@Resource private RestTemplate restTemplate;@RequestMapping("/consumer/fallback/{id}") @SentinelResource(value = "fallback") public CommonResult<Payment> fallback (@PathVariable Long id) "/paymentSQL/" +id, CommonResult.class,id);if (id == 4 ) {throw new IllegalArgumentException ("IllegalArgumentException,非法参数异常...." );else if (result.getData() == null ) {throw new NullPointerException ("NullPointerException,该ID没有对应记录,空指针异常" );return result;
入口函数
1 2 3 4 5 6 7 @SpringBootApplication @EnableDiscoveryClient public class OrderNacosMain84 {public static void main (String[] args) {
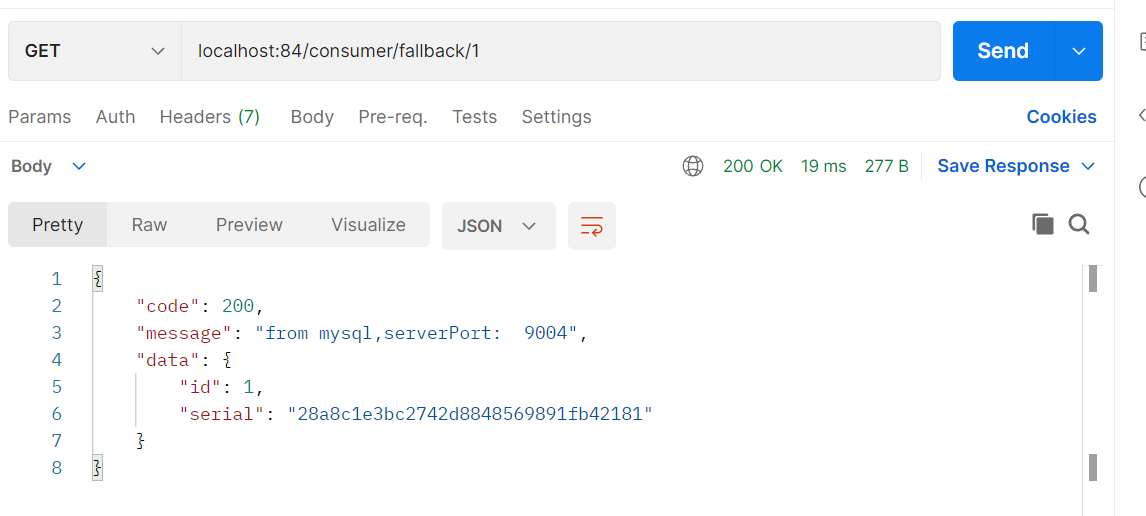
请求1正常
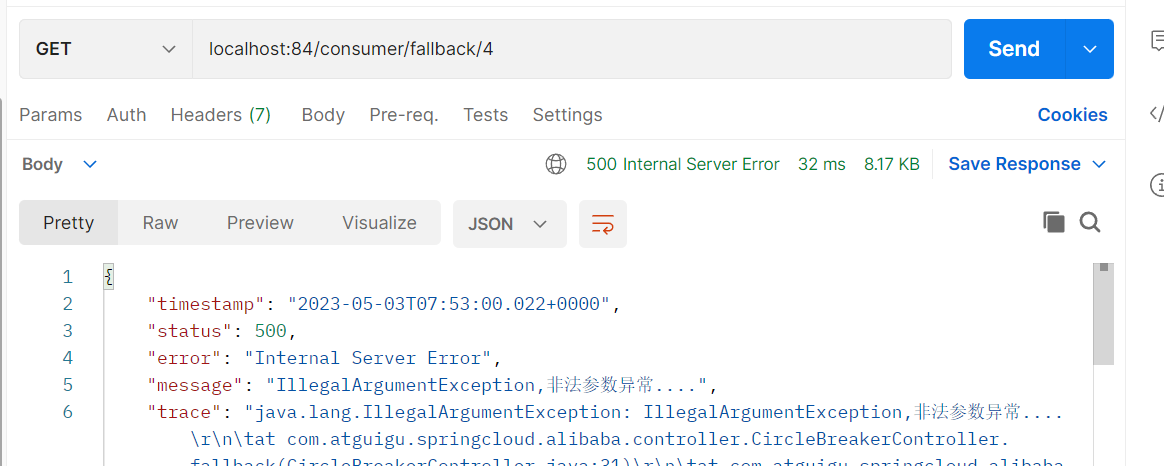
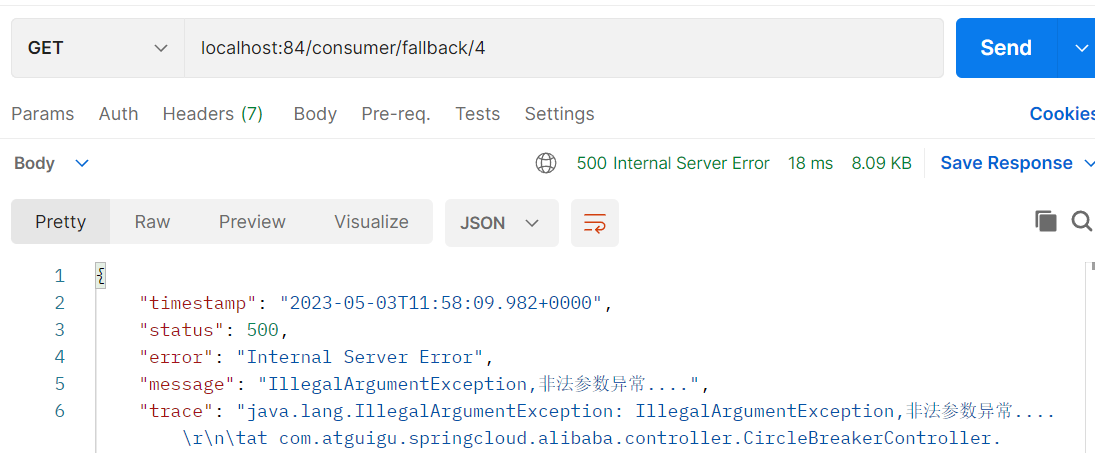
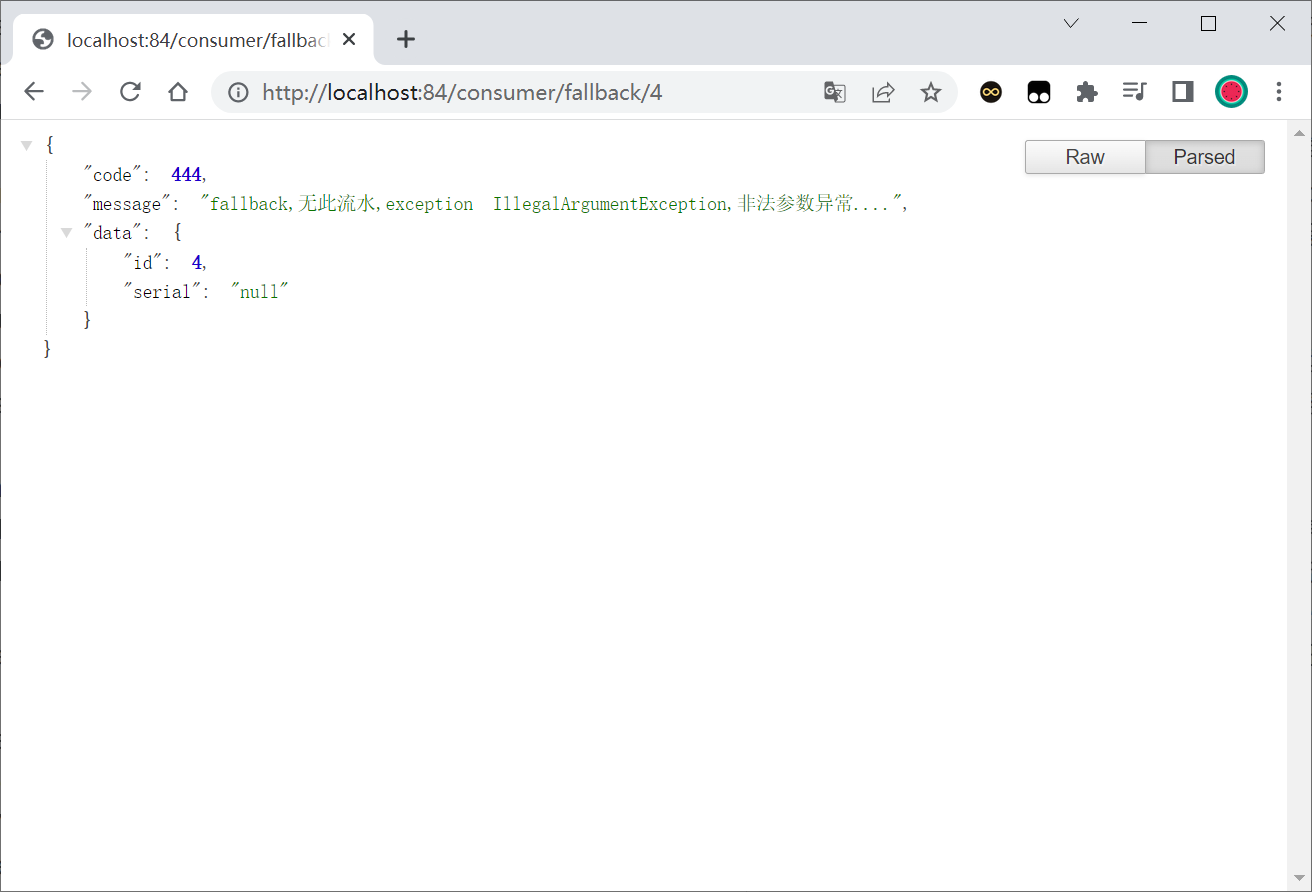
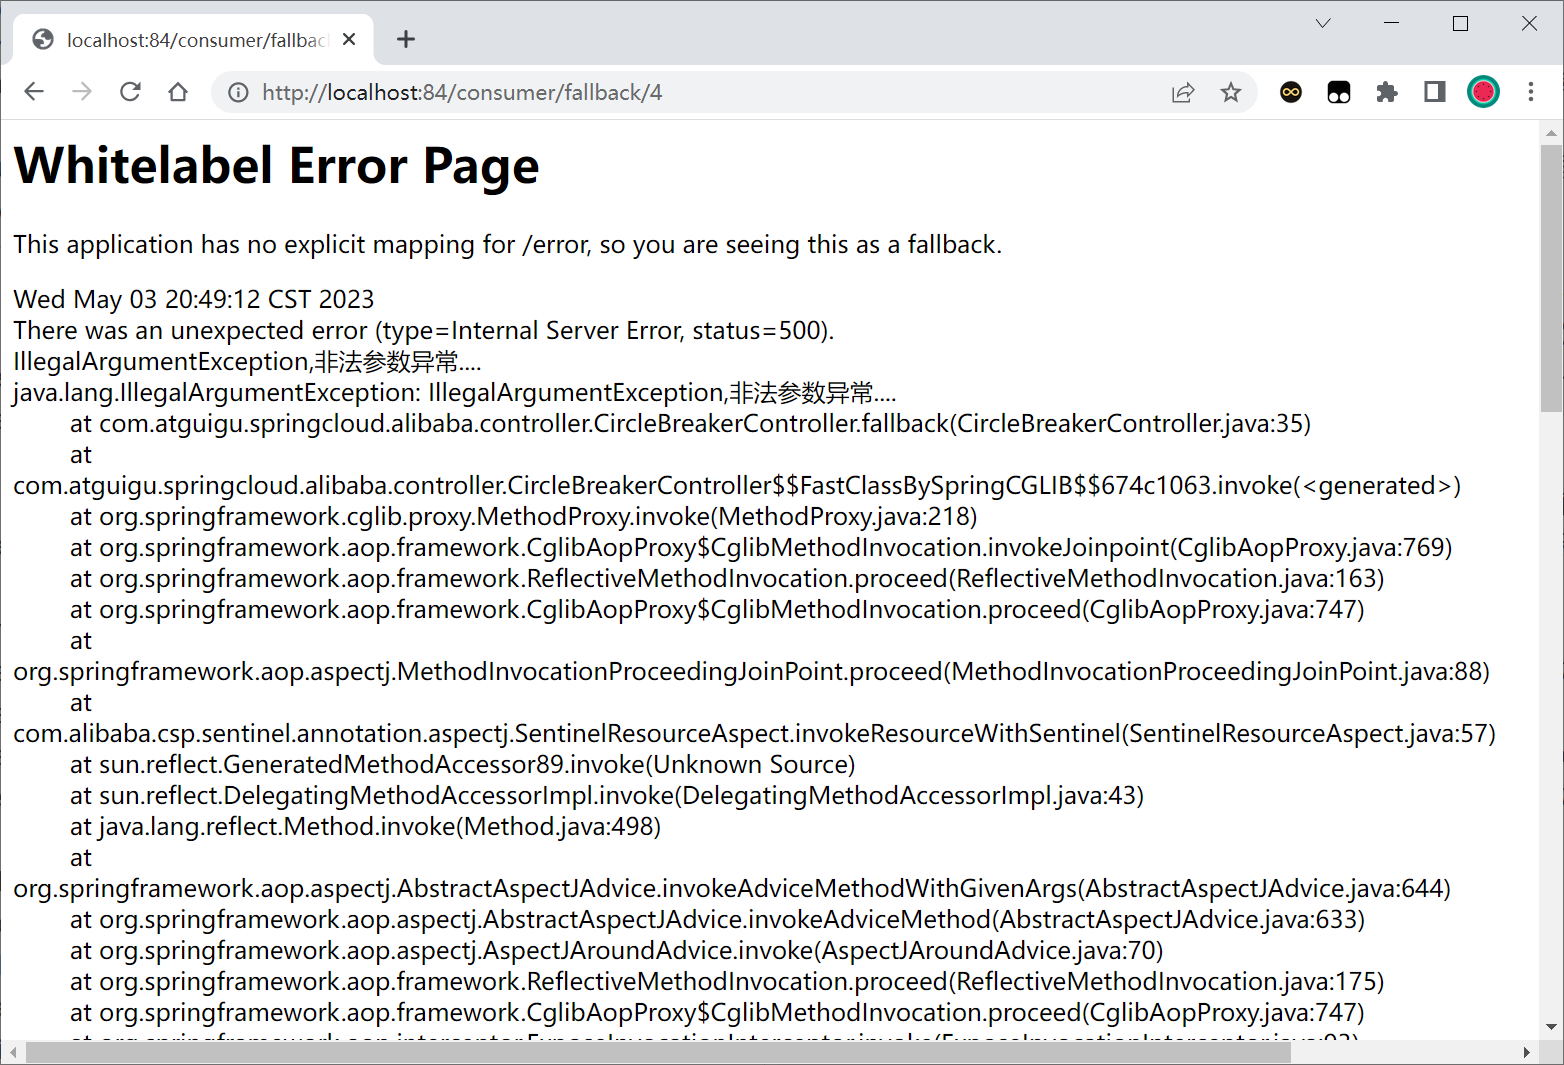
请求4显示非法参数异常
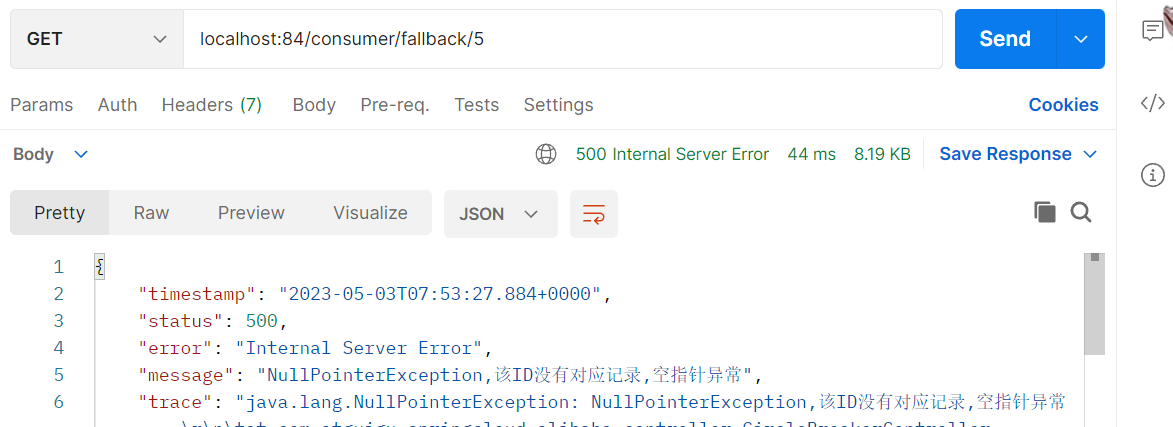
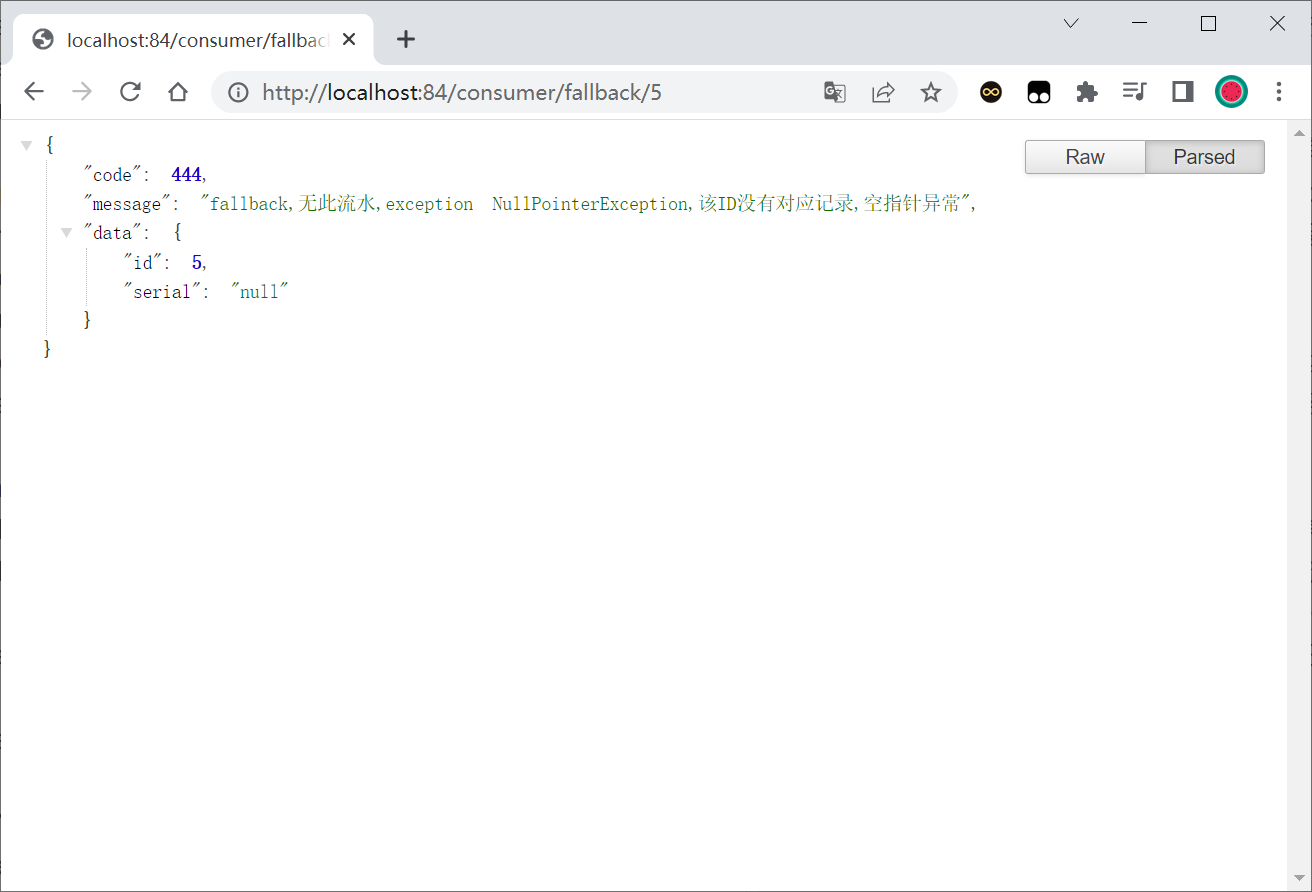
请求5显示空指针异常
可以发现当出现Error的时候, 出现的提示信息有点太多了,不够友好
Sentinel服务熔断只配置fallback 修改controller为
在CommonResult方法上给@SentinelResource注解添加fallback
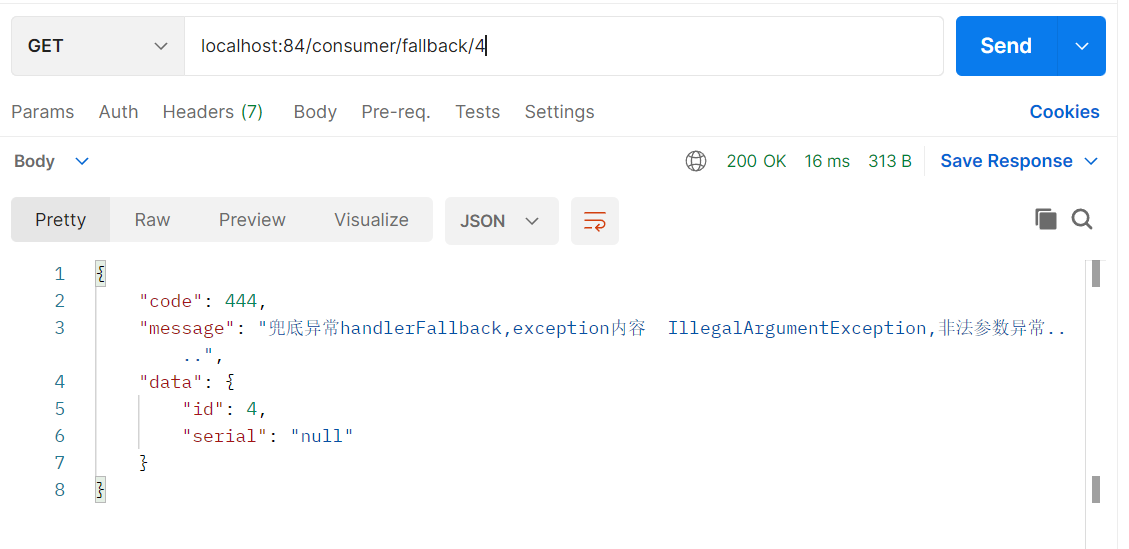
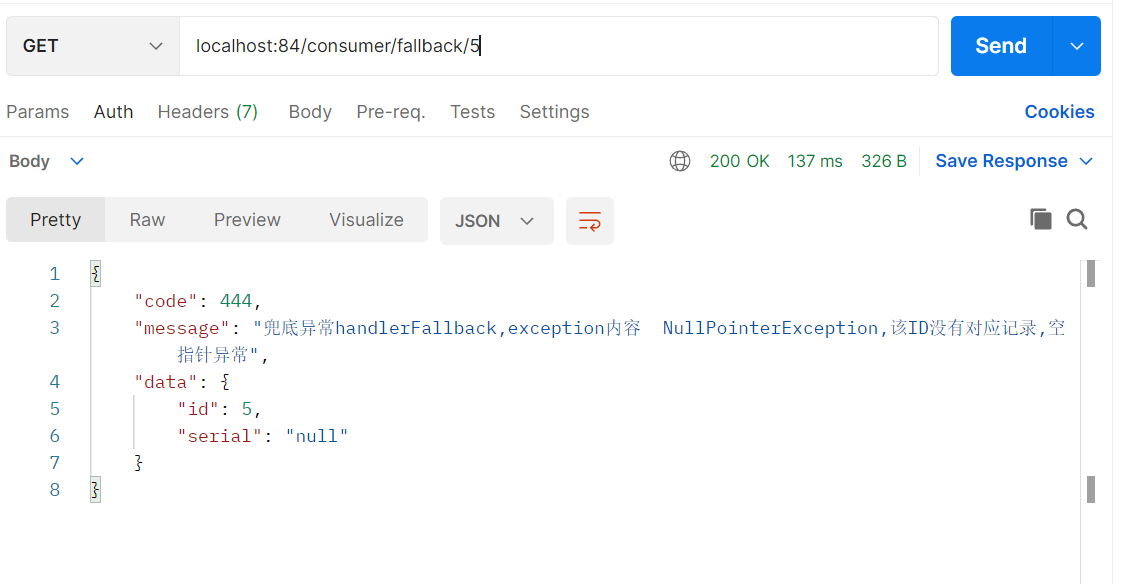
当方法内部出现了异常, 就会去执行指定的fallback
1 2 3 4 5 6 7 8 9 10 11 12 13 14 15 16 17 18 19 20 21 22 23 24 25 26 27 28 29 30 31 @RestController @Slf4j public class CircleBreakerController public static final String SERVICE_URL = "http://nacos-payment-provider" ;@Resource private RestTemplate restTemplate;@RequestMapping("/consumer/fallback/{id}") @SentinelResource(value = "fallback",fallback = "handlerFallback") public CommonResult<Payment> fallback (@PathVariable Long id) "/paymentSQL/" +id, CommonResult.class,id);if (id == 4 ) {throw new IllegalArgumentException ("IllegalArgumentException,非法参数异常...." );else if (result.getData() == null ) {throw new NullPointerException ("NullPointerException,该ID没有对应记录,空指针异常" );return result;public CommonResult handlerFallback (@PathVariable Long id,Throwable e) {Payment payment = new Payment (id,"null" );return new CommonResult <>(444 ,"兜底异常handlerFallback,exception内容 " +e.getMessage(),payment);
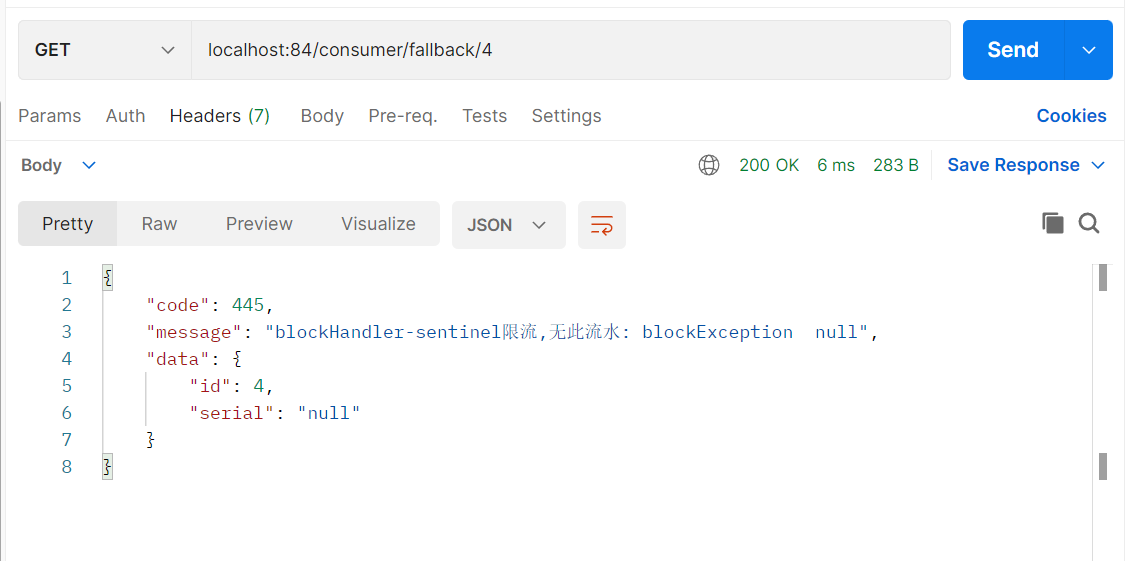
代码测试, 这样的错误信息看起来比之前的更为友好一些
Sentinel服务熔断只配置blockHandler 修改controller
配置@SentinelResource注解拥有blockHandler
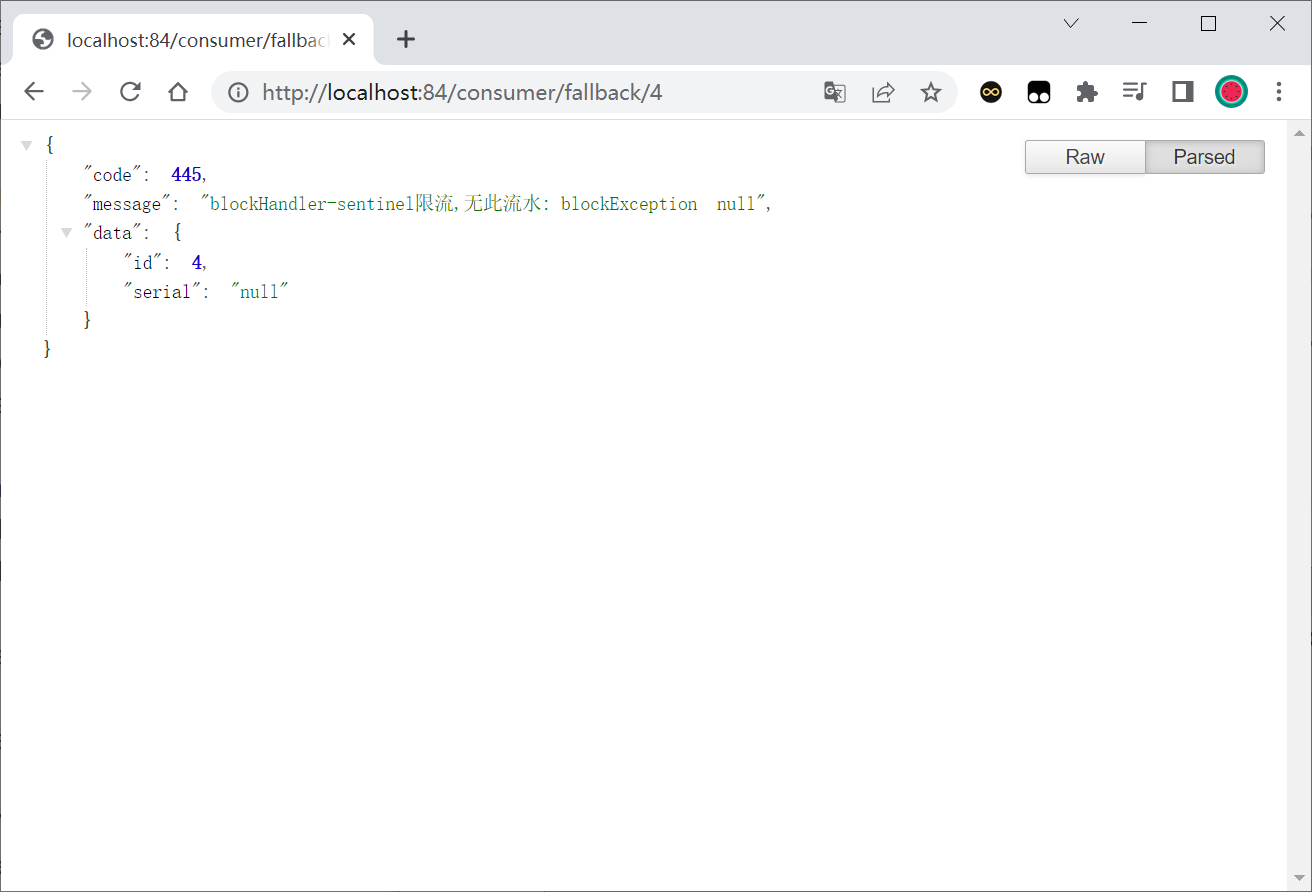
1 2 3 4 5 6 7 8 9 10 11 12 13 14 15 16 17 18 19 20 21 22 23 24 25 26 27 28 29 30 31 32 33 34 35 36 37 @RestController @Slf4j public class CircleBreakerController public static final String SERVICE_URL = "http://nacos-payment-provider" ;@Resource private RestTemplate restTemplate;@RequestMapping("/consumer/fallback/{id}") @SentinelResource(value = "fallback",blockHandler = "blockHandler") public CommonResult<Payment> fallback (@PathVariable Long id) "/paymentSQL/" +id, CommonResult.class,id);if (id == 4 ) {throw new IllegalArgumentException ("IllegalArgumentException,非法参数异常...." );else if (result.getData() == null ) {throw new NullPointerException ("NullPointerException,该ID没有对应记录,空指针异常" );return result;public CommonResult handlerFallback (@PathVariable Long id,Throwable e) {Payment payment = new Payment (id,"null" );return new CommonResult <>(444 ,"兜底异常handlerFallback,exception内容 " +e.getMessage(),payment);public CommonResult blockHandler (@PathVariable Long id, BlockException blockException) {Payment payment = new Payment (id,"null" );return new CommonResult <>(445 ,"blockHandler-sentinel限流,无此流水: blockException " +blockException.getMessage(),payment);
配置Sentinel降级
狂点发送异常请求, 此时请求异常数过大进入熔断降级
未进入降级状态, 显示Java运行的异常
Sentinel服务熔断fallback和blockHandler都配置 修改controller
1 2 3 4 5 6 7 8 9 10 11 12 13 14 15 16 17 18 19 20 21 22 23 24 25 26 27 28 29 30 31 32 33 34 35 @RestController @Slf4j public class CircleBreakerController {public static final String SERVICE_URL = "http://nacos-payment-provider" ;@Resource private RestTemplate restTemplate;@RequestMapping("/consumer/fallback/{id}") @SentinelResource(value = "fallback", fallback = "handlerFallback", blockHandler = "blockHandler") public CommonResult<Payment> fallback (@PathVariable Long id) {CommonResult result = restTemplate.getForObject(SERVICE_URL + "/paymentSQL/" + id, CommonResult.class, id);if (id == 4 ) {throw new IllegalArgumentException ("IllegalArgumentException,非法参数异常...." );else if (result.getData() == null ) {throw new NullPointerException ("NullPointerException,该ID没有对应记录,空指针异常" );return result;public CommonResult handlerFallback (@PathVariable Long id,Throwable e) {Payment payment = new Payment (id,"null" );return new CommonResult <>(444 ,"fallback,无此流水,exception " +e.getMessage(),payment);public CommonResult blockHandler (@PathVariable Long id,BlockException blockException) {Payment payment = new Payment (id,"null" );return new CommonResult <>(445 ,"blockHandler-sentinel限流,无此流水: blockException " +blockException.getMessage(),payment);
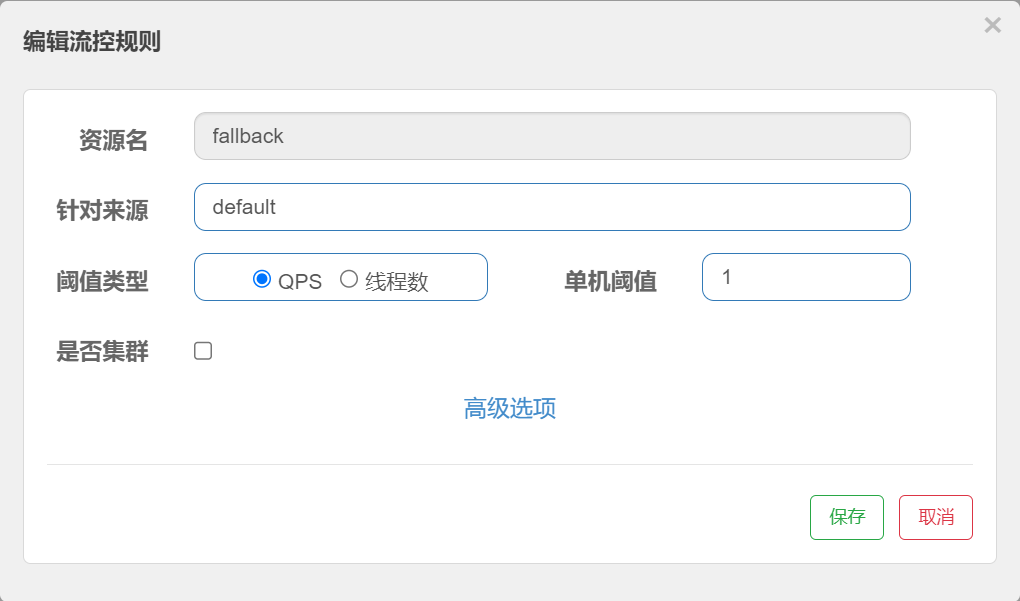
添加限流规则
请求4, 会出现Java运行异常
多次请求则被限流控制
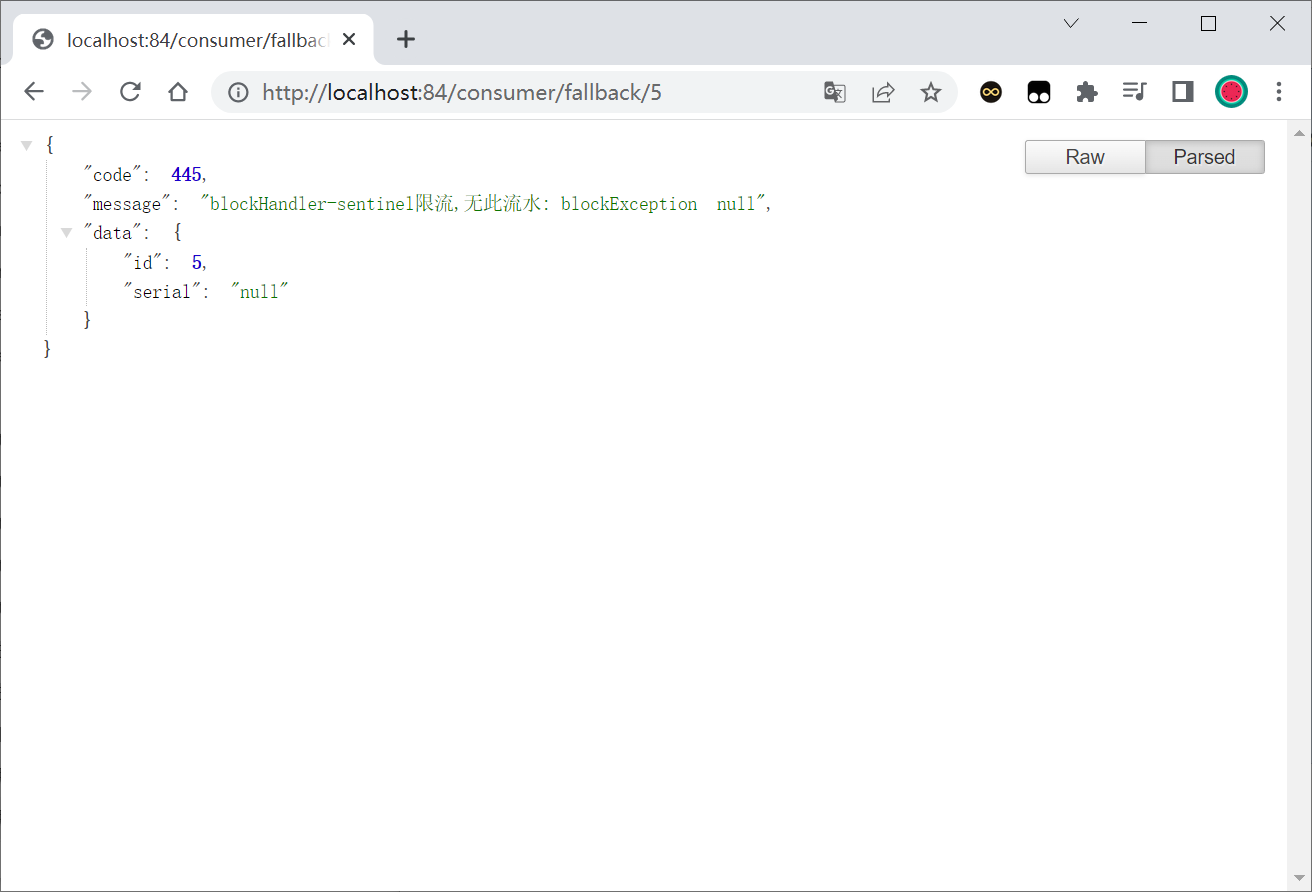
同样的请求id为5也是一样的
多次请求
如果同时配置了blockHandler和fallback
方法内部出现了异常则会走fallback 兜底方法
请求多了达到了限流则会走blockHandler处理
Sentinel服务熔断exceptionsToIgnore 修改controller为
1 2 3 4 @SentinelResource(value = "fallback", fallback = "handlerFallback", blockHandler = "blockHandler", exceptionsToIgnore = {IllegalArgumentException.class})
这个exceptionsToIgnore 的意思就是如果出现了IllegalArgumentException异常
就不会进入fallback兜底的方法, 没有服务降级的效果了
代码测试:
Sentinel服务熔断OpenFeign pom添加依赖
1 2 3 4 5 <!--SpringCloud openfeign -->
yml
1 2 3 4 # 激活Sentinel对Feign的支持true
编写service
1 2 3 4 5 6 @FeignClient(value = "nacos-payment-provider", fallback = PaymentFallbackService.class) public interface PaymentService {@GetMapping(value = "/paymentSQL/{id}") public CommonResult<Payment> paymentSQL (@PathVariable("id") Long id) ;
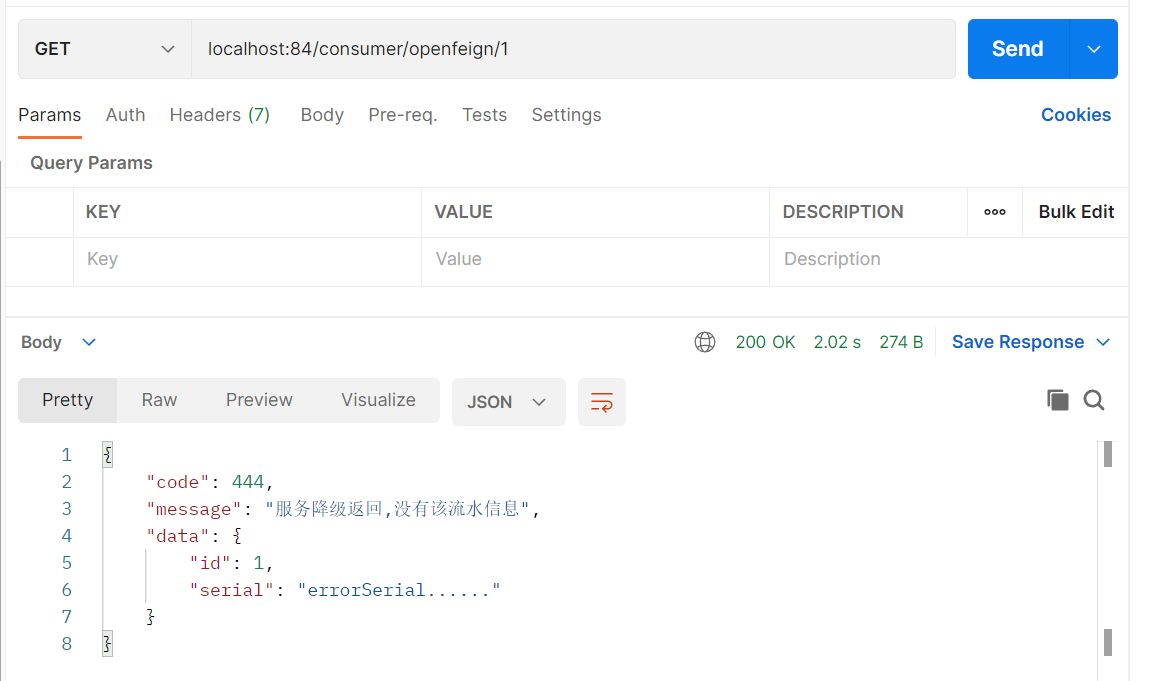
1 2 3 4 5 6 7 8 9 @Component public class PaymentFallbackService implements PaymentService {@Override public CommonResult<Payment> paymentSQL (Long id) {return new CommonResult <>(444 , "服务降级返回,没有该流水信息" ,new Payment (id, "errorSerial......" ));
controller
1 2 3 4 5 6 7 8 9 10 11 12 13 @Resource private PaymentService paymentService;@GetMapping(value = "/consumer/openfeign/{id}") public CommonResult<Payment> paymentSQL (@PathVariable("id") Long id) if (id == 4 )throw new RuntimeException ("没有该id" );return paymentService.paymentSQL(id);
代码测试:
然后关闭payment提供者微服务, 再次请求, 观察84微服务自动降级, 不会被耗死
规则持久化 修改cloudalibaba-sentinel-service8401
pom
1 2 3 4 5 <!--SpringCloud ailibaba sentinel-datasource-nacos -->
yml
1 2 3 4 5 6 7 8 9 10 11 12 13 14 15 16 17 18 19 20 21 22 23 24 25 26 27 28 29 30 31 server:8401 8848 8080 8719 端口,假如被占用会自动从8719 开始依次+1 扫描,直至找到未被占用的端口8719 8848 '*'
然后在nacos的配置列表添加配置
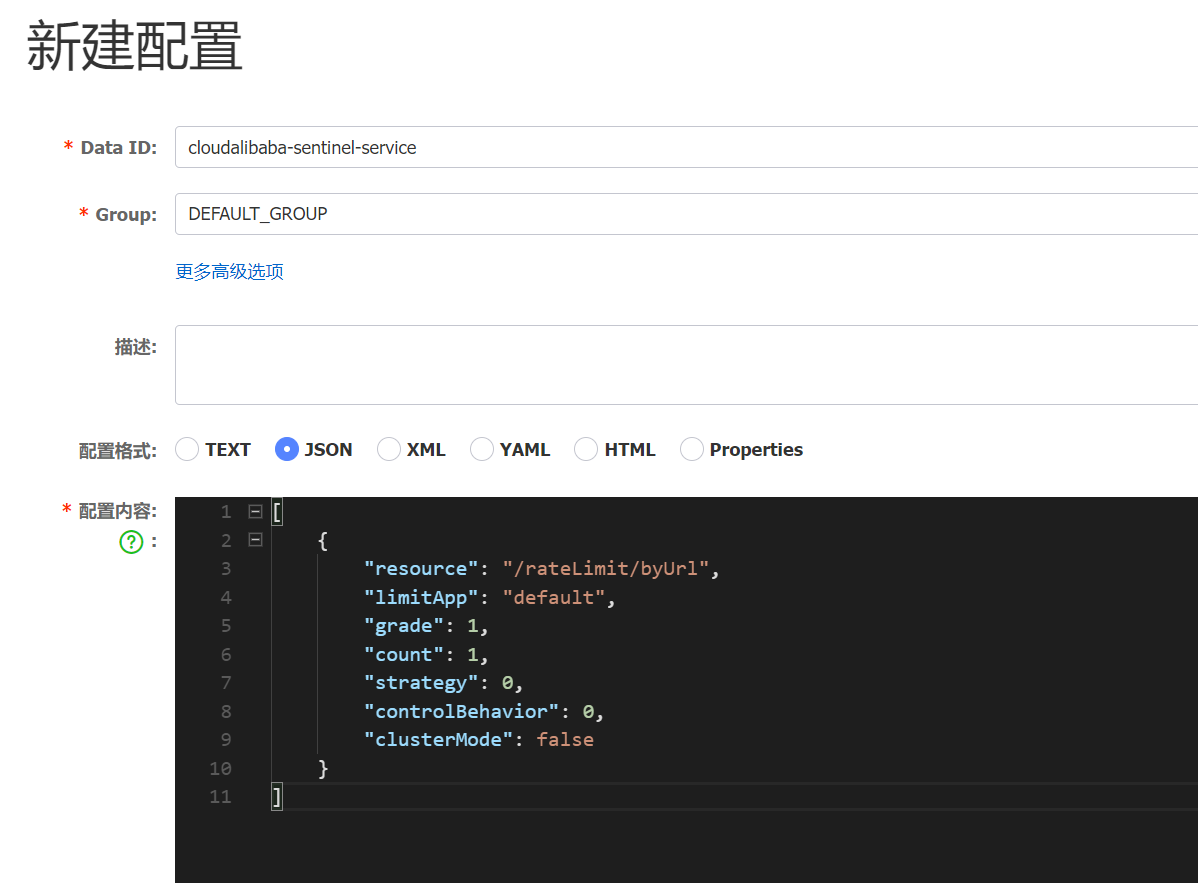
DataId cloudalibaba-sentinel-service
内容配置
1 2 3 4 5 6 7 8 9 10 11 ["resource" : "/rateLimit/byUrl" ,"limitApp" : "default" ,"grade" : 1 ,"count" : 1 ,"strategy" : 0 ,"controlBehavior" : 0 ,"clusterMode" : false
1 2 3 4 5 6 7 resource:资源名称;0 表示线程数,1 表示QPS;0 表示直接,1 表示关联,2 表示链路;0 表示快速失败,1 表示Warm Up,2 表示排队等待;
然后启动8401访问localhost:8401/rateLimit/byUrl
多次刷新, 说明流控配置起效了
上Sentinel查看一下, 刚刚配置的json配置生效了, 这个流控规则是nacos读取json配置文件给我们加载进来的
Seata 这部分懒得做笔记了
核心注解@GlobalTransactional
粘上一段核心代码
1 2 3 4 5 6 7 8 9 10 11 12 13 14 15 16 17 18 19 20 21 22 23 24 25 26 27 28 29 30 31 32 33 34 35 36 37 38 39 40 41 42 43 @Service @Slf4j public class OrderServiceImpl implements OrderService @Resource private OrderDao orderDao;@Resource private StorageService storageService;@Resource private AccountService accountService;@Override @GlobalTransactional(name = "fsp-create-order",rollbackFor = Exception.class) public void create (Order order) {"------->下单开始" );"------->order-service中扣减库存开始" );"------->order-service中扣减库存结束" );"------->order-service中扣减余额开始" );"------->order-service中扣减余额结束" );"------->order-service中修改订单状态开始" );0 );"------->order-service中修改订单状态结束" );"------->下单结束" );
Failed to fetch schema of order的解决办法
jdbc:mysql://localhost:3306/orders
jdbc:mysql://localhost:3306/orders?useInformationSchema=false
给所有的微服务都添加上?useInformationSchema=false, 然后重启
参考:
