资料来源于互联网
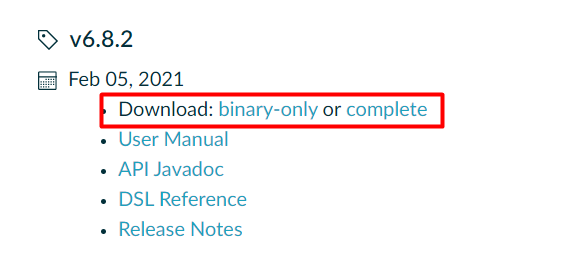
Gradle入门 一、基础环境 1、下载gradle https://gradle.org/releases/
解压到磁盘
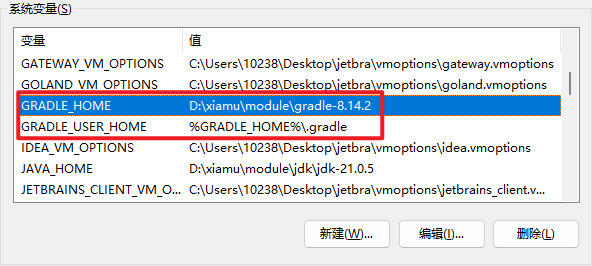
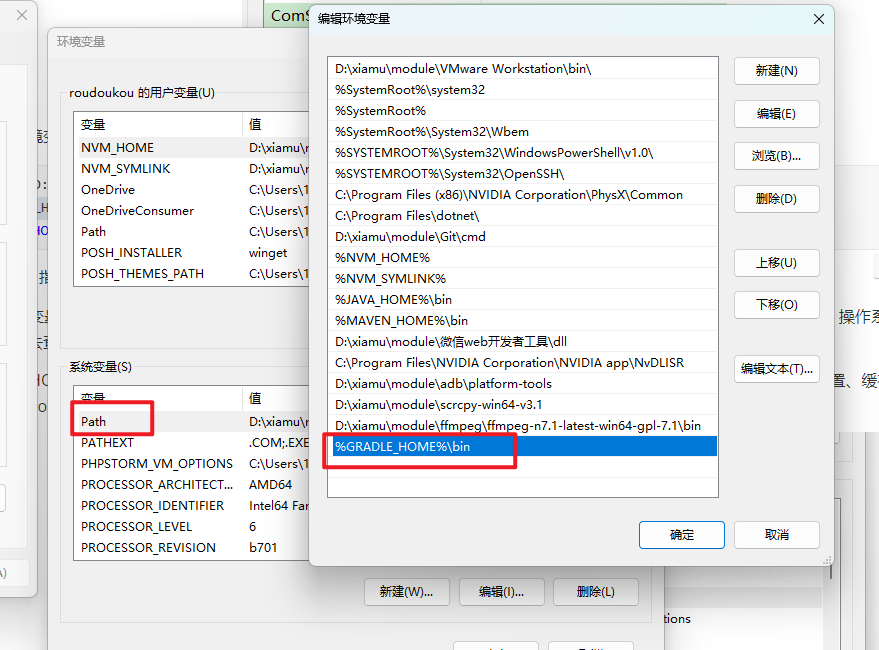
2、配置环境变量 GRADLE_HOME、PATH、GRADLE_USER_HOME【可以指向安装目录自己创建的.gradle文件夹】
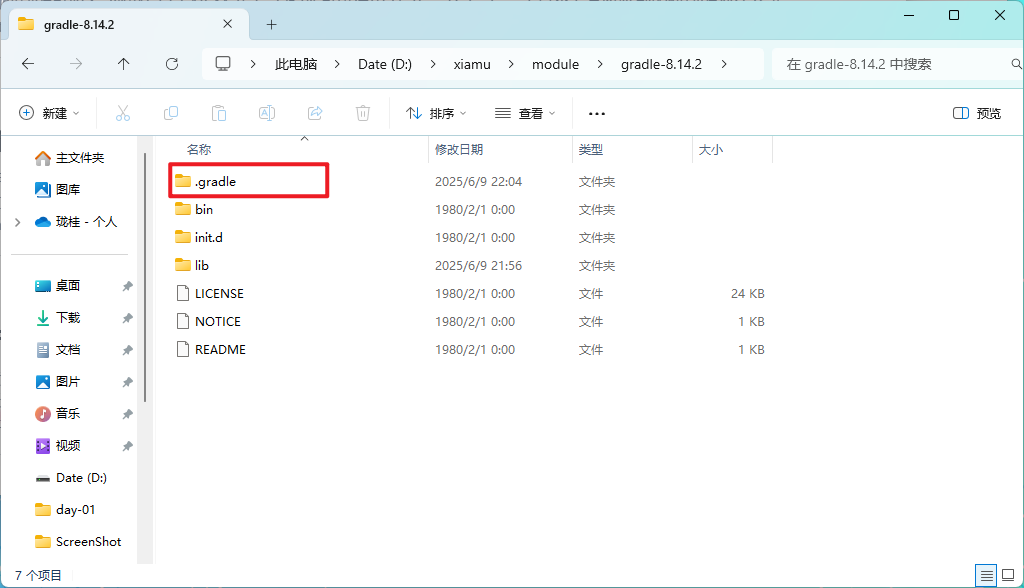
解压完之后,在gradle根目录创建.gradle目录
然后配置三个环境变量,当前我解压的路径是:D:\xiamu\module\gradle-8.14.2
1
2
3
GRADLE_HOME=D:\xiamu\module\gradle-8.14.2
GRADLE_HOME: 指向Gradle安装的根目录。它告诉系统Gradle的可执行文件和其他必要的库文件在哪里。
PATH: 这个环境变量将%GRADLE_HOME%\bin目录添加到了系统的PATH环境变量中。PATH环境变量是一个由目录路径组成的列表,操作系统在执行命令时会按照这个列表的顺序去查找可执行文件。
GRADLE_USER_HOME: 这个环境变量指定了Gradle用户家目录(User Home)的位置。Gradle会在这个目录下存储用户特定的配置、缓存文件、下载的依赖库、守护进程(daemon)日志等。
3、配置下载加速 1、gradle自己的方式 Gradle还是从maven仓库下载的。
给gradle安装目录下init.d文件夹,放一个init.gradle文件,内容如下:
1
2
3
4
5
6
7
8
9
10
11
12
13
14
15
16
17
18
19
20
21
22
23
24
25
26
27
28
29
30
31
32
33
34
35
36
37
38
39
40
41
42
43
44
45
46
47
48
49
50
51
52
53
54
55
56
57
58
59
60
61
62
63
64
65
66
67
68
69
70
71
72
73
74
gradle.projectsLoaded {def JCENTER_URL = 'https://maven.aliyun.com/repository/jcenter' def GOOGLE_URL = 'https://maven.aliyun.com/repository/google' def NEXUS_URL = 'http://maven.aliyun.com/nexus/content/repositories/jcenter' if (repo instanceof MavenArtifactRepository) {def url = repo.url.toString()if (url.startsWith('https://jcenter.bintray.com/' )) {"Repository ${repo.url} replaced by $JCENTER_URL." "buildscript ${repo.url} replaced by $JCENTER_URL." )else if (url.startsWith('https://dl.google.com/dl/android/maven2/' )) {"Repository ${repo.url} replaced by $GOOGLE_URL." "buildscript ${repo.url} replaced by $GOOGLE_URL." )else if (url.startsWith('https://repo1.maven.org/maven2' )) {"Repository ${repo.url} replaced by $REPOSITORY_URL." "buildscript ${repo.url} replaced by $REPOSITORY_URL." )def JCENTER_URL = 'https://maven.aliyun.com/repository/jcenter' def GOOGLE_URL = 'https://maven.aliyun.com/repository/google' def NEXUS_URL = 'http://maven.aliyun.com/nexus/content/repositories/jcenter' if (repo instanceof MavenArtifactRepository) {def url = repo.url.toString()if (url.startsWith('https://jcenter.bintray.com/' )) {"Repository ${repo.url} replaced by $JCENTER_URL." "buildscript ${repo.url} replaced by $JCENTER_URL." )else if (url.startsWith('https://dl.google.com/dl/android/maven2/' )) {"Repository ${repo.url} replaced by $GOOGLE_URL." "buildscript ${repo.url} replaced by $GOOGLE_URL." )else if (url.startsWith('https://repo1.maven.org/maven2' )) {"Repository ${repo.url} replaced by $REPOSITORY_URL." "buildscript ${repo.url} replaced by $REPOSITORY_URL." )
即可进行加速下载。
2、使用原来maven 原来我们安装了maven,有maven_home,就可以使用maven的设置
1
2
3
4
5
3、配置代理
https://juejin.cn/post/7235078247238336573
创建userdir/.gradle/gradle.properties文件
1 2 3 4 5 6 7 8 9 10 11 12 13 14 15 16 17 systemProp.http.proxyHost =127.0.0.1 systemProp.http.proxyPort =7890 systemProp.https.proxyHost =127.0.0.1 systemProp.https.proxyPort =7890
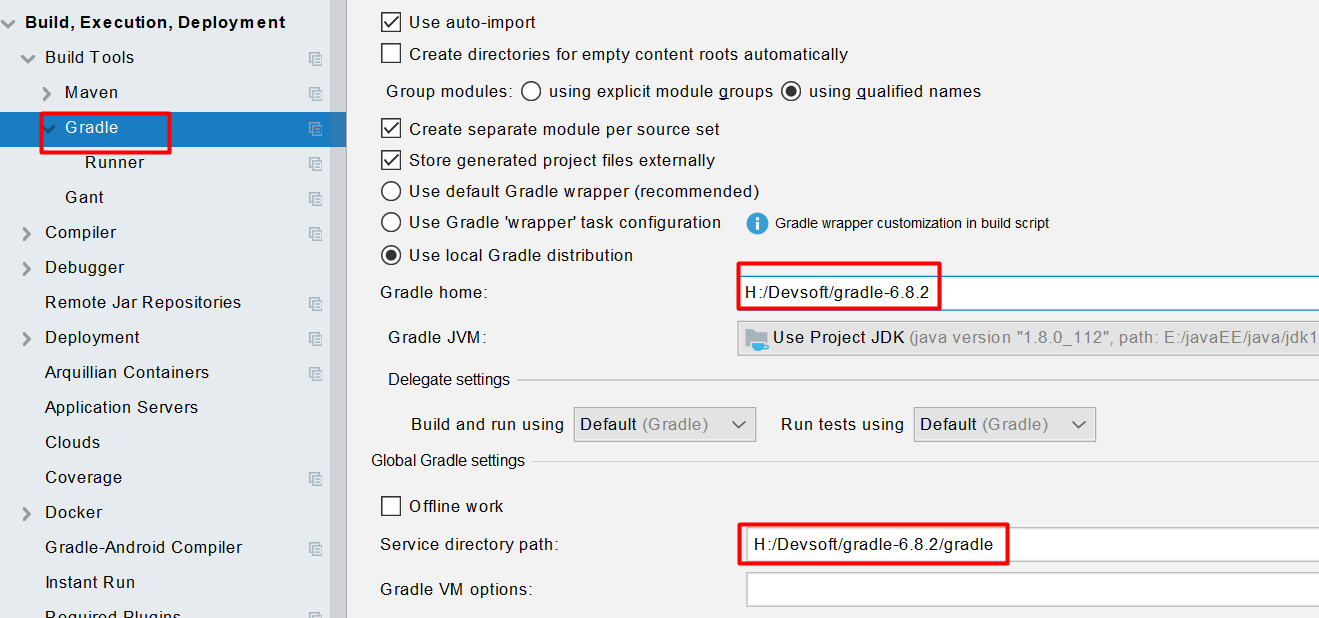
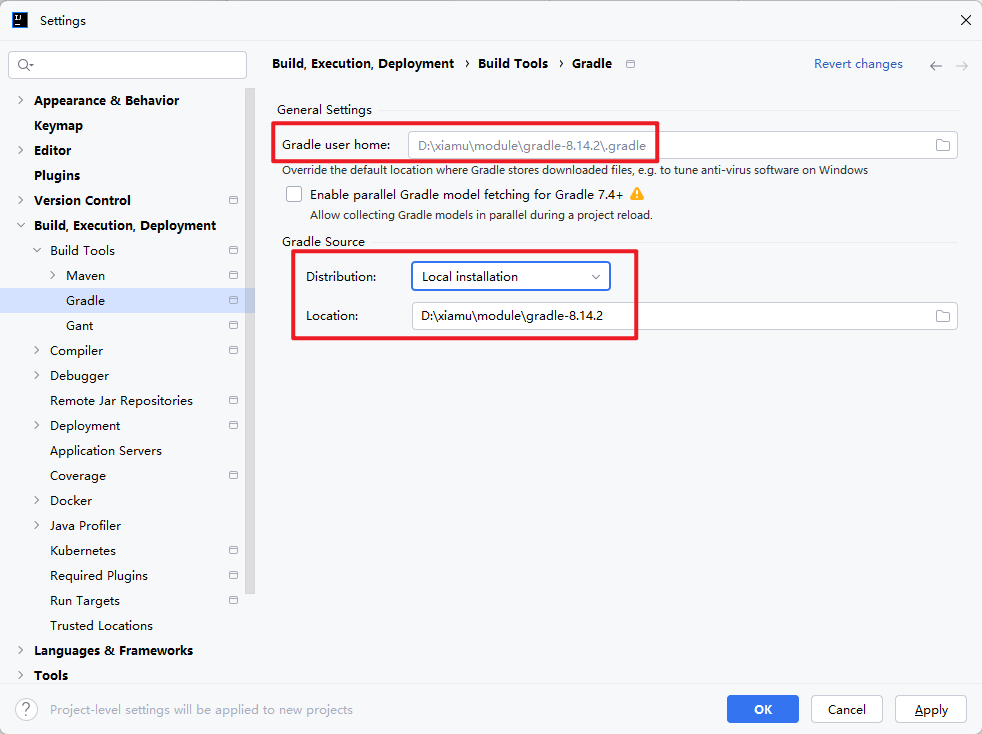
4、配置idea整合
service 目录,是代表gradle自己下载jar包的位置,类似以前maven的本地仓库
二、概念对比 1、环境变量 GRADLE_HOME = MAVEN_HOME
GRADLE_USER_HOME = maven本地仓库位置
2、优势对比 3、配置文件 1、build.gradle 用来做依赖管理,项目构建所使用的脚本… 配置示例
1
2
3
4
5
6
7
8
9
10
11
12
13
14
15
16
17
18
19
20
plugins {'java' 'com.atguigu' '1.0-SNAPSHOT' 1.8 group: 'junit' , name: 'junit' , version: '4.12' group: 'org.springframework.boot' , name: 'spring-boot-starter-web' , version: '2.4.2'
2、settings.gradle 三、实战 下载spring源码
releases: https://github.com/spring-projects/spring-framework/releases
releases6.2.7版本: https://github.com/spring-projects/spring-framework/releases/tag/v6.2.7
推荐还是装稳定版,不要从master分支拉去代码,2025-6-9 23:27:26会陷入一种很尴尬的局面, jdk24和jdk21来回切换都没法用gradle去build master里面spring7版本的代码
另外, 如果出现不可控的bug
如:Task ‘prepareKotlinBuildScriptModel’ not found in project ‘:app’
I followed the instructions from “ITachiLab” mentioned in: “:prepareKotlinBuildScriptModel Task fails in a Java project”: https://github.com/gradle/gradle/issues/14889
“In my case the problem was that I had a root Gradle project with multiple subprojects included in root’s settings.gradle, while simultaneously having one of the subprojects being added to IntelliJ’s Gradle projects manually. In other words: if you have a hierarchical Gradle project, make sure that when you open up the Gradle projects panel in IntelliJ, all subprojects are listed as children of the root. I had one subproject dangling, listed as sibling project of the root. I simply right clicked on it and chose “Unlink Gradle Project”. IntelliJ automatically adds projects listed in settings.gradle, you don’t have to add them manually by right clicking on a build.gradle and choosing “Link Gradle Project” (that’s what I did and it was a mistake). “
Basically: In the Gradle View: Right Click on every Gradle Sub-Project (that is not below the root project but instead directly appears on root level) and select “Unlink Gradle Project (Delete)”. BUT do not remove the Gradle Root Project (containing the “settings.gradle.kts” file containing the sub-project includes)! AND then click on “Synchronize”. AND now all the gradle sub-projects should appear below the root project and the error should disappear.
解决办法: https://stackoverflow.com/questions/64290545/task-preparekotlinbuildscriptmodel-not-found-in-project-app
点击idea右侧的顶部父project, 然后unlink, 再次刷新
然后添加
1 2 3 "prepareKotlinBuildScriptModel" ){}
或者
1
2
3
task prepareKotlinBuildScriptModel {
不知道是不是跟kotlin插件有问题, 再或者直接禁用kotlin插件
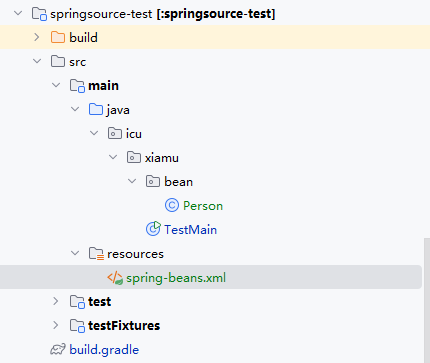
测试gradle
项目结构:
Person
1
2
3
4
5
6
7
8
9
10
11
public class Person {private String name;public String getName () {return name;public void setName (String name) {this .name = name;
spring-beans.xml
1
2
3
4
5
6
7
8
9
10
<?xml version="1.0" encoding="UTF-8" ?> <beans xmlns ="http://www.springframework.org/schema/beans" xmlns:xsi ="http://www.w3.org/2001/XMLSchema-instance" xsi:schemaLocation ="http://www.springframework.org/schema/beans http://www.springframework.org/schema/beans/spring-beans.xsd" > <bean class ="icu.xiamu.bean.Person" id ="person" > <property name ="name" value ="zhangsan" /> </bean > </beans >
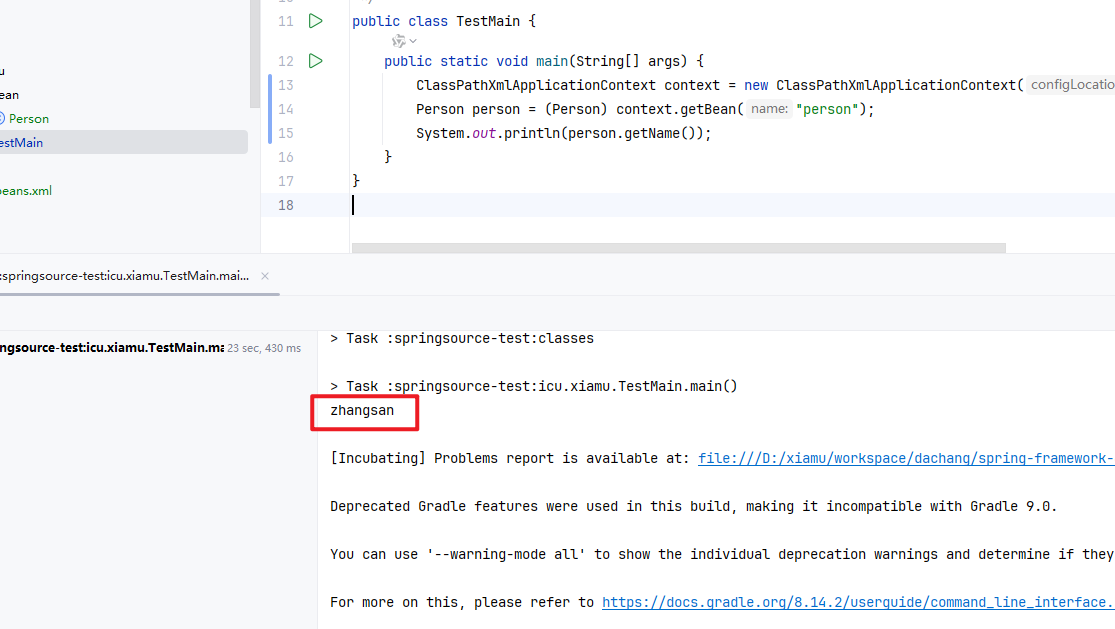
TestMain
1
2
3
4
5
6
7
public class TestMain {public static void main (String[] args) {ClassPathXmlApplicationContext context = new ClassPathXmlApplicationContext ("spring-beans.xml" );Person person = (Person) context.getBean("person" );
执行结果
四、补充知识: 自己创建的子模块, 用api引入其他模块
1
2
3
4
5
6
7
8
9
10
11
plugins {'java' 'java-library' 'org.junit:junit-bom:5.10.0' )'org.junit.jupiter:junit-jupiter' ":spring-context" ))
父工程下的settings.gradle需要include子模块
1 include 'springsource-test'
build.gradle
1
2
3
4
5
tasks .testuseJUnitPlatform ()systemProperties ["os.name" ]="linux"
groovy语法
1 2 3 4 5 tasks.test {useJUnitPlatform ()"os.name" , "linux" "abc" , "123"
使用 idea 右上角的 Run Configurationig 中 Environment variables 配置
idea gradle 设置中文不乱码, 找了好久, 才找到能解决的方法, 其余的配置什么 vm option 都不怎么管用
1
2
3
tasks .withTypeJavaExec > {jvmArgs = listOf ("-Dsun.stdout.encoding=UTF-8" )
参考知乎评论区: https://zhuanlan.zhihu.com/p/654016541